Cheeseburger Sliders
Cheeseburger Sliders
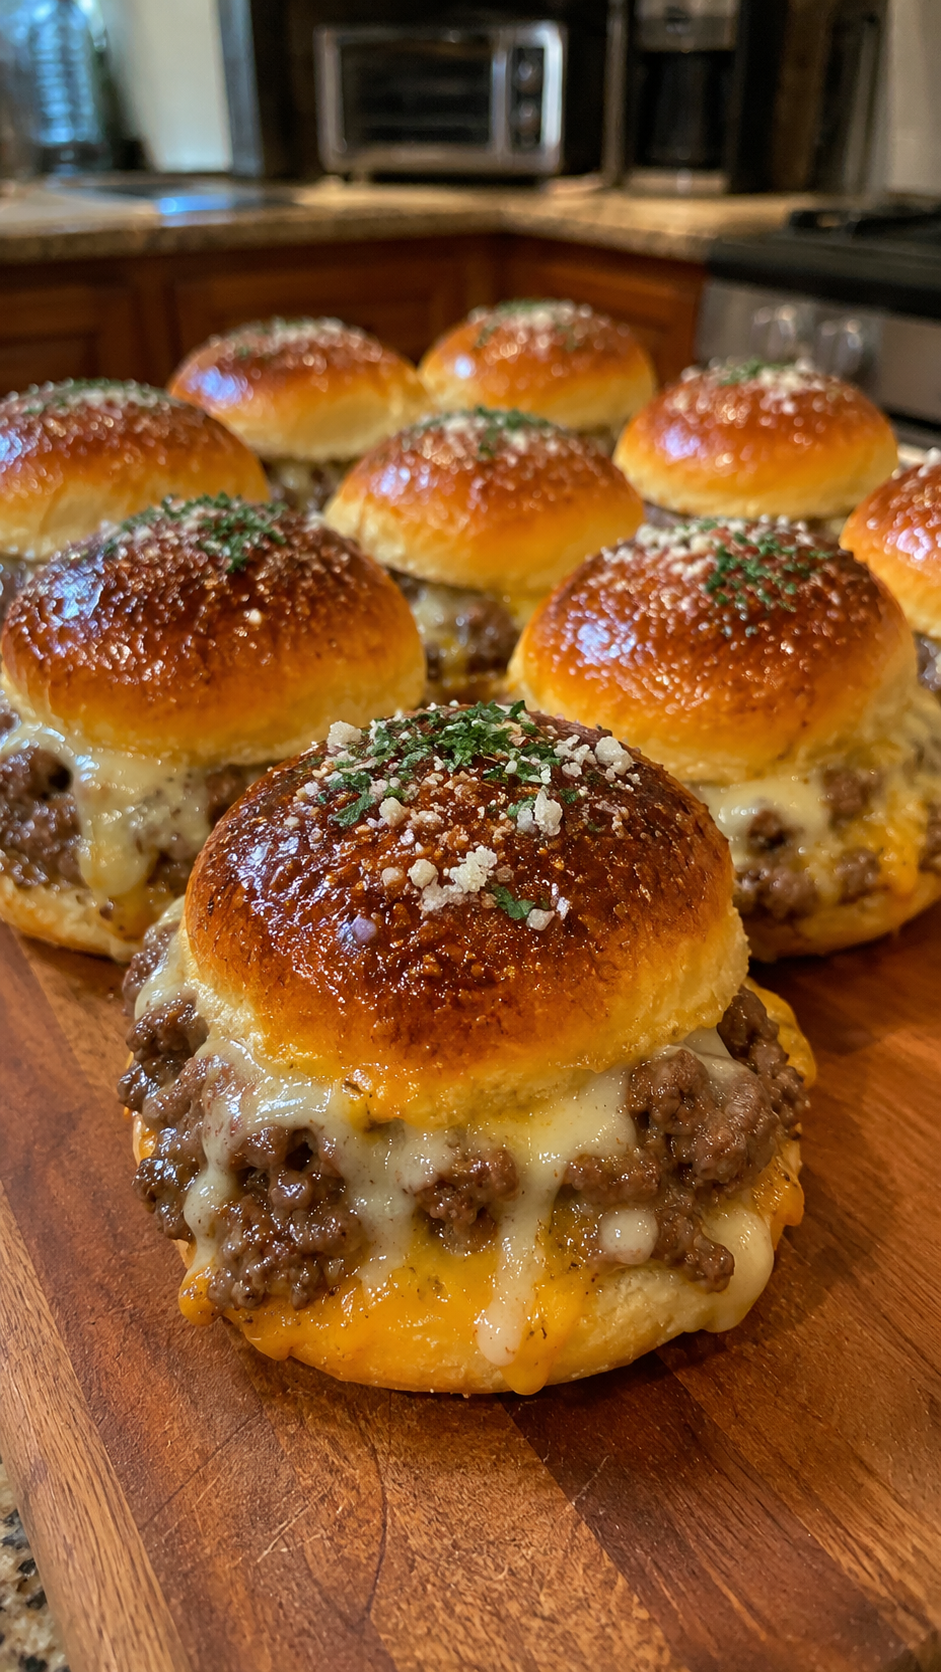
Cheeseburger Sliders are the ultimate comfort food for gatherings, game days, or a casual family dinner. These bite-sized sandwiches capture the classic flavors of a juicy beef patty, melted cheddar, crisp lettuce, and tangy pickles, all nestled between soft, buttery slider buns. The result is a handheld meal that delivers the satisfaction of a full burger with the convenience of easy sharing. The texture is a delightful balance: the exterior of the bun offers a slight resistance before giving way to the tender, savory meat inside. Because they are small, they cook quickly and evenly, making them an excellent choice when you need to feed a crowd without spending hours in the kitchen. Whether served at a backyard barbecue or as a late-night snack, these sliders provide a familiar taste that appeals to everyone from picky eaters to seasoned grill masters.
If you enjoy more detailed culinary inspiration and visual guides, Follow Hailee Recipes on Pinterest for a wide collection of tested recipes and cooking tips.
Why This Recipe Works
The success of this recipe relies on balancing moisture and structure. By using ground beef with a moderate fat content, typically around 80/20, the patties remain juicy during the short cooking time required for sliders. Leaner meats can dry out too quickly when seared at high heat. The key to the flavor profile is the layering technique; placing the cheese directly on the hot meat allows it to melt perfectly over the surface, creating a cohesive bond between the patty and the bun. Using a baking sheet method rather than grilling each individual patty ensures consistent doneness across the entire batch. This approach eliminates the risk of undercooked centers or burnt edges, which often happens when managing multiple small patties on a crowded grill. Furthermore, toasting the buns slightly adds a necessary textural contrast, preventing the bottom bun from becoming soggy from the juices and condiments.
Ingredients
To make a batch of twelve standard Cheeseburger Sliders, you will need the following ingredients. Ensure your ground beef is fresh and kept cold until ready to use. The specific measurements below are calibrated for a single tray of sliders, ensuring even distribution of toppings.
- Ground Beef: 1 pound (450g), ideally 80% lean and 20% fat for optimal juiciness.
- Slider Buns: 12 soft Hawaiian rolls or potato buns, split horizontally.
- Cheddar Cheese: 12 slices (about 6 ounces total), preferably sharp cheddar for a bold flavor.
- Unsalted Butter: 3 tablespoons, melted, for brushing the buns.
- Yellow Mustard: 2 tablespoons, for a tangy kick.
- Ketchup: 2 tablespoons, to add sweetness and acidity.
- Pickles: 12 dill pickle chips or spears, drained well.
- Lettuce: 1 cup, shredded iceberg or romaine, washed and dried thoroughly.
- Red Onion: 1 medium onion, thinly sliced into rings.
- Salt: 1 teaspoon, plus extra for seasoning the meat if desired.
- Black Pepper: ½ teaspoon, freshly ground.
- Parsley: A small handful of fresh parsley leaves, chopped, for garnish.
How To Make Cheeseburger Sliders
- Prepare the Oven and Meat: Preheat your oven to 375°F (190°C). Line a large baking sheet with aluminum foil or parchment paper for easy cleanup. In a large mixing bowl, gently combine the ground beef with the salt and black pepper. Be careful not to overwork the meat, as this can make the patties tough. Divide the mixture into twelve equal portions, roughly 3 ounces each. Shape each portion into a round patty that is slightly wider than your slider buns, about 3 inches in diameter. Press a shallow indentation into the center of each patty with your thumb; this prevents them from puffing up too much during cooking.
- Assemble the Base Layer: Place the bottom halves of the slider buns onto the prepared baking sheet, spacing them closely together so they support one another. In a small bowl, whisk together the melted butter, yellow mustard, and ketchup. Brush this mixture generously over the cut sides of the buns. This step adds richness and helps the buns brown beautifully in the oven. Arrange the raw beef patties directly on top of the bottom buns, pressing them down lightly so they adhere to the bread.
- Add Cheese and Top Bun: Place one slice of cheddar cheese on top of each beef patty. Carefully place the top halves of the slider buns over the cheese, completing the sandwich stack. If you prefer a softer texture, you can brush the very tops of the buns with a little extra melted butter, though the bottom brushing is sufficient for browning. Cover the entire baking sheet loosely with another piece of aluminum foil. This traps steam initially, helping the cheese melt and the meat cook through without drying out the exterior.
- Bake Until Cooked: Place the baking sheet in the preheated oven. Bake for 10 to 12 minutes. Remove the foil carefully to check the progress. The cheese should be fully melted, and the internal temperature of the beef should reach 160°F (71°C) for safe consumption. If the buns are not golden brown yet, you can switch the oven to broil for the final 1 to 2 minutes, watching closely to prevent burning. Once done, remove the tray from the oven and let the sliders rest for 2 minutes. This brief resting period allows the juices to redistribute within the meat.
- Add Toppings and Serve: While the sliders are still warm, open the top buns slightly. Add a layer of shredded lettuce, a few rings of red onion, and a pickle chip to each slider. Close the buns back up. Sprinkle the chopped fresh parsley over the tops for a pop of color and freshness. Cut the sliders apart if they were baked as a connected block, or serve them whole. They are best enjoyed immediately while the cheese is gooey and the buns are warm.
Doneness And Troubleshooting
Achieving the perfect slider requires attention to visual cues and timing. The most reliable indicator of doneness is the internal temperature. Use an instant-read meat thermometer inserted into the side of a patty to ensure it has reached 160°F (71°C). If you do not have a thermometer, look for firmness; the patty should feel solid to the touch, and the juices running clear when pierced indicate it is cooked. If the buns are browning too quickly before the meat is done, cover the tray with foil again to shield the bread while the interior cooks. Conversely, if the meat is cooked but the buns are pale, remove the foil and increase the heat or switch to broil for a minute to achieve that desirable golden crust.
Common issues include soggy bottoms or dry patties. Sogginess usually occurs if the buns are not toasted or if wet toppings like pickles are added before the cheese melts. Ensuring your lettuce and onions are thoroughly dried after washing is crucial. Dry patties often result from overworking the meat or using lean beef. Stick to the 80/20 ratio and handle the meat gently to maintain tenderness. If the cheese does not melt completely, the oven temperature might be too low, or the foil was left on for too long; removing the foil earlier in the process helps direct heat to the cheese.
Substitutions And Variations
This recipe is highly adaptable to different dietary needs and flavor preferences. For a lighter option, you can substitute the ground beef with ground turkey or chicken, though you may need to add a tablespoon of olive oil to the meat mixture to compensate for the lower fat content and prevent dryness. Plant-based crumbles designed for burgers work well as a vegetarian alternative; simply follow the same assembly steps, keeping in mind that plant-based patties often require less cooking time, so reduce the bake time by 2-3 minutes.
For those who dislike raw onion, sautéing the red onion slices in a pan with a little butter until caramelized adds a sweet, mellow flavor that pairs exceptionally well with the beef. If you prefer a spicy kick, swap the yellow mustard for Dijon or add a few slices of jalapeño peppers along with the cheese. You can also experiment with different cheeses; Swiss or provolone offer a milder taste, while pepper jack introduces a subtle heat. When using gluten-free buns, be aware that they may be more fragile, so handle them gently when assembling and consider toasting them separately on a skillet for better structural integrity.
Serving Suggestions
Cheeseburger Sliders are versatile enough to stand alone as a main course or serve as part of a larger spread. They pair wonderfully with crispy french fries, potato chips, or a simple garden salad dressed with a light vinaigrette. For a complete meal, serve them alongside coleslaw, which provides a cool, creamy contrast to the warm, savory sliders. Beverages like lemonade, iced tea, or a cold soda complement the rich flavors of the beef and cheese. If serving at a party, arrange the sliders on a platter with toothpicks to hold them together, making them easy for guests to grab and eat while mingling.
Storage And Reheating
Leftover Cheeseburger Sliders can be stored in an airtight container in the refrigerator for up to three days. It is best to store the components separately if possible; keep the cooked patties and buns in one container and the fresh vegetables in another to maintain texture. If you must store them assembled, wrap them tightly in plastic wrap or foil. To reheat, place the sliders on a baking sheet and warm them in a 350°F (175°C) oven for about 10 minutes. This method restores the warmth and crispness of the bun better than microwaving, which can make the bread rubbery. Avoid freezing assembled sliders with fresh lettuce and tomatoes, as these ingredients will become mushy upon thawing. You can freeze the cooked patties separately for up to three months.
Remember that food safety is paramount. Always refrigerate leftovers within two hours of cooking. When reheating, ensure the internal temperature reaches 165°F (74°C) to eliminate any potential bacteria. With these guidelines, you can enjoy the flavors of homemade cheeseburgers throughout the week with minimal effort.
Cheeseburger Sliders
Ingredients
Method
- Preheat oven to 375°F. Mix beef with salt and pepper, form into 12 patties with a thumb indent.
- Place bun bottoms on a baking sheet. Whisk butter, mustard, and ketchup; brush on buns. Place patties on buns.
- Top each patty with cheese. Place bun tops on. Cover tray with foil.
- Bake for 10-12 minutes until cheese melts and internal temp reaches 160°F. Uncover for last 2 mins if needed for browning.
- Rest for 2 minutes. Add lettuce, onion, and pickles. Garnish with parsley and serve.