Alien Sliders
Alien Sliders
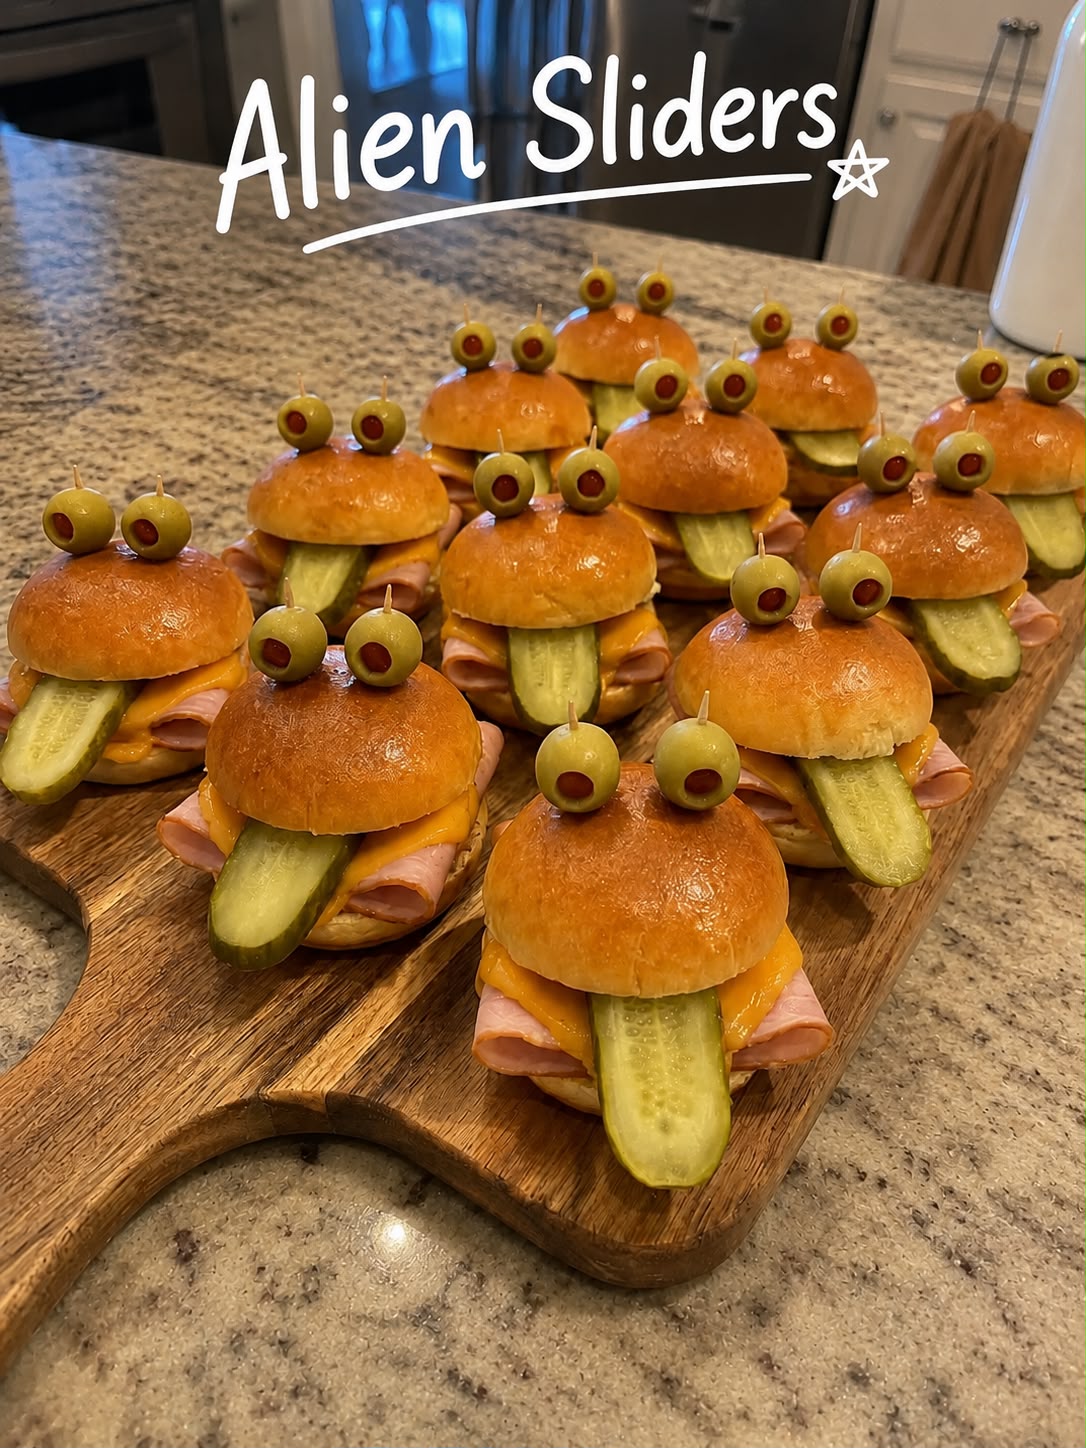
Alien Sliders: A Playful, Delicious Bite That’ll Become Your New Comfort Favorite
I created Alien Sliders on a random Tuesday night when my partner was craving something fun and a little bit weird. We’d been stuck in a rut of the same old burger recipes, and honestly, I was bored. I wanted to make something that felt nostalgic but also totally unexpected—something that would make us laugh while we ate it. That’s when it hit me: what if I made sliders with a creepy-cool green twist, loaded with unexpected flavors and textures that somehow just worked together?
The first batch came out of my kitchen looking genuinely alien-like, and we couldn’t stop giggling. But here’s the thing—beneath that playful presentation is a genuinely delicious little sandwich that tastes way better than it looks. These sliders are crispy on the outside, juicy in the middle, and packed with flavors that make you want to reach for another one immediately.
Alien Sliders are perfect for game nights, casual dinner parties, or when you just want to have fun in the kitchen. They’re approachable enough for beginners but interesting enough to impress your friends. I’ve made them for potlucks, family dinners, and quiet nights in, and they never disappoint. The best part? They’re totally customizable, so you can make them exactly how you want them.
If you’re looking for a recipe that feels special without demanding hours of your time, this is it. Follow me on HaileeRecipes on Pinterest for more fun, approachable recipes that bring a little joy to your kitchen.
Why You’ll Love This Recipe
Let me be real with you—life’s too short to eat boring food. Alien Sliders are fun without being fussy. They take maybe 30 minutes from start to finish, and most of that is just assembly.
Here’s what makes them special:
- They’re genuinely delicious. The combination of flavors isn’t just for show. There’s real depth here—savory, a little tangy, a hint of sweetness, and texture that keeps things interesting.
- They’re perfect for feeding a crowd. Whether you’re making six or sixteen, the process scales easily. Plus, people always remember the sliders with the cool presentation.
- They’re customizable to your taste. Don’t like one ingredient? Swap it out. Want to go vegetarian? Totally doable. These sliders work with your preferences, not against them.
- They feel fancy but taste homey. There’s something about a slider that makes people feel like you’ve put in more effort than you actually have. It’s a total win.
- Leftovers are genuinely good. Unlike some sliders that get soggy, these hold up well and actually taste great the next day.
Ingredients
Here’s what you’ll need to make a batch of about 12 Alien Sliders:
- 1 pound ground beef (80/20 blend works best)
- 2 tablespoons butter
- 1 small onion, minced very fine
- 3 cloves garlic, minced
- 1/2 cup fresh spinach, chopped finely
- 1/4 cup fresh basil, chopped
- 1/4 cup grated Parmesan cheese
- 1 tablespoon soy sauce
- 1 teaspoon Worcestershire sauce
- 1/2 teaspoon salt
- 1/4 teaspoon black pepper
- 1/4 teaspoon garlic powder
- 12 small slider buns (or mini brioche buns)
- 6 slices provolone or Swiss cheese, cut in half
- 1/4 cup mayonnaise mixed with 1 tablespoon pesto (for serving)
- Fresh arugula or lettuce for topping
- Thinly sliced tomato (optional)
- 1 tablespoon olive oil for cooking
Hailee’s Tip: The “alien” look comes from the green herbs and spinach peeking through the meat. Don’t skip the fresh basil—it’s what makes these feel special. And please, use fresh spinach if you can. Frozen works in a pinch, but squeeze it really well to remove all the moisture.
Hailee’s Tip: Ground beef at 80/20 is your sweet spot. It’s got enough fat to stay juicy but won’t be greasy. If you only have 85/15, that’s fine too—just don’t go leaner than that.
Hailee’s Tip: Mince your onions and garlic super fine. You want them to disappear into the meat, not create chunks. A microplane or food processor makes this so much easier.
Optional Add-Ins and Variations
The beauty of sliders is that you can play around. Here are some of my favorite additions:
- For extra umami: Add 1 tablespoon of miso paste to the meat mixture. It sounds weird, but trust me.
- For a spicy kick: Mix in 1/4 teaspoon of red pepper flakes or a pinch of cayenne.
- For a Mediterranean vibe: Replace the basil with oregano and add sun-dried tomatoes.
- For a mushroom lover: Finely chop 1/4 cup of mushrooms, sauté them first, and fold them in.
- For caramelized sweetness: Add 1 tablespoon of balsamic vinegar to the meat.
- For a crispy topping: Crumble crispy bacon into the meat mixture.
Step-by-Step Method
Step 1: Prep your ingredients
Mince your onion and garlic until they’re almost paste-like. Chop your spinach and basil finely. Get your cheese ready. I know this feels like a lot of prep work, but trust me—having everything ready before you start makes the actual cooking so much smoother. I learned this the hard way after forgetting the basil halfway through and having to stop everything.
Step 2: Make the meat mixture
In a large bowl, combine your ground beef, minced onion, garlic, spinach, basil, Parmesan, soy sauce, Worcestershire sauce, salt, pepper, and garlic powder. Use your hands to gently combine everything. And I do mean gently. Overworking the meat makes it dense and tough. You want it just combined, with the green herbs visible throughout. This is the magic moment where it starts looking a little alien.
What I messed up: The first time I made these, I mixed the meat like I was making meatballs—aggressively and thoroughly. The sliders came out tough and rubbery. Now I barely touch it, and they’re so much better.
Step 3: Shape your patties
Divide the mixture into 12 equal portions. I use a cookie scoop to keep them consistent. Gently shape each portion into a patty that’s slightly wider than your buns (they’ll shrink as they cook). Make a tiny indent in the center with your thumb—this helps them cook evenly and prevents them from puffing up like little meatballs.
Step 4: Chill if you have time
Pop these in the fridge for 15 minutes if you can. They’ll hold together better when you cook them. If you’re in a rush, you can skip this, but it does help.
Step 5: Cook the sliders
Heat olive oil in a large skillet over medium-high heat. Once it’s shimmering, carefully place your patties in the pan. Don’t crowd them—work in batches if you need to. Let them cook undisturbed for about 3 minutes. You want a nice golden crust. Flip them gently and cook for another 2-3 minutes. In the last minute of cooking, add a small piece of cheese to the top of each patty so it melts.
What I messed up: I used to flip them constantly because I was worried they’d burn. They don’t need that. Leave them alone and let them develop that beautiful crust.
Step 6: Toast your buns
While the patties are cooking, lightly butter your slider buns and toast them cut-side down in another skillet or on a griddle. This takes about 2 minutes and makes such a difference. It keeps the buns from getting soggy and adds a subtle richness.
Step 7: Assemble
Spread a little of the pesto mayo on the bottom bun, add a small piece of arugula or lettuce, then your cooked slider, then a tomato slice if you’re using it. Top with the top bun and serve immediately.
Common Mistakes to Avoid
Using ground beef that’s too lean: You need that fat for juiciness and flavor. Lean beef makes dry, sad sliders.
Not mincing the herbs and onions fine enough: If they’re chunky, they won’t distribute evenly and you’ll get weird texture.
Overmixing the meat: This makes them tough. Mix just until combined.
Cooking on too high heat: Medium-high is your friend. Too high and the outside burns before the inside cooks.
Skipping the bun toasting: I know it seems like an extra step, but it’s genuinely important. It changes everything.
Making the patties too thick: These are sliders, not burgers. Thin and wide is the way to go.
My Tested Substitutions
Ground turkey or chicken: You can absolutely use these instead of beef. Use a 75/25 blend if possible (ground turkey or chicken with some fat added). They’ll be leaner, so be extra careful not to overcook them. They’ll take about the same time to cook.
Vegetarian version: Replace the ground beef with crumbled firm tofu or a plant-based ground meat. The cooking time might be slightly less—watch them carefully. The flavor profile is totally different but still really good.
No fresh basil: Use 1/2 teaspoon of dried basil instead. It’s not quite the same, but it works.
No spinach: Honestly, you can skip it, but the sliders won’t have that fun green speckled look. If you want to replace it, try finely chopped kale or even zucchini that’s been squeezed dry.
Different cheese: Cheddar, American, or mozzarella all work beautifully. Pick whatever you love.
How to Customize
The fun part about these sliders is making them your own. Here’s how:
Make them spicy: Add hot sauce to the pesto mayo, or mix red pepper flakes into the meat.
Make them Mediterranean: Swap the basil for oregano, add sun-dried tomatoes to the meat, and use feta instead of Parmesan.
Make them Asian-inspired: Replace the Worcestershire with more soy sauce, add a teaspoon of sesame oil, and top with pickled ginger and wasabi mayo.
Make them fancy: Top with caramelized onions, crispy bacon, and a fried egg.
Make them breakfast sliders: Use breakfast sausage instead of beef, add crispy bacon, and top with a fried egg and American cheese.
Serving Ideas
These sliders are versatile little things. Here’s how I like to serve them:
- As an appetizer: Make them slightly smaller and serve them with toothpicks. People can grab one or two without committing to a full meal.
- For a casual dinner: Serve with a simple green salad and some crispy fries or sweet potato fries.
- For a game day spread: Set up a slider bar where people can customize their own. Have different toppings and sauces available.
- For a party: Make them ahead and keep them warm in a low oven. Guests can assemble their own or grab them as they wish.
- With a side: Coleslaw, roasted vegetables, or a grain salad all pair beautifully.
Meal Prep and Storage
Making them ahead: You can shape the patties up to 24 hours in advance. Keep them covered in the fridge on a parchment-lined plate. Cook them when you’re ready to serve.
Cooked sliders: If you’ve already cooked them, they’ll keep in an airtight container in the fridge for up to 3 days. Reheat them gently in a low oven (around 300°F) for about 10 minutes so they don’t dry out.
Freezing: The raw patties freeze beautifully for up to 3 months. Freeze them on a parchment-lined baking sheet first, then transfer to a freezer bag. Cook them from frozen—just add a couple extra minutes to the cooking time.
The assembled sliders: I don’t recommend freezing fully assembled sliders because the buns get weird. But the patties alone? Absolutely.
Nutritional Breakdown
Here’s the nutrition info per slider (approximate):
- Calories: 280
- Protein: 18g
- Carbs: 16g
- Fat: 16g
- Fiber: 1g
These numbers can vary depending on your specific ingredients and how much cheese and mayo you use, but this gives you a solid ballpark.
Final Thoughts
Alien Sliders are one of those recipes that feel more complicated than they actually are. They look impressive, they taste delicious, and they bring a little bit of playfulness to your dinner table. I love them because they remind me that cooking doesn’t have to be serious to be good.
The first time you make these, you might feel a little uncertain. That’s totally normal. But once you do it, you’ll realize how straightforward they really are. And once you taste them, you’ll understand why I keep making them over and over again.
I hope you give these a try and that they become a favorite in your kitchen like they are in mine. There’s something special about a meal that makes people smile before they even take a bite. That’s what these sliders do.
Happy cooking, and enjoy your little green creations.
—
Alien Sliders
Ingredients
Method
- Mince onion and garlic very fine. Chop spinach and basil finely.
- In a large bowl, combine ground beef, onion, garlic, spinach, basil, Parmesan, soy sauce, Worcestershire sauce, salt, pepper, and garlic powder. Gently mix until just combined.
- Divide mixture into 12 equal portions and gently