Caramel Apple Pie Dessert
Caramel Apple Pie Dessert
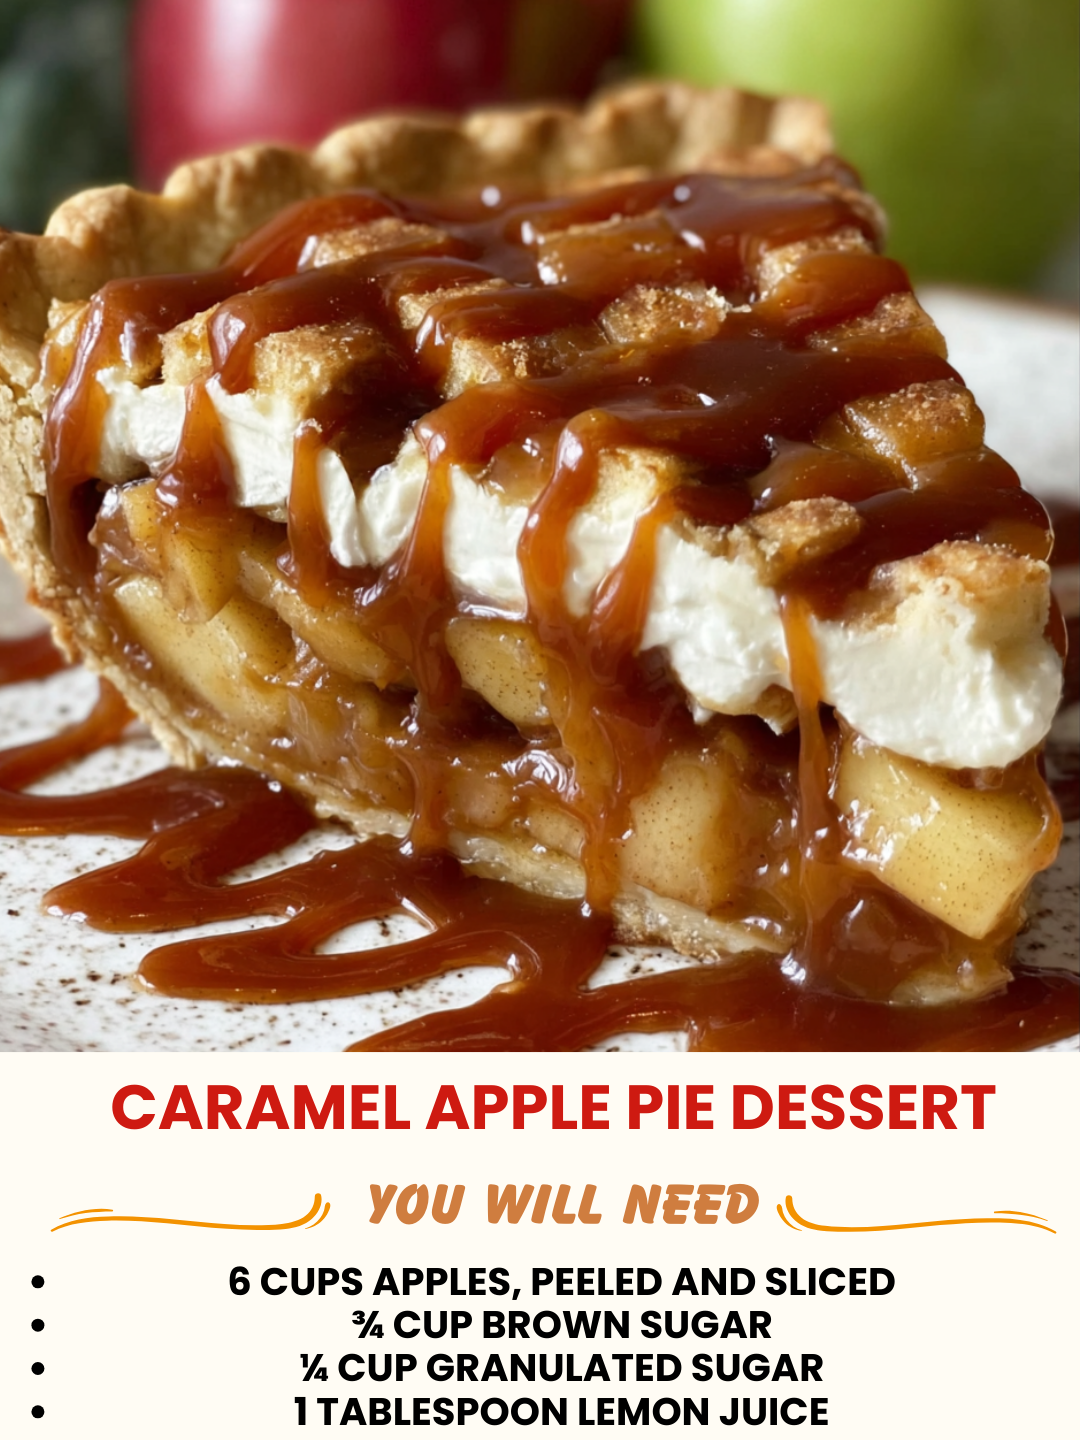
Caramel Apple Pie Dessert: A Cozy Shortcut to Pure Comfort
I’m sitting here on a chilly October evening with a cup of tea, thinking about the exact moment I invented this recipe. It was one of those nights where I wanted apple pie desperately—like, couldn’t-stop-thinking-about-it desperately—but I didn’t have the energy to make a full pastry crust from scratch. My kitchen was already calling it quits at 7 PM, and I had maybe thirty minutes before I wanted to collapse on the couch.
That’s when I realized I had a bag of vanilla wafers in the pantry, some beautiful honeycrisp apples on the counter, and a jar of caramel sauce that’s basically my secret weapon for everything. I started layering and baking, and honestly? What came out of the oven was better than I expected. It was warm, buttery, deeply caramel-forward, with soft apples that tasted like fall in a bowl. My partner took one bite and asked if I was opening a bakery.
This Caramel Apple Pie Dessert is what I call a “real person’s recipe.” It’s for anyone who loves the idea of apple pie but doesn’t want to spend three hours making it. It’s for busy weeknights, for impressing people without stressing yourself out, and for those moments when you need comfort food that actually tastes like you tried. The beauty of this recipe is that it feels homemade and special, but it comes together in about an hour total—and most of that time is just the oven doing the work.
If you’re looking for a dessert that tastes like autumn in the best way, that won’t keep you in the kitchen all day, and that genuinely makes people happy, I’ve got you covered. Follow me on HaileeRecipes on Pinterest for more desserts like this one.
Why You’ll Love This Recipe
Let me be real with you: this isn’t a complicated recipe, but it punches way above its weight in terms of flavor and satisfaction.
- It actually tastes like apple pie. I’m not exaggerating. The apples get tender and juicy, the caramel soaks into everything, and you get that warm, spiced dessert feeling without the fuss.
- It’s faster than traditional apple pie. No rolling dough, no blind baking, no stressing about whether your crust is golden enough. We’re talking about an hour from start to finish.
- The texture is incredible. You get a buttery, almost crumbly base from the vanilla wafers, soft spiced apples in the middle, and a gorgeous caramel layer that caramelizes even more in the oven. It’s like three desserts in one.
- It’s genuinely forgiving. Overcooked your apples slightly? They’re supposed to be soft. Didn’t measure the caramel perfectly? It all works out. This recipe doesn’t require precision baking knowledge.
- People think you spent way more time than you did. I’m not saying that’s the only reason to make it, but it’s definitely a bonus.
Ingredients
- 2 cups vanilla wafer crumbs (about 40-45 wafers)
- 6 tablespoons melted butter
- 2 tablespoons brown sugar
- 6 medium apples (I use a mix of Honeycrisp and Granny Smith)
- 1/4 cup granulated sugar
- 2 tablespoons brown sugar
- 1 teaspoon ground cinnamon
- 1/4 teaspoon ground nutmeg
- 1/8 teaspoon ground cloves
- 2 tablespoons all-purpose flour
- 1 tablespoon fresh lemon juice
- 1 teaspoon vanilla extract
- 3/4 cup caramel sauce (store-bought is totally fine)
- 2 tablespoons heavy cream (optional, but I recommend it)
- Fleur de sel or sea salt for garnish (optional)
Hailee’s Tip: Don’t buy pre-crushed vanilla wafers if you can help it. They’re usually stale. Buy whole wafers and pulse them in a food processor yourself—takes two minutes and makes a huge difference in texture.
Hailee’s Tip: For the apples, I specifically mix Honeycrisp (for sweetness and a little texture) with Granny Smith (for tartness and structure). If you only have one kind, that’s fine, but the combination is worth hunting down.
Hailee’s Tip: Caramel sauce brands vary wildly in thickness. If yours is super thick and fudgy, thin it with a tablespoon of cream before layering. If it’s very runny, let it sit for five minutes before using.
Optional Add-Ins and Variations
Here’s where you can make this recipe feel like yours. I’ve tested all of these, and they genuinely work:
- Pecans or walnuts: Toss a half cup of chopped nuts into the apple mixture. They add a nice crunch and pair beautifully with caramel.
- A splash of bourbon or rum: Add 1 tablespoon to the apple mixture. It deepens the flavor in a sophisticated way.
- Cream cheese in the base: Mix 2 tablespoons softened cream cheese into the butter before combining with the wafer crumbs. It adds a subtle tang that balances the sweetness.
- Salted caramel instead of regular: If you can find it, use salted caramel sauce instead. It’s a game-changer.
- A streusel topping: Mix 1/2 cup oats, 1/4 cup brown sugar, 1/4 cup melted butter, and 1/4 cup chopped pecans. Sprinkle over the apples before baking. It adds texture and makes it feel more like a crisp.
Step-by-Step Method
Prep (15 minutes)
- Preheat your oven to 350°F. Grab a 9-inch pie dish or a similar-sized baking dish. I use a ceramic one because it heats evenly, but glass or metal works fine.
- Make your crust: Combine the vanilla wafer crumbs, melted butter, and 2 tablespoons brown sugar in a bowl. Stir until it looks like wet sand. Press this firmly into the bottom and slightly up the sides of your baking dish. Don’t stress about making it perfect—it doesn’t need to be.
- Peel, core, and slice your apples into about 1/4-inch slices. I use an apple peeler for speed, but a regular peeler works too. Honestly, a knife works if that’s what you have. Just try to keep the slices relatively uniform so they cook at the same rate.
- In a large bowl, toss the apple slices with the granulated sugar, 2 tablespoons brown sugar, cinnamon, nutmeg, cloves, flour, lemon juice, and vanilla extract. Taste a tiny piece of apple (raw is fine). It should taste like fall—sweet but with spice and a tiny bit of tartness from the lemon. Adjust the cinnamon if you want more spice.
Assembly and Baking (45 minutes)
- Spread half of your caramel sauce directly onto the wafer crust. It doesn’t need to be perfectly even—just get it roughly distributed. This creates a caramel layer on the bottom that gets really sticky and amazing.
- Layer half of your spiced apple mixture over the caramel. Arrange them as neatly or casually as you want. I usually just pile them in.
- Drizzle the remaining caramel sauce over the apples. If your caramel is thick, you can warm it gently in the microwave for 20 seconds to make it more pourable.
- Top with the remaining apples. They’ll look like a lot, but they shrink down as they bake.
- Bake for 40-45 minutes, until the edges are bubbling and the top apples are tender when you poke them with a fork. The apples should look slightly caramelized on top, not pale.
- If you’re using the heavy cream, warm it gently and drizzle it over the hot dessert right out of the oven. It’ll mix with the caramel and create this incredible sauce. Sprinkle with fleur de sel if you have it.
What I Messed Up (So You Don’t Have To): The first time I made this, I didn’t press the wafer crust firmly enough, and it stayed too crumbly. Now I really pack it down and even use the bottom of a measuring cup to even it out. Also, I once used canned pie filling apples by mistake (don’t ask), and they turned to mush. Fresh apples are worth it.
Common Mistakes to Avoid
Using stale vanilla wafers. This is the biggest one. Stale wafers taste dusty and don’t bind well. Buy fresh ones, or use butter crackers or shortbread cookies instead.
Skipping the lemon juice. I know it seems small, but that acid is what keeps the apples from tasting flat and one-dimensional. It brightens everything.
Not pressing your crust firmly. A loose crust will separate from the filling as it bakes. Take 30 seconds and really pack it down.
Cutting into it while it’s still steaming hot. I get it—it smells incredible. But wait at least 10 minutes. The layers need time to set slightly, or you’ll end up with a beautiful mess instead of neat slices. (Not that a beautiful mess tastes bad, but you know what I mean.)
Using only one type of apple. All Granny Smith and it’s too tart. All Honeycrisp and it’s one-note sweet. The mix is what makes the magic happen.
My Tested Substitutions
No vanilla wafers? Use 2 cups of crushed butter cookies, shortbread, or even digestive biscuits. The flavor will shift slightly, but the texture works the same way.
Allergic to nuts but want texture? Use crushed pretzels mixed into the wafer crumbs, or add a streusel topping made with oats and brown sugar instead.
Don’t have fresh apples? I’ve used frozen apple slices in a pinch. Thaw them completely and drain off any liquid first, or you’ll end up with a watery dessert. They won’t be quite as good as fresh, but they’ll work.
Can’t do dairy? Use dairy-free butter and skip the heavy cream drizzle. The caramel sauce is the star here anyway. Most store-bought caramel is actually dairy-free, but check your label.
Prefer homemade caramel? By all means, make your own. Use a recipe you trust. Just make sure it’s cooled to room temperature before layering, or the wafer crust will get too soft.
How to Customize
This recipe is genuinely flexible, and I love that about it. Here’s how to make it feel like your own:
Make it spicier: Add 1/2 teaspoon ground ginger or a pinch of cayenne pepper to the apple mixture. The cayenne sounds weird, but it brings out the caramel flavor in an incredible way.
Make it richer: Stir 2 tablespoons of cream cheese into your caramel sauce before layering. It creates a more luxurious texture.
Make it boozy: Add 1-2 tablespoons of bourbon, brandy, or even apple cider to the apple mixture. It adds depth without making it taste alcoholic.
Make it a breakfast situation: Serve it with a scoop of vanilla ice cream and a cup of strong coffee. Breakfast solved.
Make it fancy: Serve individual portions in small bowls or glasses with whipped cream and a caramel drizzle. Suddenly it’s a restaurant dessert.
Serving Ideas
This Caramel Apple Pie Dessert is honestly good on its own, but here are my favorite ways to serve it:
- Warm with vanilla ice cream: This is the classic for a reason. The cold ice cream against the warm, caramel-soaked apples is perfection.
- With a dollop of whipped cream and a sprinkle of sea salt: The salt brings out all the caramel flavors. Trust me on this.
- In a bowl with Greek yogurt: Sounds weird, but the tang of the yogurt balances the sweetness beautifully. It’s also a way to feel slightly less guilty about dessert.
- Straight from the pan with a spoon: Sometimes you don’t need to dress it up. Sometimes you just need a spoon and a quiet moment.
- As part of a dessert board: Serve it alongside cheese, crackers, and chocolate. It’s a nice, warm element on a grazing board.
Meal Prep and Storage
One of my favorite things about this recipe is that it keeps beautifully.
Room temperature: Cover loosely with foil and leave it on the counter for up to 2 days. It’s actually still delicious at room temperature, which is clutch for those moments when you want dessert but don’t want to reheat.
Refrigerated: Cover with plastic wrap and store for up to 4 days. Reheat gently in a 300°F oven for about 10 minutes, or microwave individual servings for 30-45 seconds.
Frozen: You can freeze this for up to 3 months. Let it cool completely, wrap it tightly in plastic wrap and then foil, and freeze. Thaw overnight in the fridge before reheating.
Make-ahead tip: You can assemble this completely the night before and bake it the next day. Just cover it with plastic wrap and store it in the fridge. Add 5 minutes to the baking time if you’re baking it straight from the fridge.
Nutritional Breakdown
Per serving (makes 8 servings):
- Calories: 385
- Protein: 2g
- Carbohydrates: 58g
- Fat: 17g
- Fiber: 2g
- Sugar: 38g
Keep in mind that this varies depending on the specific brands you use, especially the caramel sauce. If you’re watching macros, you can reduce the caramel slightly or use a sugar-free version.
Final Thoughts
Okay, I’m going to be honest with you. This recipe exists because I was lazy one October night and didn’t want to deal with pie dough. But what I ended up with was something that’s become my go-to dessert for fall—not just because it’s easier than traditional apple pie, but because it’s genuinely delicious. It tastes like someone spent hours on it, when really you spent maybe 20 minutes of actual hands-on time.
That’s what I love about cooking. Sometimes the best things come from constraints. Sometimes the “shortcut” version is actually better than the original. And sometimes all you need is vanilla wafers, apples, and caramel to make something that feels special.
I hope you make this Caramel Apple Pie Dessert soon. I hope it fills your kitchen with that warm, spiced apple smell. I hope someone you love gets to eat it while it’s still warm. And I hope it becomes your go-to fall dessert the way it’s become mine.
Let me know how it turns out. Seriously. Drop me a comment or tag me on social media. I love hearing about what you’re making in your kitchen.
Happy baking, friend.
—
Recipe Card
**Ingredients**
* 2 cups vanilla wafer crumbs (about 40-45 wafers)
* 6 tablespoons melted butter
* 2 tablespoons brown sugar
* 6 medium apples (mix of Honeycrisp and Granny Smith)
* 1/4 cup granulated sugar
* 2 tablespoons brown sugar
* 1 teaspoon ground cinnamon
* 1/4 teaspoon ground nutmeg
* 1/8 teaspoon ground cloves
* 2 tablespoons