Caramel Biscuit Dessert
Caramel Biscuit Dessert
Caramel Biscuit Dessert
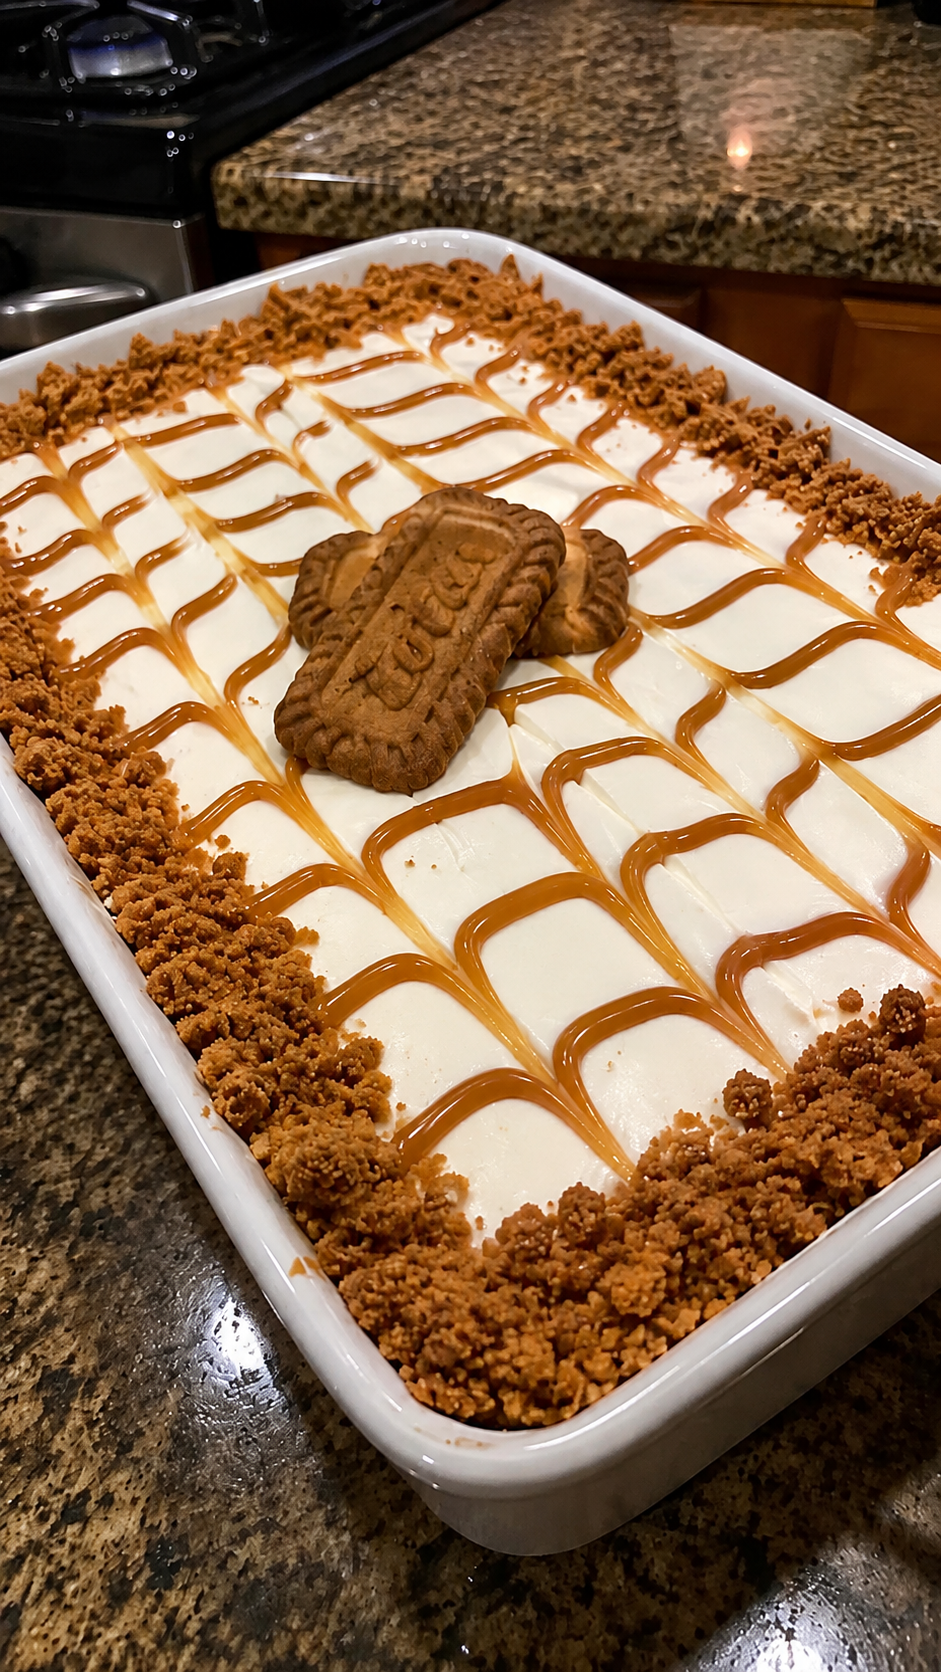
A Caramel Biscuit Dessert is a comforting, no-bake treat that balances the buttery crunch of crushed cookies with the rich, chewy sweetness of homemade or store-bought caramel. This dessert features a dense, crumbly base made from finely ground biscuits bound with melted butter, topped with a thick layer of smooth caramel sauce and often finished with a drizzle of chocolate or additional biscuit pieces for texture. The result is a sliceable bar that offers a satisfying contrast between the crisp edges and the soft, gooey center. It is an ideal choice for busy weeknights when you need a sweet finish to dinner without turning on the oven, or for potlucks where a portable, crowd-pleasing dish is required. The flavors are straightforward yet sophisticated, relying on the quality of the caramel and the freshness of the biscuits to create a memorable experience.
Follow Hailee Recipes on Pinterest for more simple, delicious ideas that bring joy to your kitchen table.
Why This Recipe Works
This dessert succeeds because it relies on structural integrity rather than complex chemical reactions. By crushing the biscuits into fine crumbs and pressing them firmly into the pan, you create a stable foundation that holds up under the weight of the heavy caramel topping. The key lies in the ratio of butter to crumbs; enough butter ensures the mixture binds together like wet sand, while too little results in a dry, crumbling base that falls apart when sliced. The caramel layer acts as both a flavor enhancer and a binding agent for any optional mix-ins, such as nuts or marshmallows, if you choose to add them. Because the dessert sets in the refrigerator, the caramel firms up just enough to allow for clean cuts, yet remains soft enough to yield easily to a fork. This method eliminates the risk of overbaking, which can happen with custard-based desserts, ensuring a consistent texture every time you make it.
Ingredients
To assemble this dessert, you will need high-quality ingredients that provide distinct textures and deep flavors. The simplicity of the recipe means that each component plays a vital role, so avoid using stale biscuits or low-fat alternatives that may compromise the structure.
- 1 ½ cups (180g) plain biscuits: Use standard tea biscuits or digestive biscuits. These have a neutral flavor and a sturdy texture that crushes well. Avoid sweetened cream-filled cookies unless you plan to reduce the sugar in the caramel.
- 6 tablespoons (85g) unsalted butter: Melted. This provides the necessary fat to bind the crumbs and adds a rich, creamy mouthfeel to the base.
- 1 cup (240ml) salted caramel sauce: You can use a high-quality jarred version or make a quick stovetop caramel. If making your own, ensure it is slightly cooled before pouring to prevent melting the butter in the crust.
- ½ cup (75g) semi-sweet chocolate chips: Optional but recommended for a classic finish. Melt these for a drizzle or sprinkle them over the top for texture.
- Pinch of flaky sea salt: Used to enhance the sweetness of the caramel and balance the richness of the butter.
How To Make Caramel Biscuit Dessert
- Prepare the Pan and Oven: Line an 8×8 inch square baking pan with parchment paper, leaving an overhang on two opposite sides. This creates “handles” to lift the set dessert out of the pan later for easy slicing. While the recipe is technically no-bake, preheating your oven to 350°F (175°C) is helpful if you prefer a slightly toasted base, though you can skip this step entirely for a strictly cold preparation. If toasting, place the prepared pan in the oven for just 5 minutes to warm the bottom, then remove it.
- Create the Crumb Base: Place the biscuits into a large resealable plastic bag or a food processor. Pulse or roll a rolling pin over the bag until the biscuits are reduced to fine, uniform crumbs. There should be no large chunks remaining. Transfer the crumbs to a medium mixing bowl and pour the melted butter over them. Stir thoroughly with a wooden spoon or spatula until every crumb is coated and the mixture resembles wet sand. It should hold its shape when squeezed in your hand.
- Press the Crust: Pour the crumb mixture into the prepared pan. Using the back of a spoon or a flat-bottomed glass, press the mixture down firmly and evenly. Apply significant pressure to compact the crumbs; this step is crucial for preventing the dessert from falling apart when you cut it. Ensure the layer is level and reaches all four corners of the pan. If you toasted the pan earlier, let the crust cool for 5 minutes before proceeding.
- Add the Caramel Layer: Once the crust is firm, pour the caramel sauce directly over the top. Tilt the pan gently to spread the caramel into an even layer, covering the entire surface. Be careful not to disturb the crust underneath. If you are adding chopped nuts or marshmallows now, scatter them lightly over the caramel. Place the pan in the refrigerator immediately to allow the caramel to begin setting and the base to firm up further. Chill for at least 30 minutes.
- Finish and Slice: After the initial chill, melt the chocolate chips in a microwave-safe bowl in 20-second intervals, stirring between each interval until smooth. Drizzle the melted chocolate over the caramel in a zigzag pattern. Sprinkle the flaky sea salt over the top while the chocolate is still wet so it adheres properly. Return the dessert to the refrigerator for another 30 to 45 minutes, or until the caramel is completely firm to the touch. Use the parchment paper handles to lift the block out of the pan, place it on a cutting board, and slice into squares with a sharp knife wiped clean between cuts.
Doneness And Troubleshooting
The success of this dessert is determined by how well the layers adhere to one another and how cleanly they slice. If your base crumbles when you try to press it, you likely did not add enough butter. Add an extra tablespoon of melted butter and mix again until the texture improves. Conversely, if the base feels greasy or separates, you may have used too much butter; simply pat the excess away with a paper towel before pressing.
When checking the doneness of the final product, the caramel should feel firm and not sticky to the touch. If the caramel remains runny after refrigeration, it may be too thin or warm. In this case, return the dessert to the fridge for another hour. If the slices are sticking to the knife, dip the blade in hot water and wipe it dry before each cut. This ensures clean lines and prevents the caramel from smearing across the biscuit base.
Substitutions And Variations
This recipe is highly adaptable to dietary needs and flavor preferences. For a gluten-free version, simply swap the standard biscuits for a certified gluten-free variety, ensuring they are sturdy enough to crush. Oatmeal cookies can also work well, offering a heartier texture, though they will impart a stronger oat flavor.
If you prefer a dairy-free option, use a plant-based butter alternative and a dairy-free caramel sauce. Note that some plant-based butters have higher water content, which might require slightly less quantity to achieve the same binding effect. For a nutty twist, fold in ½ cup of roasted peanuts or pecans into the crumb mixture before pressing. Alternatively, replace the chocolate drizzle with a dusting of cocoa powder or a swirl of peanut butter for a different flavor profile. Always label substitutions clearly if serving guests with allergies.
Serving Suggestions
Caramel Biscuit Dessert is versatile enough to serve at various times of the day. It pairs beautifully with a cup of hot coffee or black tea, where the bitterness of the beverage complements the sweetness of the caramel. For a more indulgent presentation, serve a square alongside a scoop of vanilla ice cream or a dollop of whipped cream. The contrast between the cold, creamy topping and the room-temperature dessert adds a delightful textural element. It also makes an excellent addition to a dessert platter alongside fresh berries, which provide a tart counterpoint to the rich, sugary bars.
Storage And Reheating
Store leftover dessert in an airtight container in the refrigerator. The parchment paper wrap helps maintain freshness and prevents the caramel from absorbing odors from other foods. Properly stored, the dessert will remain fresh for up to 5 days. Do not leave the dessert at room temperature for extended periods, as the caramel can become overly soft and the butter may spoil.
While this dessert is best served chilled, you can briefly warm individual slices in the microwave for 10 to 15 seconds if you prefer a softer, gooier texture. Be cautious not to overheat, as this can cause the chocolate to separate or the caramel to become too liquid. Freezing is also an option; wrap individual squares tightly in plastic wrap and freeze for up to 3 months. Thaw in the refrigerator overnight before serving to restore the original texture.
Remember that the quality of your caramel sauce will define the overall taste of this dish. Investing in a good-quality sauce or taking the time to make a small batch from scratch will elevate the dessert significantly. With these steps and tips, you can confidently prepare a delicious treat that satisfies any sweet tooth.
Caramel Biscuit Dessert
Ingredients
Method
- Line an 8x8 inch pan with parchment paper. Crush biscuits into fine crumbs.
- Mix crumbs with melted butter until resembling wet sand. Press firmly into the pan.
- Pour caramel sauce over the crust and spread evenly. Chill for 30 minutes.
- Melt chocolate chips and drizzle over the caramel. Sprinkle with sea salt.
- Refrigerate for another 30-45 minutes until firm. Lift out and slice into squares.