
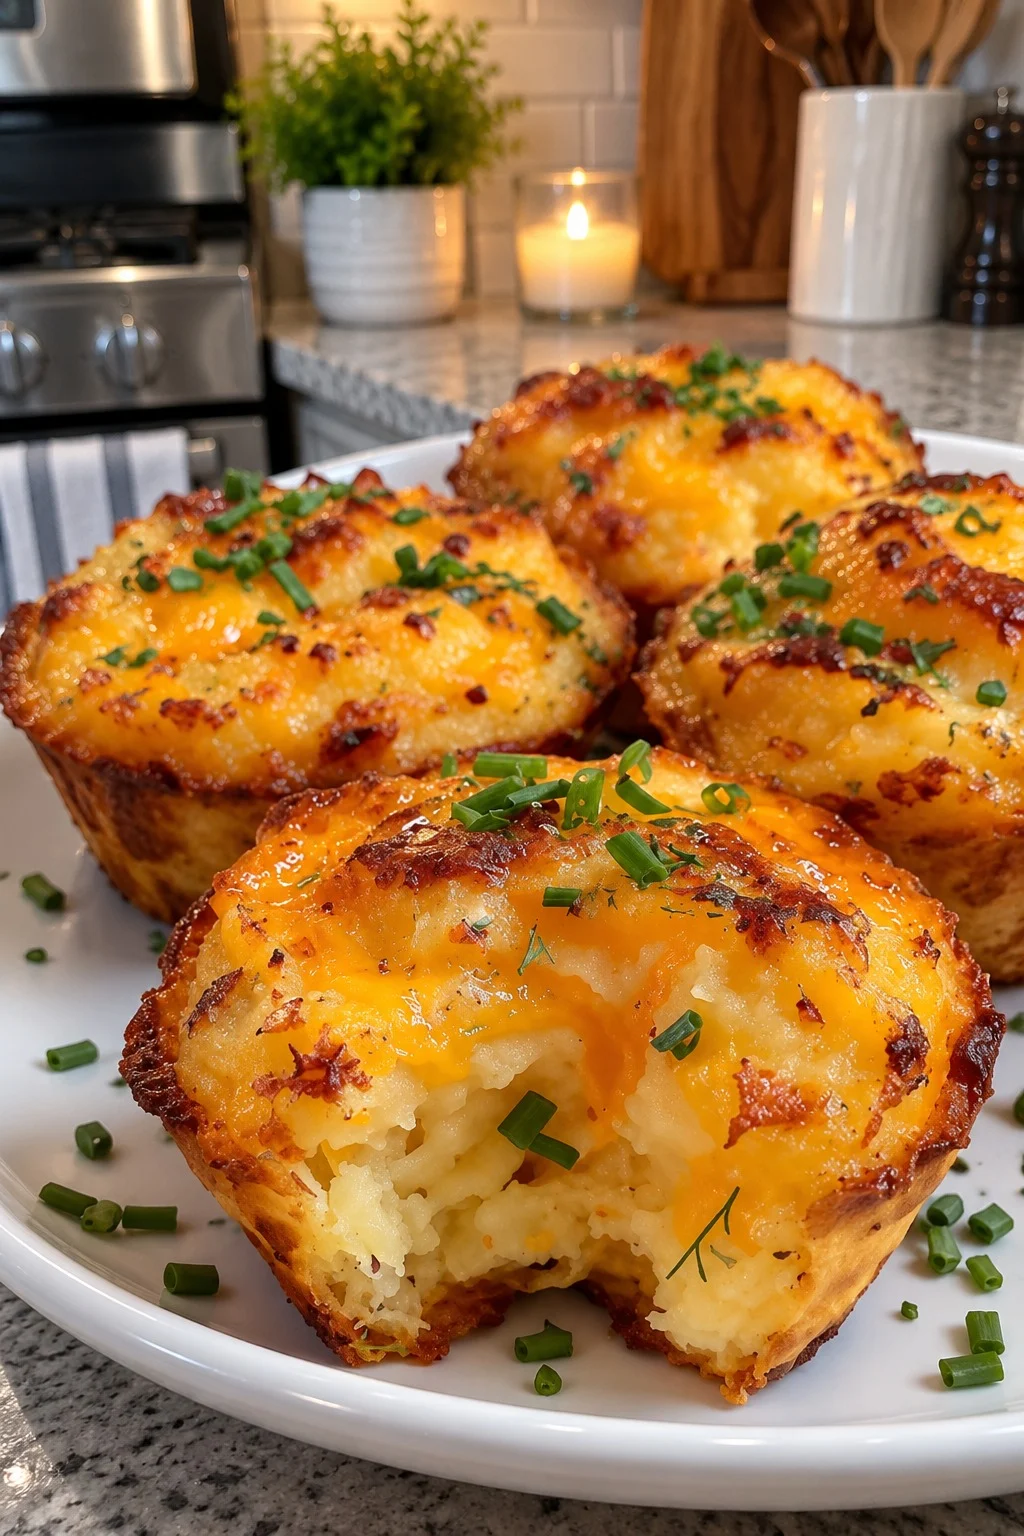
Cheesy Mashed Potato Cups offer a delightful fusion of comfort and convenience, transforming the humble side dish into an elegant, handheld appetizer or a hearty main course. Imagine a golden-brown, crispy exterior made from seasoned potato dough that gives way to a warm, fluffy interior loaded with melted cheddar cheese and finished with fresh, chopped chives. This dish bridges the gap between a classic baked potato and a savory pastry, providing a satisfying texture contrast that appeals to both children and adults. It is particularly useful for holiday gatherings, potlucks, or busy weeknight dinners where you need something substantial yet easy to serve. The cups hold their shape well, making them perfect for finger food scenarios without the mess of traditional mashed potatoes. By focusing on simple techniques and accessible ingredients, this recipe ensures that even novice cooks can create a restaurant-quality presentation in their own kitchen.
If you are looking for more inspiration for your next gathering, Follow Hailee Recipes on Pinterest to discover a wide array of tested dishes designed for real life.
Why This Recipe Works
The success of Cheesy Mashed Potato Cups lies in the specific balance of moisture and structure within the potato mixture. Unlike standard mashed potatoes, which are often too soft to hold a shape when baked, this recipe utilizes a technique that slightly dries out the potato base before shaping. By mashing the potatoes thoroughly and allowing them to cool completely, excess steam evaporates, resulting in a dough-like consistency that is pliable enough to press into muffin tins but firm enough to maintain its cup shape during baking. The addition of cheese directly into the mash acts as a binder, helping the potato matrix set as it heats up, while also contributing rich flavor throughout the entire bite rather than just on the surface.
Furthermore, the use of a standard muffin tin eliminates the need for specialized equipment like tart molds or individual ramekins, making the process accessible to any home cook. The high heat required to crisp the edges simultaneously melts the cheese inside, creating a gooey center without burning the potato crust. This method ensures that every component of the dish contributes to the final texture: the crispy rim provides structural integrity, the cheesy center offers creaminess, and the chive garnish adds a necessary sharp, fresh note to cut through the richness of the dairy and starch.
Ingredients
To make these cups, you will need a few staple pantry items and fresh produce. The core components rely on the quality of the potatoes and the cheese, so choose a starchy variety like Russet or Yukon Gold for the best texture, and a block of cheddar that you grate yourself for optimal melting properties.
- Potatoes: 2 pounds (about 4 medium) Russet or Yukon Gold potatoes, peeled and cut into uniform chunks
- Dairy Fat: 1/3 cup unsalted butter, softened to room temperature
- Milk: 1/4 cup whole milk, warmed slightly
- Seasoning: 1 teaspoon salt, plus more to taste; 1/2 teaspoon freshly ground black pepper
- Cheese: 1 1/2 cups sharp cheddar cheese, finely shredded
- Aromatics: 2 tablespoons fresh chives, finely chopped
- Oil: Cooking spray or olive oil for greasing the pan
Note: Ensure all ingredients are at room temperature before mixing to ensure a smooth emulsion. If using pre-shredded cheese, be aware that it often contains anti-caking agents that can prevent it from melting as smoothly as block cheese.
How To Make Cheesy Mashed Potato Cups
- Prepare the Potatoes: Place the peeled and cut potato chunks into a large pot and cover with cold water by at least an inch. Add a generous pinch of salt to the water. Bring the pot to a boil over high heat, then reduce the heat to maintain a steady simmer. Cook the potatoes for 15 to 20 minutes, or until they are fork-tender and easily crumble when pierced. Drain the potatoes thoroughly in a colander and return them to the hot, empty pot for one minute to allow any residual surface moisture to evaporate. This step is crucial for preventing a watery mash.
- Create the Base Mixture: While the potatoes are still hot, mash them using a potato ricer or a hand masher until no lumps remain. Do not use a food processor, as this will release too much starch and make the texture gummy. Add the softened butter, warmed milk, salt, and black pepper to the hot potatoes. Mix vigorously until the butter is fully incorporated and the mixture is smooth and creamy. Allow the mashed potatoes to cool to room temperature; this may take about 20 to 30 minutes. Cooling is essential because adding cold cheese to hot potatoes can cause the fat to separate, while adding cheese to warm potatoes helps it melt evenly into the mix.
- Incorporate Cheese and Chives: Once the potato mixture has cooled sufficiently to handle, stir in the finely shredded cheddar cheese and the chopped fresh chives. Mix until the cheese is evenly distributed throughout the mash. The mixture should now be thick and cohesive. If it feels too sticky, let it sit for another 5 minutes; if it seems too dry, add a tablespoon of milk, though this is rarely necessary if the potatoes were drained well.
- Shape the Cups: Preheat your oven to 400°F (200°C). Generously grease a standard 12-cup muffin tin with cooking spray or brush each cup with a thin layer of olive oil. Take approximately 1/3 cup of the potato mixture and place it into a greased cup. Using your fingers or the back of a spoon, press the mixture firmly against the bottom and up the sides of the muffin cup. Ensure the walls are even and about 1/2 inch thick. Create a small indentation in the center of each cup to hold extra filling if desired, or simply leave it flat. Repeat this process for all 12 cups, ensuring they are packed tightly so they do not collapse during baking.
- Bake Until Golden: Place the muffin tin in the center rack of the preheated oven. Bake for 20 to 25 minutes. You are looking for the edges to turn a deep golden brown and the tops to become slightly firm to the touch. The cheese inside should be fully melted and bubbling slightly at the seams. If you prefer a softer interior, check at the 20-minute mark; for a crispier shell, extend the time to 25 minutes. Remove the tin from the oven and let the cups rest in the pan for 5 minutes. This brief cooling period allows the structure to set, making them easier to remove without breaking.
- Serve: Carefully run a thin knife around the edge of each cup to loosen them from the tin. Transfer the cups to a serving platter. Garnish with additional fresh chives if desired and serve immediately while warm.

Doneness And Troubleshooting
Recognizing when the cups are perfectly baked relies on visual cues rather than internal temperature, as the dense potato mixture does not require a specific safety temperature once cooked. The primary indicator is color: the edges should be a rich, caramelized gold. If the tops look pale after 25 minutes, the oven may be running cool, or the potato mixture was too wet. In this case, you can switch the oven to broil for the last 1 to 2 minutes, watching closely to prevent burning. Conversely, if the edges are browning too quickly before the centers are hot, tent the muffin tin loosely with aluminum foil to slow down the browning process.
If the cups fall apart when you try to remove them from the pan, it usually indicates that the potato mixture was too moist or the cooling step was skipped. Always ensure the potatoes are drained well and cooled before adding the cheese. Another common issue is a soggy bottom. This can happen if the muffin tin is not greased properly or if the potato mixture is pressed too thinly at the base. Aiming for a consistent thickness of about 1/2 inch throughout the cup helps distribute the heat evenly and creates a sturdy vessel.
Substitutions And Variations
This recipe is versatile and can be adapted to suit various dietary preferences or flavor profiles. For a dairy-free version, substitute the butter with a high-quality plant-based stick margarine and use a dairy-free cheddar alternative. Note that some plant-based cheeses may not melt as seamlessly as dairy, so you might need to bake them slightly longer to achieve a gooey texture. To make the recipe gluten-free, ensure that any added seasonings or cheese products do not contain wheat fillers, though the core ingredients are naturally gluten-free.
You can also experiment with different cheeses. While sharp cheddar provides a robust flavor, Monterey Jack offers a milder, creamier melt, and Gruyère adds a nutty depth. For a spicy kick, mix in a teaspoon of diced jalapeños or a dash of cayenne pepper along with the chives. If you want to add protein, consider folding in cooked, crumbled bacon or diced ham into the potato mixture before shaping. When adding wet ingredients like vegetables, such as spinach or mushrooms, be sure to sauté them first to remove excess moisture, otherwise, the cups may become soggy during baking.
Serving Suggestions
Cheesy Mashed Potato Cups are incredibly flexible regarding what they accompany. As an appetizer, serve them alongside a bowl of warm marinara sauce, ranch dressing, or a zesty salsa verde for dipping. They pair beautifully with a light garden salad dressed in vinaigrette, which cuts through the richness of the cheese and potatoes. For a heartier meal, place three cups on a plate with a side of roasted broccoli or green beans and a piece of grilled chicken breast. These cups also work exceptionally well as a side dish for roast beef, turkey, or pork chops, offering a comforting alternative to a traditional baked potato.
Storage And Reheating
Leftover Cheesy Mashed Potato Cups can be stored in an airtight container in the refrigerator for up to three days. Because they contain dairy and potatoes, they should be cooled to room temperature before being placed in the fridge to prevent condensation from making the shells soggy. To reheat, place the cups on a baking sheet and warm them in a 350°F (175°C) oven for 10 to 15 minutes until heated through and the exterior is crisp again. Avoid microwaving, as this will steam the potatoes and result in a soft, rubbery texture rather than a crispy one.
For longer storage, you can freeze the unbaked cups. After shaping them in the muffin tin, flash freeze the tin for one hour until the cups are solid. Then, transfer the frozen cups to a freezer-safe bag or container. They can be kept frozen for up to two months. To cook from frozen, place the cups directly into a preheated 400°F (200°C) oven and bake for 25 to 30 minutes, adding a few extra minutes to the standard baking time to ensure the center is hot.
These cups are a testament to how simple ingredients can be boosted with a bit of technique. By focusing on the texture of the potato and the timing of the bake, you create a dish that feels special without requiring hours of labor. Whether you are feeding a crowd or just enjoying a cozy night in, these cups deliver consistent results and satisfy cravings for something warm and savory.
Cheesy Mashed Potato Cups
Ingredients
Method
- Boil potatoes until tender, drain well, and return to pot to dry out residual moisture.
- Mash potatoes with butter, milk, salt, and pepper until smooth; cool to room temperature.
- Stir in shredded cheddar cheese and chopped chives until evenly combined.
- Grease a 12-cup muffin tin and press 1/3 cup of mixture into each cup to form a shell.
- Bake at 400°F for 20-25 minutes until golden brown and edges are crisp.