Chocolate Oreo Crust Cheesecake Recipe | Fudge Drizzle
Chocolate Oreo Crust Cheesecake Recipe | Fudge Drizzle
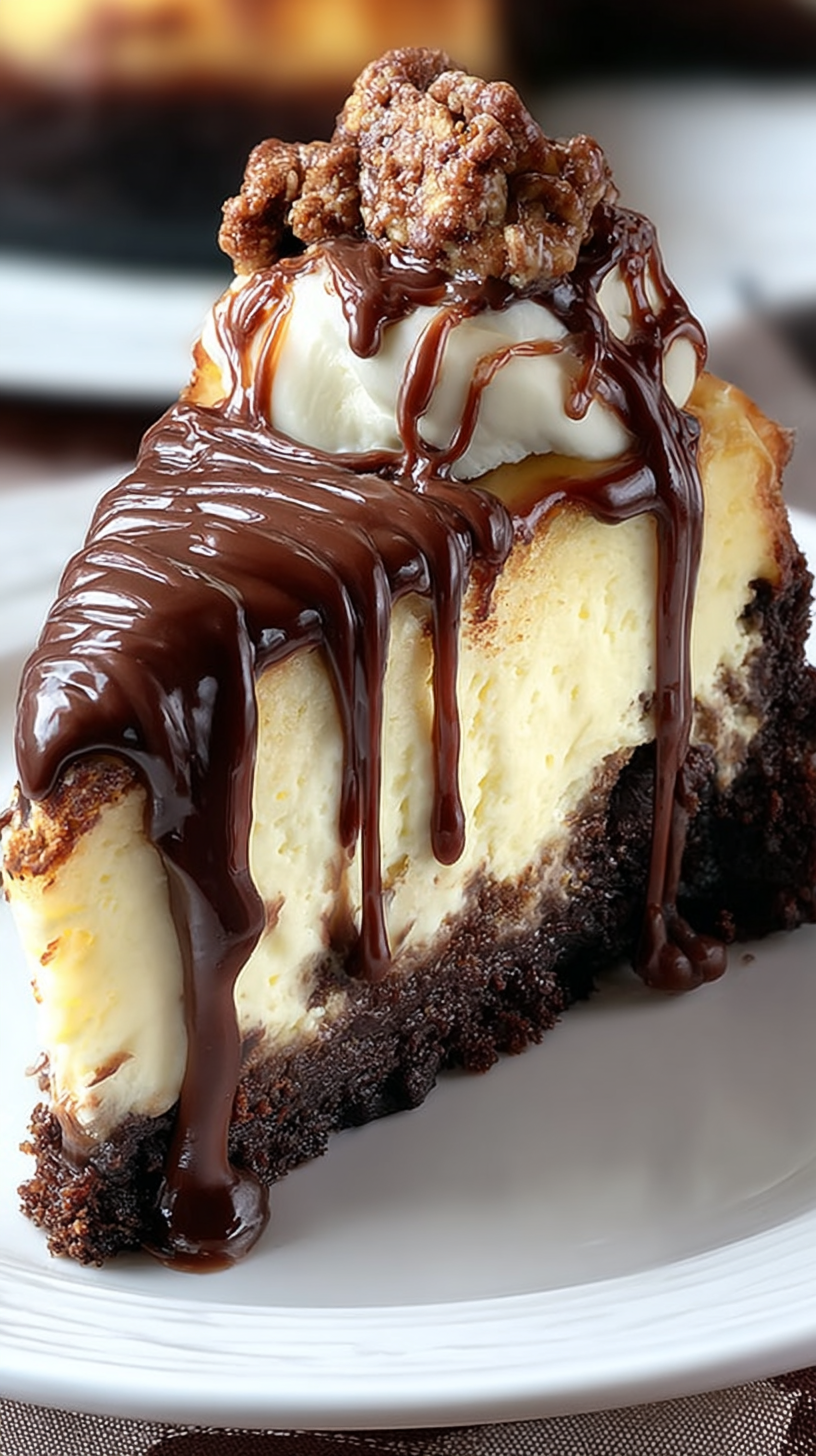
Chocolate Oreo Crust Cheesecake with Fudge Drizzle
I have a confession: I’m the person who orders cheesecake at every restaurant, even when I have no business eating dessert. There’s just something about that creamy, tangy, indulgent bite that makes me feel like I’m treating myself right. But here’s the thing—restaurant cheesecake can be hit or miss, and honestly, it’s usually oversweetened and underseasoned.
A few years ago, I was craving that perfect cheesecake moment at home on a random Tuesday night. I didn’t want to drive anywhere or spend thirty dollars. So I decided to make one from scratch, and I went all in. I wanted a crust that actually tasted like something (hello, crushed Oreos), a filling that was silky and slightly tangy, and a finish that screamed indulgence. That’s when I created this Chocolate Oreo Crust Cheesecake with Fudge Drizzle, and honestly, it’s become my go-to recipe whenever I need to impress someone or just impress myself.
This recipe is for anyone who loves cheesecake but maybe feels intimidated by making it at home. I’m here to tell you: it’s not as scary as you think. Yes, there are a few important steps to follow, but I’m going to walk you through every single one. The result is a stunning, restaurant-quality dessert that tastes like you spent hours in the kitchen when really, most of that time is just the oven doing the work.
This cheesecake feeds about twelve people, making it perfect for dinner parties, holiday gatherings, or just having a few slices stashed in your fridge for those moments when life gets tough. It’s rich, it’s chocolatey, it’s creamy, and it’s absolutely worth the effort. If you love this kind of stuff, make sure to follow me on HaileeRecipes on Pinterest for more cozy desserts and recipes that actually work.
Why You’ll Love This Recipe
Let me be real with you: this isn’t a light, fluffy dessert. This is a celebration cheesecake. It’s dense, creamy, and unapologetically indulgent. Here’s what makes it special:
- The crust is actually delicious. I’m not talking about a sad, crumbly base that falls apart when you bite into it. This Oreo crust has butter and a little bit of salt, so it’s buttery, slightly salty, and holds together beautifully.
- The filling is silky and tangy. I use full-fat cream cheese, sour cream, and a touch of vanilla. That sour cream is the secret—it keeps the cheesecake from being cloyingly sweet and gives it that classic tang you’re looking for.
- The fudge drizzle is the cherry on top. It’s homemade, glossy, and adds that extra layer of chocolate flavor without being overwhelming.
- It looks fancy but tastes homemade. Your guests will think you spent all day on this, when really you spent about twenty minutes of actual hands-on time.
Ingredients
For the Oreo Crust
- 20 Oreo cookies (about 1.75 cups crushed)
- 4 tablespoons unsalted butter, melted
- Pinch of sea salt
For the Cheesecake Filling
- 32 ounces full-fat cream cheese, softened to room temperature
- 1 cup granulated sugar
- 3/4 cup sour cream
- 2 large eggs, room temperature
- 1 teaspoon vanilla extract
- 1/4 teaspoon sea salt
For the Fudge Drizzle
- 1/2 cup unsweetened cocoa powder
- 1/3 cup unsalted butter
- 1/3 cup light brown sugar
- 1/4 cup whole milk
- 1 teaspoon vanilla extract
- Pinch of sea salt
Hailee’s Tips
Room temperature is non-negotiable. I cannot stress this enough. Your cream cheese, eggs, and sour cream need to be at room temperature. Cold ingredients won’t blend smoothly, and you’ll end up with lumps in your filling. Take them out of the fridge about an hour before you start baking.
Use full-fat everything. I know it’s tempting to go with low-fat options, but cheesecake is not the place to skimp. Full-fat cream cheese and sour cream create that silky texture that makes this dessert worth eating.
Don’t skip the water bath. I know it seems like extra work, but it’s literally the difference between a creamy cheesecake and a cracked, dry one. A water bath ensures gentle, even cooking.
Optional Add-Ins and Variations
One of the best things about cheesecake is how customizable it is. Here are some directions you could take this recipe if you want to switch things up:
- Chocolate swirl: Melt 4 ounces of dark chocolate and swirl it into the filling before baking. It looks beautiful and adds extra chocolate flavor.
- Espresso kick: Add 1 tablespoon of instant espresso powder to the filling. It enhances the chocolate without making the cheesecake taste like coffee.
- Crushed candy cane crust: Replace half the Oreos with crushed candy canes for a holiday version. It’s stunning and tastes amazing.
- Salted caramel drizzle: Skip the fudge and drizzle with homemade salted caramel instead. The sweet and salty combination is incredible.
- Mini chocolate chips: Sprinkle a handful of mini chocolate chips on top of the filling before baking. They’ll sink slightly and create little pockets of chocolate throughout.
Step-by-Step Method
Preparing the Pan and Crust
Step 1: Preheat and prep. Get your oven to 325 degrees Fahrenheit. Tear off a large piece of aluminum foil and wrap it tightly around the outside of a 9-inch springform pan. This is going to help keep water out during the water bath. Trust me on this.
Step 2: Make the crust. Crush your Oreos into fine crumbs—I use a food processor, but you can also put them in a zip-top bag and go to town with a rolling pin. You want some texture, but mostly crumbs. Mix the crushed Oreos with melted butter and a pinch of salt until it looks like wet sand.
Step 3: Press and bake. Press the mixture firmly into the bottom of your prepared pan. Use the bottom of a measuring cup to really pack it down so it holds together. Bake for 8 minutes, then remove and let cool slightly while you make the filling. This pre-bake step is crucial—it keeps your crust from being soggy.
Making the Filling
Step 4: Beat the cream cheese. In a large bowl, beat your softened cream cheese with an electric mixer on medium speed for about 2 minutes, until it’s smooth and creamy. Scrape down the sides of the bowl frequently. This is important because any lumps in your cream cheese will show up in your final cheesecake.
Step 5: Add sugar gradually. With the mixer still on medium speed, slowly add your sugar about a quarter cup at a time. This takes about 3 minutes total. You’re not trying to whip air into the filling, so don’t go crazy with the mixer speed.
Step 6: Incorporate sour cream and vanilla. Add your sour cream and vanilla extract, beating on low speed just until combined. Don’t overmix. Overmixing is actually one of the main reasons cheesecakes crack, so be gentle here.
Step 7: Add eggs one at a time. This is where I slow down and really pay attention. Add one egg, mix on low speed until just combined, then add the next egg. Do this for all three eggs. Once all the eggs are in, add your pinch of salt and mix just until combined. The filling should look smooth and creamy.
What I messed up: The first time I made this, I added all the eggs at once and overmixed trying to get them incorporated. The result was a slightly airy filling that didn’t have that dense, creamy texture I was going for. Adding them one at a time and mixing gently makes all the difference.
Baking the Cheesecake
Step 8: Pour and prepare for water bath. Pour your filling over the cooled crust and smooth the top with a spatula. Place your springform pan inside a larger roasting pan. Pour hot water into the roasting pan until it comes about halfway up the sides of the springform pan. This water bath is going to keep your cheesecake moist and prevent cracking.
Step 9: Bake low and slow. Bake at 325 degrees for 55 to 65 minutes. The cheesecake is done when the edges are set but the center still jiggles slightly when you gently shake the pan. It should look like it’s barely set in the middle—this is not a mistake. The carryover cooking while it cools will finish it perfectly.
Step 10: Cool gradually. Turn off the oven and crack the door open about 4 inches. Let the cheesecake sit in the warm oven for 1 hour. This gradual cooling prevents the dreaded cracks. After an hour, remove it from the oven and let it cool to room temperature on the counter, about another hour. Then refrigerate for at least 8 hours, preferably overnight.
Making the Fudge Drizzle
Step 11: Combine and heat. In a small saucepan over medium heat, combine your cocoa powder, butter, and brown sugar. Stir constantly until the butter is melted and everything is combined, about 2 minutes.
Step 12: Add milk and vanilla. Remove from heat and stir in the milk, vanilla, and salt. The drizzle should be smooth and pourable but not too thin. If it’s too thick, add a splash more milk. If it’s too thin, let it cool for a few minutes.
Step 13: Drizzle and serve. Once your cheesecake is fully chilled, drizzle the fudge over the top. You can do thin, elegant lines or go wild and cover the whole thing. It’s your cheesecake, do what makes you happy.
Common Mistakes to Avoid
I’ve made every mistake in the book, so you don’t have to. Here’s what to watch out for:
- Using cold ingredients: This is the number one cause of lumpy filling. Room temperature is essential.
- Overmixing: More mixing doesn’t mean better cheesecake. Mix just until combined, especially once the eggs are added.
- Skipping the water bath: I know it seems fussy, but it’s genuinely the best way to prevent cracks and ensure even cooking.
- Opening the oven door: Resist the urge to peek. Temperature fluctuations cause cracks. Trust the process.
- Not cooling gradually: Rushing the cooling process is a one-way ticket to a cracked cheesecake. The gradual cooling is just as important as the baking.
- Underbaking: A slightly underbaked cheesecake is better than an overbaked one. It will continue to cook as it cools.
My Tested Substitutions
Life happens, and sometimes you don’t have exactly what the recipe calls for. Here’s what I’ve successfully swapped:
- Sour cream swap: If you don’t have sour cream, use Greek yogurt in the same amount. It gives a similar tang and texture.
- Oreo swap: Use any chocolate sandwich cookie. Thin Mints work beautifully, or even homemade chocolate cookies crushed up.
- Cocoa powder swap: Use melted dark chocolate instead of cocoa powder for the fudge drizzle. Use about 4 ounces melted chocolate plus 1 tablespoon butter.
- Brown sugar swap: Regular granulated sugar works fine for the drizzle. You might lose a tiny bit of depth, but it’s still delicious.
How to Customize
The beauty of this Chocolate Oreo Crust Cheesecake with Fudge Drizzle is that it’s a blank canvas for your creativity. Here are some fun directions you could take it:
- Make it mini: Use a muffin tin with paper liners and divide the filling accordingly. Bake for about 20 minutes. Perfect for individual portions.
- Add a cinnamon swirl: Mix 1 tablespoon cinnamon with 2 tablespoons sugar and swirl it into the filling before baking.
- Peanut butter drizzle: Make a drizzle with peanut butter, cocoa powder, and a little honey. The combination is incredible.
- Crushed candy topping: Instead of fudge drizzle, top with crushed candy (Oreos, Reese’s pieces, or toffee bits) right before serving.
- Cheesecake bars: Use a 9×13 baking dish instead of a springform pan. Bake for about 45 minutes and cut into squares. Makes more servings and is easier to transport.
Serving Ideas
A slice of cheesecake is beautiful on its own, but here are some ways to make it feel extra special:
- With fresh berries: A handful of raspberries or strawberries on the side adds brightness and cuts through the richness.
- With whipped cream: A dollop of lightly sweetened whipped cream on top is classic for a reason.
- With espresso: Serve alongside a small cup of strong espresso. The coffee and chocolate combination is perfection.
- With a drizzle of caramel: Add a thin drizzle of caramel sauce alongside the fudge for extra decadence.
- With crushed cookies: Sprinkle a few crushed Oreos on top for a little extra texture and visual appeal.
- With a cherry on top: One fresh cherry or a maraschino cherry looks fancy and adds a pop of color.
Meal Prep and Storage
One of the best things about cheesecake is that it actually gets better after a day or two. The flavors meld together, and the texture becomes even creamier.
In the refrigerator: Store your cheesecake covered in the fridge for up to 5 days. I like to cover it with plastic wrap or store it in a cake container.
In the freezer: Cheesecake freezes beautifully for up to 3 months. Wrap slices individually in plastic wrap and then aluminum foil, or freeze the whole cheesecake wrapped the same way. Thaw overnight in the refrigerator before serving.
Make-ahead tip: You can make this cheesecake up to 2 days ahead of time. Just wait to add the fudge drizzle until a few hours before serving so it looks fresh and glossy.
Pro tip: If you’re taking this to a potluck or party, transport it in the springform pan and only remove it right before serving. It’s much easier to transport, and it stays pristine.
Nutritional Breakdown
Here’s what you’re looking at per slice (based on 12 servings):
- Calories: 485
- Protein: 8g
- Carbohydrates: 48g
- Fat: 28g
- Fiber: 1g
- Sugar: 42g
This is a rich dessert, so a little goes a long way. One slice is genuinely satisfying.
Final Thoughts
Making this Chocolate Oreo Crust Che