Chocolate Peanut Butter Cheesecake Recipe
Chocolate Peanut Butter Cheesecake Recipe
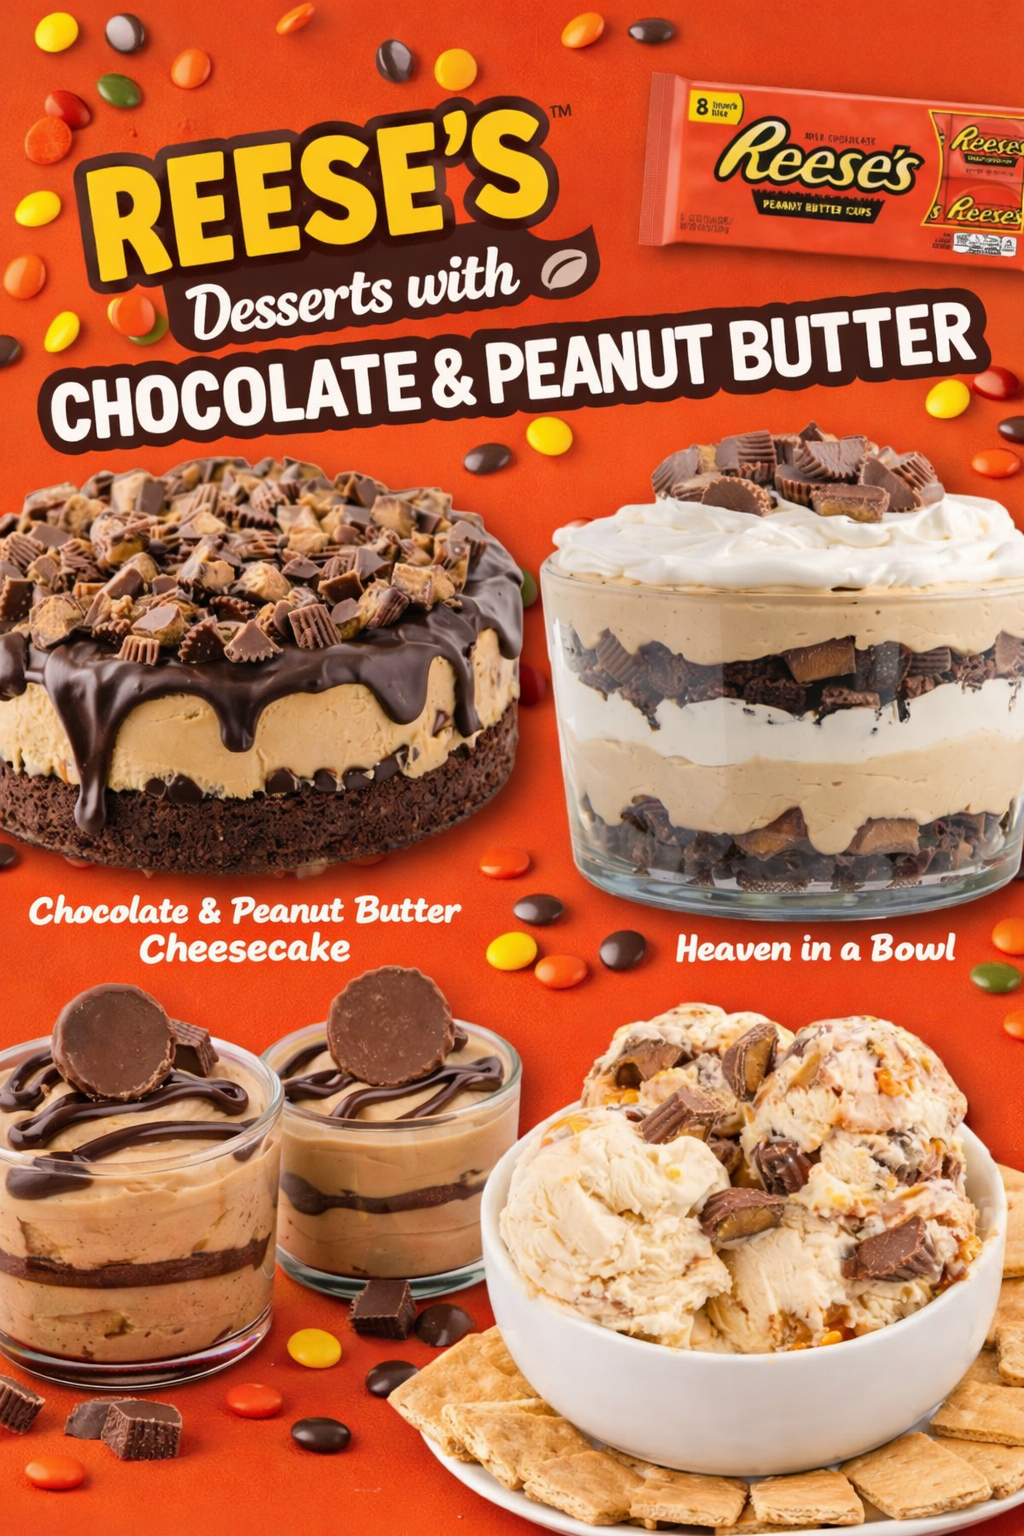
Chocolate Peanut Butter Cheesecake: A Cozy Dessert That Actually Works
I’m going to be totally honest with you—I made this Chocolate Peanut Butter Cheesecake on a Tuesday night when I was supposed to be meal prepping for the week. Instead, I found myself standing in my kitchen at 9 PM, covered in graham cracker crumbs, absolutely mesmerized by the idea of combining two of my favorite flavors into one ridiculously good dessert.
Here’s the thing: I’ve made a lot of cheesecakes over the years, and most of them were either too heavy, too sweet, or just… boring. But this one? This one hits different. The chocolate base is rich without being overwhelming, the peanut butter layer is creamy and genuine (not that artificial peanut butter candy flavor), and they somehow come together in a way that feels both indulgent and somehow not totally irresponsible to eat.
I’m sharing this recipe because I genuinely believe it’s one of those desserts that looks fancy enough to serve at dinner parties but is actually forgiving enough that you won’t stress yourself out making it. You don’t need special equipment, you don’t need to be a pastry chef, and you definitely don’t need to panic if it cracks a little on top (mine always does, and honestly, nobody cares once they taste it).
This cheesecake works for literally anyone who loves chocolate and peanut butter—which, let’s be real, is pretty much everyone. Whether you’re making it for a special occasion, a random Tuesday night, or just because you deserve something good, I’ve got you covered. If you love easy, delicious recipes, follow me on HaileeRecipes on Pinterest for more desserts that actually turn out.
Why You’ll Love This Recipe
First, let’s talk about what makes this different from other chocolate peanut butter cheesecakes you might have tried. I’ve stripped away the complicated steps and the weird ingredient lists. This is a recipe that uses things you probably already have, or can grab on a quick grocery run.
The chocolate layer is fudgy and intense without tasting like artificial chocolate powder. The peanut butter layer is smooth and creamy, and it actually tastes like real peanut butter, not like some weird candy approximation. They don’t fight each other—they complement each other in a way that makes you want another slice immediately.
Honestly? I love this recipe because it’s a little forgiving. Cheesecakes have a reputation for being finicky, but this one doesn’t require you to be perfect. Your oven temperature doesn’t have to be exact. You don’t need a water bath (though I’ll mention it if you want to go fancy). It’s the kind of dessert that comes together beautifully even if you’re not a baking expert.
Plus, it keeps well in the fridge for days, which means you can make it ahead and actually enjoy your dinner party instead of stressing in the kitchen.
Ingredients
For the Crust:
- 1 1/2 cups graham cracker crumbs (about 10-12 full crackers)
- 1/3 cup unsalted butter, melted
- 2 tablespoons granulated sugar
- Pinch of sea salt
For the Chocolate Layer:
- 8 ounces semi-sweet chocolate, chopped (or chocolate chips work fine)
- 1/4 cup heavy cream
- 2 tablespoons unsalted butter
- 1/4 teaspoon vanilla extract
- Pinch of sea salt
For the Peanut Butter Layer:
- 16 ounces cream cheese, softened to room temperature
- 1/2 cup natural peanut butter (or regular, your choice)
- 1/3 cup granulated sugar
- 2 large eggs
- 1/4 cup heavy cream
- 1 teaspoon vanilla extract
- 1/4 teaspoon sea salt
For the Top Chocolate Layer:
- 4 ounces semi-sweet chocolate, chopped
- 2 tablespoons heavy cream
- 1 tablespoon unsalted butter
- Pinch of sea salt
Hailee’s Tips:
- Room temperature cream cheese is non-negotiable. I leave mine on the counter for about 30 minutes while I prep everything else. Cold cream cheese makes lumpy filling, and nobody wants that.
- Graham cracker crumbs: I just crush them in a bag with my hands. No need for a food processor unless you want to. Chunky is fine.
- Natural peanut butter works beautifully here, but regular peanut butter is totally fine too. Use whatever you love. Just not the powdered kind—that won’t work.
- Don’t skip the salt. I know it sounds weird in a sweet dessert, but salt brings out all the flavors and keeps it from being one-note sweet.
Optional Add-Ins and Variations
This is where you can make this recipe your own, and honestly, I encourage it.
- Peanut Butter Swirl: If you want to get fancy, you can drizzle extra peanut butter on top of the chocolate layer before adding the peanut butter filling. It looks gorgeous and tastes even better.
- Crushed Peanuts: Sprinkle some crushed roasted peanuts on top of the final chocolate layer. Adds texture and makes it feel extra special.
- Espresso Powder: Add 1/2 teaspoon of espresso powder to the chocolate layers to deepen the chocolate flavor. It’s subtle but makes a difference.
- Salted Caramel Drizzle: Drizzle some salted caramel over the top layer. Sounds weird, tastes incredible.
- Bourbon or Rum: If you’re feeling adventurous, add 1 tablespoon of bourbon or dark rum to the peanut butter filling. Adults only, obviously.
Step-by-Step Method
Prep Work (15 minutes)
First things first: preheat your oven to 325°F. Line a 9-inch springform pan with parchment paper on the bottom. I also wrap the outside with foil to catch any drips, because I’ve learned that lesson the hard way.
Make sure your cream cheese is sitting on the counter getting soft. This is actually important. I know it seems fussy, but trust me.
Step 1: Make the Crust
Combine your graham cracker crumbs, melted butter, sugar, and salt in a bowl. Mix it until it looks like wet sand. Press it firmly into the bottom of your prepared pan. Use the bottom of a measuring cup to really pack it down—you want it solid so it doesn’t crumble when you slice into it later.
Bake this for about 8 minutes. You’re not fully baking it, just setting it so it holds together. Take it out and let it cool while you work on the filling.
Step 2: Make the Bottom Chocolate Layer
Chop your chocolate and put it in a heat-safe bowl with the cream, butter, vanilla, and salt. I microwave this in 30-second bursts, stirring between each one, until it’s smooth and glossy. You could also do this in a double boiler if you’re fancy, but I’m not, so microwave it is.
Pour about half of this chocolate mixture over your crust. Spread it evenly. Pop it back in the oven for 5 minutes just to set it slightly. This keeps your peanut butter layer from sinking into the chocolate. Take it out and let it cool for a few minutes.
Hailee’s Honest Moment: The first time I made this, I didn’t let the chocolate layer set, and my peanut butter filling kind of swirled into it. Was it bad? No, actually it looked kind of cool. But if you want distinct layers, give it that 5 minutes.
Step 3: Make the Peanut Butter Filling
This is where the magic happens. Beat your softened cream cheese with an electric mixer until it’s completely smooth and creamy. This takes about 2-3 minutes. Scrape down the bowl a few times because cream cheese likes to hide in the corners.
Add your peanut butter and mix until combined. Add the sugar and mix again. Add your eggs one at a time, mixing on low speed after each one. Don’t overmix once the eggs are in—you don’t want to incorporate too much air.
Finally, add the heavy cream, vanilla, and salt. Mix until smooth.
Step 4: Assemble and Bake
Pour your peanut butter filling over the chocolate layer. Smooth the top with a spatula. Now here’s the part where you can go two ways:
Easy Way: Just bake it as is. The cheesecake will bake for about 35-40 minutes. It’s done when the edges are set but the center still jiggles just a tiny bit when you gently shake the pan. It should look almost done but not quite.
Fancy Way: Use a water bath. Put your springform pan inside a larger roasting pan, and fill the roasting pan with hot water until it comes halfway up the sides of the springform pan. This creates steam and gives you a creamier texture. Bake for 40-45 minutes.
I usually do the easy way because I’m lazy, and honestly, it turns out great either way.
Step 5: Cool It Down
This is the hardest part because you want to eat it immediately, but please don’t. Turn off your oven and crack the door open about 4 inches. Let the cheesecake sit in the cooling oven for 30 minutes. This prevents it from cracking on top (though again, a little crack is fine).
Take it out and let it cool completely on the counter, about an hour. Then refrigerate it for at least 4 hours, but preferably overnight. Yes, overnight. I know you want it now, but the flavors get better and the texture gets creamier.
Step 6: Make the Top Chocolate Layer
Right before you serve it, make your final chocolate layer. Chop your chocolate and combine it with cream, butter, and salt. Microwave in 30-second bursts until smooth. Let it cool for a minute or two, then pour it over the top of your chilled cheesecake. Smooth it out and let it set for at least 15 minutes before slicing.
Common Mistakes to Avoid
Using Cold Cream Cheese: I mentioned this already, but it bears repeating. Cold cream cheese won’t blend smoothly, and you’ll end up with lumps. Room temperature is your friend.
Overmixing: Once your eggs are in, stop mixing. Overmixing incorporates air, which can cause cracks. Mix just until combined.
Skipping the Cooling Process: I get it. You’re impatient. So am I. But the cooling process is when the magic happens. Skip it, and you’ll have a slightly grainy texture instead of that silky smooth cheesecake texture.
Opening the Oven Door Too Much: Every time you open it, you mess with the temperature and the steam. Resist the urge to peek. You know it’s done when the edges are set and the center jiggles slightly.
Cutting It While It’s Still Warm: This is torture, but trust me. A warm cheesecake falls apart. A cold cheesecake slices beautifully. Use a hot, wet knife and wipe it clean between slices.
My Tested Substitutions
Dairy-Free Version: Use dairy-free cream cheese, dairy-free butter, and coconut cream instead of heavy cream. The chocolate layers can use dairy-free chocolate and coconut cream. It works, though the texture is slightly less creamy. Still delicious.
Gluten-Free Crust: Swap regular graham crackers for gluten-free ones. Everything else stays the same. The crust might be slightly more fragile, so pack it down extra well.
Lower Sugar: You can reduce the sugar in the filling to 1/4 cup without dramatically changing the taste. It won’t be as sweet, which some people prefer. The chocolate layers will still taste good because chocolate is naturally sweet.
Almond Butter Instead of Peanut Butter: If you have a peanut allergy or just want to switch it up, almond butter works beautifully. Use the same amount. The flavor is slightly more subtle, which is kind of nice.
Greek Yogurt Addition: Add 1/4 cup of plain Greek yogurt to the peanut butter filling for a slightly lighter texture and a subtle tang. It actually works really well.
How to Customize
Want to make this your own? Here’s what you can play with:
- More Chocolate: If you’re a chocolate fanatic, increase the chocolate in the bottom and top layers. Use dark chocolate instead of semi-sweet for a deeper flavor.
- More Peanut Butter: Increase the peanut butter to 3/4 cup if you want it to be more peanut butter forward. You might need to reduce the sugar slightly so it’s not overly sweet.
- Different Crust: Use Oreos, chocolate cookies, or even pretzels instead of graham crackers. Adjust the butter slightly depending on how dry your base ingredient is.
- Flavor Additions: Add 1/2 teaspoon of cinnamon to the peanut butter layer, or a touch of maple syrup for depth.
- Toppings: Once it’s completely set, you can add crushed peanut butter cups, chocolate shavings, or even a drizzle of honey.
Serving Ideas
Okay, so you’ve made this beautiful cheesecake. Now what? Here’s how I like to serve it:
- Plain and Simple: Slice it with a hot knife, plate it, and eat it. Sometimes the simplest way is the best way.
- With Coffee: A slice of this with a strong cup of coffee is basically a perfect afternoon.
- With Whipped Cream: A dollop of fresh whipped cream on top is never wrong. Add a tiny pinch of sea salt to the whipped cream for sophistication.
- With Fresh Berries: Raspberries or strawberries on the side brighten up the richness of the cheesecake.
- With Hot Fudge: If you really want to go there, drizzle some warm hot fudge over a slice. It’s indulgent and delicious.
- With Vanilla Ice Cream: Warm chocolate peanut butter cheesecake with cold vanilla ice cream is basically heaven.
Meal Prep and Storage
In the Fridge: This cheesecake keeps beautifully in the refrigerator for up to 5 days. Cover it loosely with plastic wrap or keep it in an airtight container. The longer it sits, the more the flavors develop, so day two or three is actually better than day one.
In the Freezer: You can freeze this for up to 2 months. Wrap it well in plastic wrap and then in foil. Thaw it in the refrigerator overnight before serving. The texture stays creamy and delicious.
Make-Ahead Option: You can make the crust and chocolate layers up to 2 days ahead. Cover and refrigerate. Add the peanut butter filling and bake when you’re ready to serve.
Slicing Tips: Use a hot, wet knife and wipe it clean between each slice. This gives you clean cuts instead of messy ones. A bench scraper works great for this too.
Nutritional Breakdown
This cheesecake is rich, so the servings are on the smaller side. Each slice is meant to be satisfying, not overwhelming.
Per slice (out of 12 slices):
- Calories: approximately 385
- Protein: 8g
- Carbohydrates: 32g