Creamy Sweet Banana Pudding
Creamy Sweet Banana Pudding
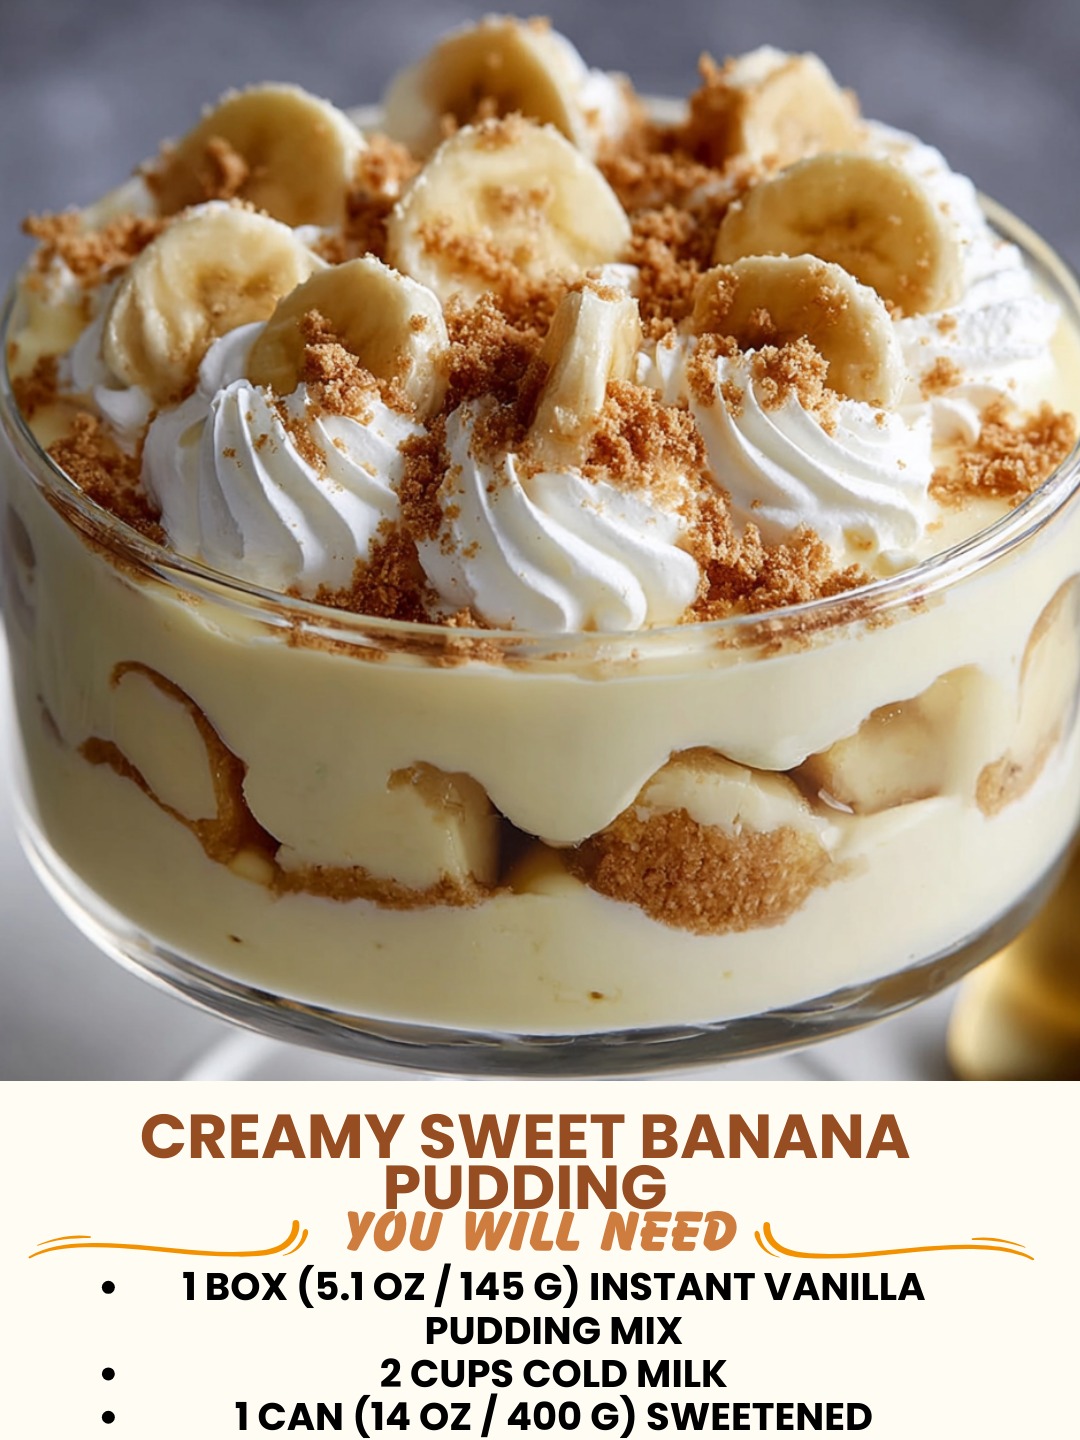
Creamy Sweet Banana Pudding: The Comfort Dessert That Actually Tastes Like Home
I grew up watching my grandmother layer vanilla wafers and sliced bananas into a baking dish on Sunday afternoons, and honestly, I thought that was the only way banana pudding existed. Then, about five years ago, I was craving something creamier, richer, and a little more indulgent than the traditional version. I wanted that nostalgic banana pudding feeling but with actual depth and a silky texture that made you want to eat it straight from the bowl with a spoon. So I started experimenting in my kitchen, and this Creamy Sweet Banana Pudding became my answer.
This isn’t a complicated recipe. It’s actually the opposite. What makes it special is the combination of a real custard base (not instant pudding mix, though I’ll give you that shortcut), fresh bananas, and a careful balance of sweetness that doesn’t make your teeth hurt. The pudding itself is smooth, luxurious, and tastes like it took way more effort than it actually did. That’s the magic right there.
I’m sharing this with you because I know what it’s like to want something homemade but not have three hours to spend in the kitchen. This recipe works for weeknight cravings, potlucks where you want to impress people, or those cozy nights when you just need comfort in a bowl. It’s forgiving, adaptable, and honestly kind of therapeutic to make. Follow me on HaileeRecipes on Pinterest for more recipes like this one that feel fancy but don’t require a culinary degree.
Why You’ll Love This Recipe
First, let’s be real: this Creamy Sweet Banana Pudding tastes indulgent without being overly complicated. You’re not making a seven-layer cake or tempering chocolate. You’re making a custard, letting it cool, and assembling something that looks and tastes like you spent way more time than you actually did.
Second, the texture. The pudding is genuinely creamy and smooth, not grainy or weird. The bananas stay fresh-tasting and don’t get brown and mushy (as long as you follow my timing tips, which I’ll get to). There’s a subtle sweetness that balances the vanilla and banana flavors without being cloying.
Third, it’s flexible. You can make it ahead, customize it with different cookies or toppings, swap ingredients based on what’s in your pantry, and even make it dairy-free if you need to. This recipe meets you where you are.
Ingredients
- 2 cups whole milk — I use whole milk because the fat content makes the custard richer. You can use 2% in a pinch, but whole milk is worth it here.
- 1 cup heavy cream — This is what makes it truly creamy. Don’t skip it.
- 5 egg yolks — The backbone of your custard. Room temperature makes them easier to work with.
- 3/4 cup granulated sugar — Divided into two portions (1/2 cup and 1/4 cup). I’ll explain why in the method.
- 1/4 teaspoon sea salt — Brings out the banana flavor and balances sweetness.
- 2 teaspoons vanilla extract — Real vanilla, please. It makes a difference.
- 3 tablespoons unsalted butter — Adds richness and helps the custard feel luxurious.
- 4-5 ripe but firm bananas — Not brown-spotted ones. You want them still a little yellow. Slice them about 1/4 inch thick.
- 40 vanilla wafers — About 1 box. I like Nilla Wafers, but any vanilla cookie works.
- 2 tablespoons fresh lemon juice — Prevents the bananas from browning and adds subtle brightness.
- Whipped cream for topping (optional) — Fresh whipped cream or store-bought, your call.
Hailee’s Tip: Get your eggs out of the fridge 20 minutes before you start. Cold eggs are harder to whisk and incorporate smoothly into the hot milk mixture.
Hailee’s Tip: I use a whisk for the custard base, not an immersion blender or electric mixer. A whisk gives you better control and fewer lumps.
Optional Add-Ins and Variations
Want to make this recipe your own? Here are my favorite tweaks:
- Bourbon or rum: Add 1 tablespoon to the custard base for a grown-up version. It doesn’t make it taste boozy, just adds depth.
- Nutmeg: A tiny pinch (1/8 teaspoon) in the custard is subtle but lovely.
- Brown butter: Instead of regular butter, brown it first. It takes 5 minutes and adds a nutty flavor that elevates the whole thing.
- Crushed vanilla wafers on top: Mix crushed wafers with melted butter and sprinkle on top before serving for crunch.
- Caramel drizzle: A thin line of caramel sauce over the top is never a bad idea.
Step-by-Step Method
Step 1: Heat Your Dairy
Pour the milk and heavy cream into a saucepan over medium heat. You’re not boiling it—just heating it until it’s steaming and a few tiny bubbles form around the edges. This usually takes about 5-7 minutes. While that’s happening, grab a bowl and whisk together your egg yolks and 1/2 cup of sugar until the mixture is pale and thick, about 2 minutes. This is important because it helps the eggs cook evenly and prevents scrambling.
Hailee’s Note: The first time I made this, I didn’t heat the milk hot enough and ended up with a pudding that was too thin. Lesson learned: make sure it’s actually steaming.
Step 2: Temper Those Eggs
This sounds fancy but it’s just a safety step. Slowly pour the hot milk into the egg mixture while whisking constantly. I’m talking slow and steady—not dumping it all at once. Whisk for about 30 seconds after you’ve added all the milk. This brings the eggs up to temperature without scrambling them.
Step 3: Cook the Custard
Pour the mixture back into the saucepan and set it over medium-low heat. Grab a wooden spoon and stir constantly for about 8-10 minutes. You’re looking for it to thicken enough to coat the back of the spoon—when you run your finger across the spoon, the line should stay. Don’t rush this. Low and slow is your friend.
Step 4: Finish the Custard
Remove from heat and stir in the butter, vanilla extract, salt, and remaining 1/4 cup sugar. Stir until everything is smooth and incorporated. Pour the custard through a fine-mesh strainer into a bowl to catch any cooked egg bits or lumps. Let it cool to room temperature, about 15 minutes.
Step 5: Prep Your Bananas
Slice your bananas into about 1/4-inch rounds and toss them gently in a bowl with the lemon juice. This prevents browning and adds a subtle brightness that balances the sweetness. Don’t do this too far ahead—I do it about 10 minutes before assembly.
Step 6: Assemble
In a 9×13-inch baking dish, start with a thin layer of custard on the bottom. Then layer: vanilla wafers, banana slices, custard. Repeat until you run out of ingredients, ending with custard on top. You should have about 3-4 layers depending on how generous you are.
Step 7: Chill
Cover with plastic wrap and refrigerate for at least 2 hours, but ideally 4-6 hours. This lets the flavors meld and the pudding set up properly. You can make this the day before, which I often do.
Step 8: Top and Serve
Right before serving, add a dollop of whipped cream on top if you’re feeling fancy. A sprinkle of crushed vanilla wafers is nice too.
Common Mistakes to Avoid
Using bananas that are too ripe: Brown, soft bananas will turn to mush in the pudding. Aim for yellow with maybe a few tiny brown spots, not a leopard print situation.
Skipping the lemon juice: I know it seems random, but this one step keeps your bananas from browning and adds a subtle brightness. Don’t skip it.
Not tempering the eggs: If you dump hot milk straight into cold eggs, you’ll get scrambled eggs in your pudding. It’s not pretty. Slow and steady wins here.
Overcooking the custard: If you cook it too long or at too high a temperature, it can break or become grainy. Medium-low heat and constant stirring are your friends.
Assembling too far ahead: If you layer it more than 6 hours before serving, the wafers get soggy and the bananas start to brown. Make it the morning of serving or the night before, but not days ahead.
My Tested Substitutions
No heavy cream? Use all milk, but the pudding won’t be quite as rich. You can also use half-and-half or even Greek yogurt for tanginess.
Dairy-free: Use unsweetened oat milk and coconut cream in place of the milk and heavy cream. The custard will be slightly thinner but still delicious. Use dairy-free butter too.
No vanilla wafers? Graham crackers, digestive biscuits, or even shortbread cookies work. Each changes the flavor slightly, but all are good.
Egg-free: This is trickier because you lose the custard structure. You could make a pudding-based version using instant vanilla pudding mixed with whipped cream, but it won’t be the same.
Less sugar? You can reduce the sugar to 1/2 cup total, but I wouldn’t go lower. The bananas add natural sweetness, but you need enough sugar for the custard to set properly.
How to Customize
Want to make this recipe completely your own? Here’s what you can play with:
Cookie swap: Try chocolate wafers, gingersnaps, or even ladyfingers for a different vibe.
Fruit additions: Layer in some fresh berries between the bananas, or add a thin layer of strawberry jam.
Spice it up: Add a pinch of cinnamon, cardamom, or even cayenne pepper to the custard.
Liqueur: A tablespoon of bourbon, rum, or even Kahlúa changes the flavor completely.
Texture: Top with crushed cookies mixed with melted butter for a crunch, or candied banana chips for elegance.
Serving Ideas
This pudding is amazing on its own, but here are my favorite ways to serve it:
- With a dollop of fresh whipped cream and a sprinkle of crushed vanilla wafers
- Drizzled with caramel or chocolate sauce
- With a small scoop of vanilla ice cream on the side
- As part of a dessert board alongside other small bites
- In individual glasses for a more elegant presentation
- With a thin slice of pound cake on the side
Meal Prep and Storage
In the refrigerator: This keeps for up to 3 days covered with plastic wrap. The wafers will gradually soften, but that’s not necessarily a bad thing—some people prefer it that way.
Make-ahead: You can make the custard base up to 2 days ahead and store it in an airtight container. Assemble the pudding the morning of serving or the night before.
Freezing: I don’t recommend freezing the assembled pudding because the texture gets weird. But you can freeze the custard base for up to a month. Thaw in the refrigerator overnight before using.
Individual servings: Layer the pudding in mason jars or small glasses for easy grab-and-go servings. These keep for 2-3 days in the fridge.
Nutritional Breakdown
This makes about 8 servings. Per serving:
- Calories: 385
- Protein: 6g
- Carbs: 52g
- Fat: 17g
- Fiber: 1g
These numbers are estimates based on standard ingredients. Actual nutrition varies depending on your specific brands and how generously you layer everything.
Final Thoughts
This Creamy Sweet Banana Pudding is the kind of dessert that makes people feel cared for. It’s not pretentious or overly complicated, but it tastes like you put thought into it. That’s honestly my favorite kind of recipe to share.
I love making this when I want to impress people without stressing myself out, or when I just need something comforting and familiar. It reminds me of my grandmother’s kitchen but feels like something new at the same time. I hope it becomes a favorite in your house too.
If you make this, I’d love to hear how it turns out. Do you add anything special? Do you have a vanilla wafer preference? These are the kinds of things I genuinely want to know. Cooking is better when we’re doing it together, even if we’re in different kitchens.
Happy cooking, and enjoy every creamy, sweet bite.
—
Creamy Sweet Banana Pudding
Ingredients
Method
- Heat milk and heavy cream in a saucepan over medium heat until steaming, about 5-7 minutes.
- In a bowl, whisk egg yolks and 1/2 cup sugar until pale and thick, about 2 minutes.
- Slowly pour hot milk into egg mixture while whisking constantly.
- Pour mixture back into saucepan and cook over medium-low heat, stirring constantly, until it coats the back of a spoon, about 8-10 minutes.
- Remove from heat and stir in butter, vanilla extract, salt, and remaining 1/4 cup sugar. Pour through a fine-mesh strainer into a bowl.
- Cool custard to room temperature, about 15 minutes.
- Toss sliced bananas with lemon juice.
- In a 9x13-inch baking dish, layer custard, vanilla wafers, and banana slices. Repeat until all ingredients are used, ending with custard on top.
- Cover with plastic wrap and refrigerate for at least 2 hours, preferably 4-6 hours.
- Top with whipped cream before serving if desired.