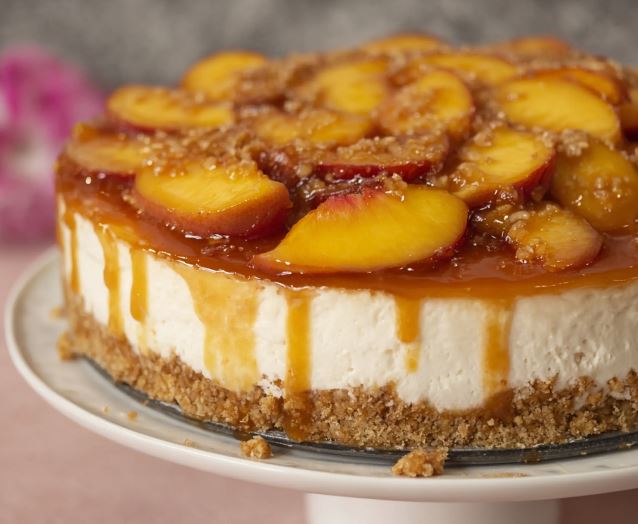
Delicious Dump Cakes to Go!
Delicious Dump Cakes to Go!
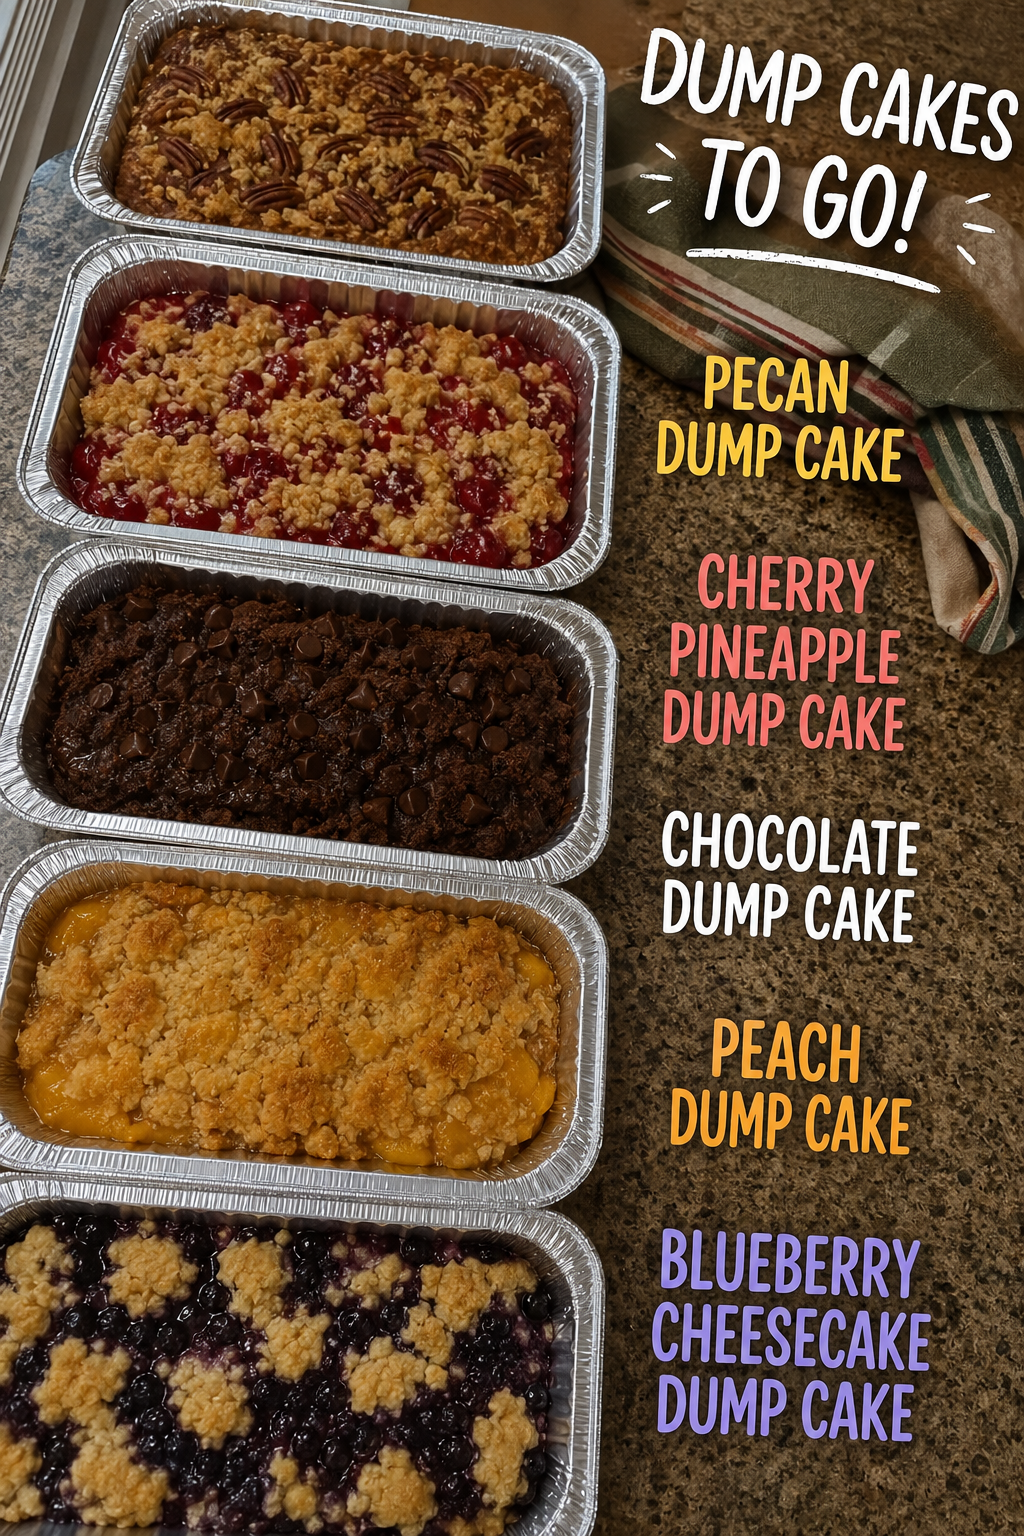
I’m so excited to share my collection of delicious dump cakes to go with you today! If you haven’t discovered the magic of dump cakes yet, you’re in for a treat. These are some of the easiest desserts you can make, and honestly, they taste like you spent way more time in the kitchen than you actually did. Whether you’re planning a potluck, need a quick dessert for a weeknight dinner, or just want something comforting and delicious, dump cakes are your new best friend.
What I love most about these recipes is how forgiving and flexible they are. You literally dump your ingredients into a pan, pop it in the oven, and walk away. No fancy techniques, no stress, just pure dessert happiness. I’ve rounded up five of my favorite dump cake recipes that my family keeps asking me to make again and again, and I promise you’ll want to bookmark every single one of them.
From fruity classics like cherry pineapple to decadent chocolate and that show-stopping blueberry cheesecake version, there’s something here for every craving and every occasion. Follow me on HaileeRecipes on Pinterest for even more easy dessert ideas you can save for later. Now let’s dive into these five amazing dump cakes that are about to become your go-to recipes!
1. Pecan Dump Cake
This irresistible pecan dump cake combines buttery cake layers with a gooey caramel-pecan topping that bakes right into the dessert. With its tender crumb, nutty flavor, and sweet-savory notes, it’s the perfect comfort dessert for fall gatherings, potlucks, or whenever you need something impressive without the fuss. The beauty of this dump cake is that you literally dump ingredients into a baking dish and let the oven do the work, making it ideal for busy home bakers who still want to impress.
Why You’ll Love It
- Minimal prep time with maximum flavor—just dump and bake for an elegant-tasting dessert.
- The pecans toast beautifully during baking, creating a rich, nutty topping that rivals any traditional cake.
- Naturally feeds a crowd and tastes even better the next day as flavors meld together.
Ingredients
- 1 1/2 cups all-purpose flour
- 1 cup granulated sugar
- 2 teaspoons baking powder
- 1/2 teaspoon salt
- 1 cup whole milk
- 6 tablespoons unsalted butter, melted
- 1 teaspoon vanilla extract
- 1 cup chopped pecans
- 1 cup packed brown sugar
- 1 3/4 cups hot water
How To Make It
- Preheat your oven to 350 degrees Fahrenheit and lightly grease a 9-by-13-inch baking dish.
- In a large bowl, whisk together the flour, granulated sugar, baking powder, and salt until well combined.
- Stir in the milk, melted butter, and vanilla extract until you have a smooth batter, then pour it evenly into the prepared baking dish.
- Sprinkle the chopped pecans and brown sugar evenly over the batter without stirring.
- Carefully pour the hot water over the entire top layer, allowing it to distribute evenly across the pecans and brown sugar.
- Bake for 45 to 50 minutes, until the cake is golden brown and a toothpick inserted into the cake portion comes out clean.
- Remove from the oven and let cool for 10 minutes before serving, allowing the caramel sauce to set slightly.
Variations And Substitutions
Swap pecans for walnuts, almonds, or a combination of nuts based on preference. Replace half the brown sugar with maple sugar for deeper autumn flavor, or add a teaspoon of cinnamon to the dry ingredients for extra warmth. For a chocolate twist, sprinkle cocoa powder into the batter or use chocolate chips mixed with the pecans. You can also substitute half the water with strong brewed coffee to enhance the nutty notes.
Make-Ahead, Storage, And Serving Tips
Prepare the dry ingredients and measure all components the night before, then assemble and bake when ready. Store covered at room temperature for up to three days or refrigerate for up to five days. This cake reheats beautifully—warm individual portions in the microwave for 20 to 30 seconds. Serve warm or at room temperature with whipped cream, vanilla ice cream, or a drizzle of caramel sauce for extra indulgence. The cake actually tastes better after sitting overnight as the caramel sauce fully infuses into the cake.
2. Cherry Pineapple Dump Cake
This Cherry Pineapple Dump Cake combines the bright tropical sweetness of pineapple with tart cherries for a perfectly balanced dessert that tastes far more impressive than its minimal effort requires. The fruit juices create a luscious sauce while the topping bakes into a golden, buttery crumble that contrasts beautifully with the tender fruit filling. Serve this warm with vanilla ice cream for an effortless crowd-pleaser at potlucks, family dinners, or casual gatherings. It’s the ultimate no-fuss dessert that delivers big flavor with practically zero skill required.
Why You’ll Love It
- Requires no mixing or complicated techniques—just dump and bake
- Uses pantry-staple ingredients you likely already have on hand
- Feeds a crowd and looks homemade impressive without the stress
Ingredients
- 1 can (21 ounces) cherry pie filling
- 1 can (20 ounces) crushed pineapple, with juice
- 1 box (15.25 ounces) yellow or vanilla cake mix
- 6 tablespoons butter, melted
- 1/2 cup chopped pecans or walnuts (optional)
- 1/4 teaspoon almond extract (optional but recommended)
- Pinch of salt
How To Make It
- Preheat your oven to 350 degrees Fahrenheit and lightly grease a 9×13-inch baking dish.
- Pour the cherry pie filling into the prepared baking dish, spreading it evenly across the bottom.
- Drain the crushed pineapple, reserving the juice, then scatter the drained pineapple over the cherries. Drizzle half the reserved pineapple juice over the fruit layer.
- In a separate bowl, combine the dry cake mix with melted butter, stirring until crumbly. Stir in the almond extract if using, along with a pinch of salt.
- Sprinkle the cake mixture evenly over the fruit, pressing down gently so it holds together in clumps rather than spreading into a solid layer.
- Scatter chopped nuts over the top if desired for added texture and flavor.
- Bake for 35 to 40 minutes until the topping is golden brown and the fruit mixture bubbles slightly at the edges.
- Remove from the oven and let cool for 10 minutes before serving warm with ice cream.
Variations And Substitutions
Swap the cherry filling for blueberry, strawberry, or peach pie filling depending on your preference. Replace pecans with walnuts, almonds, or coconut flakes for different flavor profiles. For a spiced version, add 1/2 teaspoon of cinnamon or nutmeg to the cake mixture. You can also use fresh or frozen pineapple chunks instead of canned, though reduce the amount to about 2 cups to prevent excess moisture.
Make-Ahead, Storage, And Serving Tips
Prepare the dump cake up to 24 hours ahead by assembling it in the baking dish, covering it tightly with plastic wrap, and refrigerating. Bake directly from the refrigerator, adding 5 to 10 minutes to the baking time. Store leftovers covered in the refrigerator for up to 4 days and reheat gently in a 300-degree oven. This cake is best served warm with vanilla ice cream or whipped cream, though it’s also delicious at room temperature. If the topping browns too quickly, loosely tent the dish with foil for the final 10 minutes of baking.
3. Chocolate Dump Cake
This decadent Chocolate Dump Cake delivers rich, fudgy indulgence with minimal effort. Layers of chocolate cake mix, cocoa powder, and hot fudge create a gooey, brownie-like texture that’s utterly irresistible. The magic happens when boiling water transforms the dry ingredients into a moist, molten dessert as it bakes. Perfect for chocolate lovers who crave that warm, comforting feeling, this dump cake is ideal for potlucks, family dinners, or whenever you need a show-stopping dessert without the fuss. Serve it warm with vanilla ice cream or whipped cream for the ultimate treat.
Why You’ll Love It
- Requires no mixing or creaming of butter and sugar, making it truly hands-off.
- Creates its own fudgy sauce as it bakes, eliminating the need for frosting.
- Feeds a crowd and tastes like you spent hours in the kitchen.
Ingredients
- 1 box chocolate cake mix
- 1/2 cup unsweetened cocoa powder
- 1 cup hot fudge sauce
- 2 cups boiling water
- 1/2 cup vegetable oil
- 3 large eggs
- 1 teaspoon vanilla extract
- 1/4 teaspoon salt
How To Make It
- Preheat your oven to 350 degrees Fahrenheit and lightly grease a 9×13 inch baking dish.
- In a large bowl, combine the chocolate cake mix, cocoa powder, and salt, stirring until evenly distributed.
- Add the vegetable oil, eggs, and vanilla extract to the dry mixture, stirring until just combined and thick.
- Spread the batter evenly into the prepared baking dish, smoothing the top with a spatula.
- Drizzle the hot fudge sauce over the entire surface of the batter in a crisscross pattern.
- Carefully pour the boiling water over the top, distributing it evenly. Do not stir; the water will create the sauce layer.
- Bake for 35 to 40 minutes, until the cake is set on top but still has a slight jiggle in the center.
Variations And Substitutions
Stir chocolate chips or chopped brownies into the batter for extra chocolate chunks. Swap the hot fudge sauce for caramel sauce for a different flavor profile. Use chocolate pudding mix instead of cocoa powder for a creamier texture. For a mint twist, add 1/2 teaspoon peppermint extract to the batter. You can also substitute the hot fudge with melted chocolate mixed with a little butter.
Make-Ahead, Storage, And Serving Tips
Prepare the dry ingredients the night before and store them in an airtight container; simply add wet ingredients when ready to bake. Store leftovers covered at room temperature for up to two days or refrigerate for up to four days. Reheat individual portions in the microwave for 20 to 30 seconds before serving. The cake actually tastes better the next day as flavors meld. For best results, serve warm with a scoop of vanilla ice cream or a dollop of whipped cream. If the cake seems dry, it may have baked too long; reduce baking time by a few minutes next time.
4. Peach Dump Cake
This classic Peach Dump Cake delivers summer flavor in the easiest possible way. Fresh or canned peaches are layered with a buttery cake topping that bakes into a golden, tender crumb while the fruit creates a luscious filling below. The contrast between the soft peaches and slightly crispy top makes every spoonful satisfying. Serve it warm with vanilla ice cream or whipped cream for a dessert that tastes like you spent hours in the kitchen but took mere minutes to assemble. Perfect for potlucks, weeknight dinners, or when you need an impressive dessert without the fuss.
Why You’ll Love It
- Requires only 10 minutes of prep time with no mixing bowls or special techniques.
- Works beautifully with fresh, frozen, or canned peaches so you can make it year-round.
- The simple topping bakes into a tender cake layer while peaches stay juicy and flavorful underneath.
Ingredients
- 2 cans (29 ounces each) sliced peaches in syrup, undrained
- 1 box yellow cake mix (dry)
- 1 cup all-purpose flour
- 8 tablespoons unsalted butter, melted
- 1/2 cup granulated sugar
- 1 teaspoon vanilla extract
- 1/2 teaspoon ground cinnamon
- 1/4 teaspoon ground nutmeg
How To Make It
- Preheat your oven to 350 degrees Fahrenheit and lightly grease a 9-by-13-inch baking dish.
- Pour the canned peaches with their syrup into the prepared baking dish, spreading them evenly across the bottom.
- In a medium bowl, combine the dry cake mix, flour, sugar, cinnamon, and nutmeg.
- Drizzle the melted butter and vanilla extract over the dry mixture and stir until crumbly and combined.
- Sprinkle the cake mixture evenly over the peaches, pressing down gently so it holds together but remains crumbly.
- Bake for 45 to 50 minutes, until the topping is golden brown and a toothpick inserted into the cake layer comes out clean.
- Remove from the oven and let cool for 10 minutes before serving.
Variations And Substitutions
Swap peaches for fresh or canned nectarines, apricots, or a combination of stone fruits. Add 1/2 cup chopped pecans or almonds to the topping for crunch. Substitute the yellow cake mix with white or spice cake mix for different flavor profiles. For extra richness, brown the butter before mixing it with the dry ingredients, or stir in 1/4 cup shredded coconut for tropical notes.
Make-Ahead, Storage, And Serving Tips
Assemble the dump cake up to 8 hours ahead and refrigerate unbaked, then add 5 extra minutes to the baking time. Store leftovers covered at room temperature for up to 2 days or refrigerate for up to 4 days. Reheat individual portions in the microwave for 30 to 45 seconds. Serve warm with vanilla ice cream, whipped cream, or a dollop of Greek yogurt. If the topping browns too quickly, tent the dish loosely with foil for the last 15 minutes of baking.
5. Blueberry Cheesecake Dump Cake
This Blueberry Cheesecake Dump Cake combines creamy cheesecake flavor with the convenience of a dump cake format. Fresh or frozen blueberries create a tart, juicy filling that contrasts beautifully with the rich cheesecake layer and buttery cake topping. The result is a dessert with distinct layers that feels fancy but requires minimal effort. Serve this warm with whipped cream or vanilla ice cream for an impressive finish to any meal, or bring it to potlucks where it disappears quickly.
Why You’ll Love It
- Tastes like an elegant cheesecake dessert without the complicated baking techniques.
- Minimal prep time means you can have a homemade dessert ready in under 10 minutes of work.
- Feeds a crowd and works beautifully for both casual gatherings and special occasions.
Ingredients
- 1 box vanilla cake mix
- 1/2 cup melted butter
- 8 ounces cream cheese, softened
- 1/2 cup sour cream
- 1/2 cup sugar
- 1 teaspoon vanilla extract
- 3 cups fresh or frozen blueberries
- 2 tablespoons lemon juice
How To Make It
- Preheat your oven to 350°F and lightly grease a 9×13-inch baking dish.
- In a medium bowl, whisk together the softened cream cheese, sour cream, sugar, and vanilla extract until smooth and well combined.
- Spread the cream cheese mixture evenly across the bottom of the prepared baking dish.
- Scatter the blueberries over the cream cheese layer and drizzle with lemon juice.
- In a separate bowl, combine the dry cake mix with melted butter and mix until crumbly.
- Sprinkle the cake mixture evenly over the blueberries, covering all the fruit.
- Bake for 40 to 45 minutes until the top is golden brown and a toothpick inserted into the cake layer comes out clean.
- Allow the cake to cool for 10 to 15 minutes before serving.
Variations And Substitutions
Use blackberries or raspberries instead of blueberries for a different flavor profile. Swap the vanilla cake mix for a lemon cake mix to enhance the citrus notes. Substitute Greek yogurt for half the sour cream for a tangier cheesecake layer. Add a tablespoon of lemon zest to the cream cheese mixture for extra brightness. For a no-sugar-added version, use sugar-free cake mix and reduce the sugar in the filling to 1/4 cup.
Make-Ahead, Storage, And Serving Tips
Prepare the cream cheese layer and blueberries in the baking dish up to 24 hours ahead, then add the cake topping and bake when ready. Store leftovers covered in the refrigerator for up to 3 days. Reheat gently in a 300°F oven for about 10 minutes to restore the cake’s texture. Serve warm or at room temperature with whipped cream, vanilla ice cream, or a dollop of sour cream. If using frozen blueberries, add an extra 5 minutes to the baking time and do not thaw them first.
Final Thoughts
Dump cakes are the ultimate solution for anyone who wants to enjoy a homemade dessert without spending hours in the kitchen. Whether you’re craving something fruity, chocolatey, or nutty, there’s a dump cake here that’s ready to become your new go-to recipe. The beauty of these desserts is that they deliver impressive results with minimal effort, making them perfect for weeknight dinners, potlucks, or whenever you need a sweet treat fast.
If you’re new to dump cakes, we’d encourage you to start with the Peach Cobbler Dump Cake—it’s forgiving, absolutely delicious, and will give you confidence to explore the other recipes. Once you’ve mastered one, you’ll find yourself reaching for dump cake recipes again and again. Your family and friends will be amazed that something this good came together so easily.
Delicious Dump Cakes to Go!
Ingredients
Method
- Pecan Dump Cake: Mix pecans, brown sugar, and flour together. Spread fruit filling in baking dish and top with pecan mixture and melted butter.
- Pecan Dump Cake: Bake at 350°F for 45 minutes until golden brown.
- Cherry Pineapple Dump Cake: Layer cherry pie filling and pineapple chunks in baking dish. Combine flour, sugar, and melted butter, then spread over fruit.
- Cherry Pineapple Dump Cake: Bake at 350°F for 40-45 minutes until top is golden.
- Chocolate Dump Cake: Mix flour, cocoa powder, and sugar. Place in baking dish, pour melted butter over top, then pour water over entire mixture without stirring.
- Chocolate Dump Cake: Bake at 350°F for 45 minutes as the sauce forms during baking.
- Peach Dump Cake: Pour peach slices with juice into baking dish. Combine flour, oats, and brown sugar, then sprinkle over peaches and drizzle with melted butter.
- Peach Dump Cake: Bake at 350°F for 45 minutes until bubbly and golden.
- Blueberry Cheesecake Dump Cake: Spread blueberries in baking dish. Crumble softened cream cheese over berries. Mix flour and sugar, then sprinkle on top and drizzle with melted butter.
- Blueberry Cheesecake Dump Cake: Bake at 350°F for 45-50 minutes until set and lightly browned.
Notes
Cherry Pineapple Dump Cake Tips: Best served fresh from the oven. Pairs well with vanilla ice cream. Leftovers keep refrigerated for 2 days.
Chocolate Dump Cake Tips: Creates its own sauce as it bakes. Serve warm with ice cream. Do not stir before baking for best results.
Peach Dump Cake Tips: Use fresh or canned peaches interchangeably. Serve warm. Store covered at room temperature for 1 day or refrigerate up to 3 days.
Blueberry Cheesecake Dump Cake Tips: Softening cream cheese makes it easier to distribute. Serve at room temperature or chilled. Refrigerate leftovers for up to 3 days.