Handheld Treats Easy for Parties and BBQs
Handheld Treats Easy for Parties and BBQs
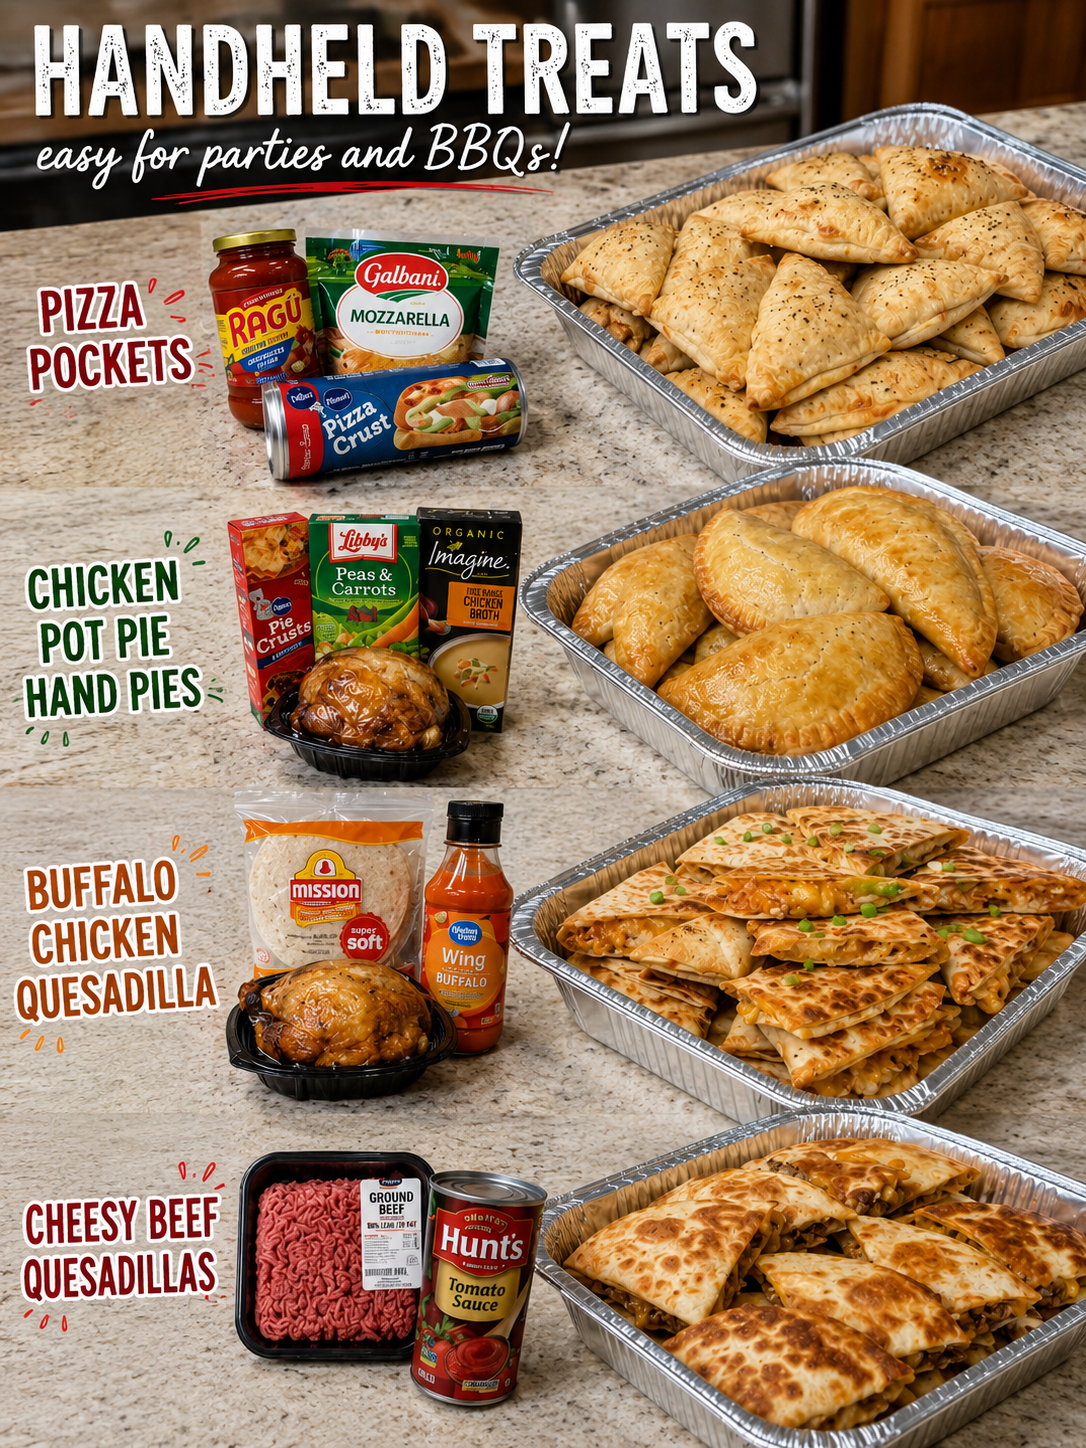
I’m so excited to share my favorite handheld treats that are easy for parties and BBQs because, let’s be honest, nobody wants to be stuck in the kitchen when there are guests to enjoy. These recipes are all about keeping things simple while still impressing everyone at your gathering. Whether you’re hosting a backyard bash or bringing something to a potluck, having portable, delicious food on hand makes entertaining so much less stressful.
What I love most about these four recipes is that they’re all make-ahead friendly and actually taste even better when you prepare them in advance. You’ll find pizza pockets that rival any takeout version, chicken pot pie hand pies that feel fancy but come together quickly, buffalo chicken quesadillas with that perfect spicy kick, and cheesy beef quesadillas that are basically crowd-pleasers on a plate. Each one is designed to be grabbed and enjoyed without a fork, which means your guests can mingle, eat, and have their hands free for socializing.
I’ve tested these recipes dozens of times at my own events, and they’re the ones people ask me for again and again. If you’re looking to build your entertaining repertoire, these are absolutely worth saving and making part of your regular rotation. Follow me on HaileeRecipes on Pinterest for more party-ready ideas that’ll make you look like the hostess with the mostest.
1. Pizza Pockets
Pizza pockets are the ultimate handheld treat that combines all the delicious flavors of pizza in a portable, mess-free package. These golden, crispy pastries are filled with melted mozzarella, pepperoni, and Italian seasonings, making them perfect for parties and backyard barbecues where guests want to eat while mingling. The combination of flaky pastry exterior and warm, savory filling creates an irresistible texture contrast. They’re crowd-pleasers that appeal to both kids and adults, can be made ahead and reheated, and disappear quickly from any spread.
Why You’ll Love It
- Requires just a few simple ingredients and minimal prep time, making them ideal for busy hosts.
- Can be made several hours ahead and reheated before serving, reducing day-of stress.
- Naturally portable and hand-held, allowing guests to enjoy them without plates or utensils.
Ingredients
- 1 package refrigerated crescent roll dough (8 ounces)
- 1 cup shredded mozzarella cheese
- 1/2 cup pepperoni slices, finely chopped
- 1/4 cup pizza sauce or marinara sauce
- 1/2 teaspoon Italian seasoning
- 1/4 teaspoon garlic powder
- 1 egg, beaten (for egg wash)
- Cooking spray or olive oil for baking sheet
How To Make It
- Preheat your oven to 375 degrees Fahrenheit and lightly spray a baking sheet with cooking spray.
- Unroll the crescent roll dough and separate it along the perforations to create 8 triangles.
- In a small bowl, combine the chopped pepperoni, mozzarella cheese, pizza sauce, Italian seasoning, and garlic powder.
- Place approximately 2 tablespoons of the filling mixture onto the center of each dough triangle.
- Fold each triangle in half to create a smaller triangle pocket, then press the edges firmly with a fork to seal.
- Brush each pocket with beaten egg for a golden finish.
- Bake for 12 to 15 minutes until the pockets are golden brown and the cheese is melted inside.
- Allow to cool for 2 to 3 minutes before serving so guests don’t burn their mouths on hot filling.
Variations And Substitutions
Customize these pockets by swapping pepperoni for cooked Italian sausage, diced ham, or vegetables like bell peppers and mushrooms. Use different cheeses such as provolone or a mozzarella and cheddar blend for flavor variation. For a white pizza version, replace the red sauce with a ricotta and cream cheese mixture. Puff pastry sheets can substitute for crescent rolls if you prefer a flakier texture.
Make-Ahead, Storage, And Serving Tips
Assemble the pockets up to 8 hours ahead, cover them with plastic wrap, and refrigerate until ready to bake. You can also freeze unbaked pockets for up to 2 months; bake directly from frozen, adding 3 to 5 extra minutes to the baking time. Store leftover cooked pockets in an airtight container in the refrigerator for up to 3 days. Reheat in a 350-degree oven for 5 minutes to restore crispness. Serve warm with extra marinara sauce for dipping.
2. Chicken Pot Pie Hand Pies
These golden, flaky hand pies deliver all the comfort of classic chicken pot pie in portable, bite-sized form. Filled with tender chicken, creamy sauce, and vegetables, each pie offers a satisfying combination of savory flavors and buttery pastry. The crispy exterior gives way to a warm, creamy filling that’s perfect for eating while mingling at outdoor gatherings. These work wonderfully for parties and BBQs because guests can grab one without needing a plate or fork, making them ideal finger food that still feels substantial and homemade.
Why You’ll Love It
- Completely handheld and mess-free, allowing guests to eat while standing and socializing.
- Can be prepared hours ahead and baked fresh just before serving for maximum flavor and crispness.
- Familiar comfort food flavors in an elegant, individual-sized package that impresses without requiring fancy plating.
Ingredients
- 2 cups cooked shredded chicken
- 3 tablespoons butter
- 1 small onion, finely diced
- 1 cup mixed vegetables (peas, carrots, celery)
- 2 tablespoons all-purpose flour
- 1 cup chicken broth
- 1/2 cup heavy cream
- 1 pound puff pastry, thawed
- 1 egg, beaten
- Salt and pepper to taste
How To Make It
- Melt butter in a large skillet over medium heat. Add diced onion and cook until softened, about 3 minutes.
- Stir in the mixed vegetables and cook for 2 minutes, then sprinkle flour over the mixture and stir constantly for 1 minute to create a roux.
- Pour in chicken broth and heavy cream, stirring constantly until the sauce thickens, about 5 minutes. Add shredded chicken and season with salt and pepper. Remove from heat and let cool completely.
- Preheat oven to 400°F. Roll out puff pastry and cut into 4-inch squares or circles using a knife or cookie cutter.
- Place 2 tablespoons of filling on one half of each pastry piece, leaving a half-inch border. Brush edges with beaten egg, fold in half, and press edges firmly to seal.
- Arrange hand pies on a parchment-lined baking sheet, brush tops with beaten egg, and bake for 18-22 minutes until golden brown.
- Let cool for 2-3 minutes before serving to prevent burning your mouth on the hot filling.
Variations And Substitutions
Replace chicken with cooked turkey or add crispy bacon for extra flavor. Substitute mixed vegetables with broccoli and cheddar for a different profile, or use frozen peas and corn for convenience. For a lighter version, use half-and-half instead of heavy cream. You can also add fresh thyme or poultry seasoning to the filling for additional depth.
Make-Ahead, Storage, And Serving Tips
Assemble the hand pies up to 8 hours ahead, cover with plastic wrap, and refrigerate until ready to bake. They can also be frozen unbaked for up to 3 months; add 5-7 extra minutes to the baking time if baking from frozen. Store leftover baked hand pies in an airtight container in the refrigerator for up to 3 days and reheat in a 350°F oven for 10 minutes. For the best texture, serve warm rather than at room temperature.
3. Buffalo Chicken Quesadilla
Buffalo chicken quesadillas deliver spicy, tangy, and satisfying flavors in a handheld package that’s perfect for parties and BBQs. Tender shredded chicken coated in zesty buffalo sauce combines with melted cheese and crispy tortillas for a crowd-pleasing treat that’s ready in minutes. The creamy interior contrasts beautifully with the golden-brown exterior, while the bold buffalo seasoning keeps guests coming back for more. These are ideal for feeding a group since they can be assembled ahead and cooked to order, making them an effortless addition to any casual gathering.
Why You’ll Love It
- Ready in under 20 minutes with minimal prep work required
- Can be made vegetarian or customized with various proteins and toppings
- Naturally portable and easy to eat while standing or mingling
Ingredients
- 2 cups cooked shredded chicken
- 3/4 cup buffalo sauce
- 8 flour tortillas (8-inch)
- 2 cups shredded cheddar cheese
- 1/2 cup diced red onion
- 1/2 cup diced celery
- 2 tablespoons butter, softened
- 1/4 cup ranch dressing for serving
How To Make It
- Toss the shredded chicken with buffalo sauce in a bowl until evenly coated and set aside.
- Lay one tortilla flat on a clean surface and spread a thin layer of butter on one side.
- Place the buttered side down in a skillet over medium-high heat and warm for 30 seconds.
- Sprinkle half the tortilla with cheese, then top with buffalo chicken, diced red onion, and celery, leaving a half-inch border.
- Add another small handful of cheese on top of the filling, then fold the tortilla in half.
- Cook for 2-3 minutes until the bottom is golden brown and crispy, then carefully flip and cook the other side for another 2 minutes until cheese is melted.
- Transfer to a cutting board and let cool for one minute before slicing in half.
- Serve immediately with ranch dressing for dipping.
Variations And Substitutions
Swap the cheddar for pepper jack or blue cheese for different flavor profiles. Add crispy bacon bits, jalapeños, or caramelized onions for extra depth. For a lighter option, use whole wheat tortillas or reduce the cheese amount. You can also substitute the chicken with shredded turkey, pulled pork, or seasoned black beans for vegetarian guests. Drizzle with blue cheese crumbles mixed with ranch instead of serving sauce on the side.
Make-Ahead, Storage, And Serving Tips
Assemble the quesadillas completely up to 2 hours ahead and refrigerate on a baking sheet covered with plastic wrap, then cook just before serving. Cooked quesadillas can be wrapped in foil and kept warm in a 200-degree oven for up to 30 minutes. For larger gatherings, prepare all components separately and set up an assembly station so guests can customize their own. Cut quesadillas into quarters for bite-sized appetizer portions, or serve as halves for heartier servings.
4. Cheesy Beef Quesadillas
Cheesy beef quesadillas are the ultimate crowd-pleaser that delivers melted cheese, seasoned ground beef, and crispy tortillas in every bite. These handheld treats combine savory flavors with a satisfying crunch and gooey interior, making them perfect for casual outdoor gatherings. Whether served as appetizers or light mains, they’re quick to assemble and cook, allowing you to spend more time with guests. The beauty of quesadillas is their versatility and speed—they come together in minutes and appeal to both kids and adults alike.
Why You’ll Love It
- Ready in under 20 minutes from start to finish, perfect for busy party hosts.
- Can be prepared ahead and reheated, making them ideal for stress-free entertaining.
- Customizable with various toppings and fillings to suit different preferences.
Ingredients
- 1 pound ground beef
- 8 flour tortillas (8-inch)
- 2 cups shredded cheddar cheese
- 1 packet taco seasoning or 2 tablespoons homemade seasoning mix
- 1 small onion, diced
- 1 bell pepper, diced
- 1/2 cup salsa
- 2 tablespoons butter or oil
- Salt and pepper to taste
How To Make It
- Heat a large skillet over medium-high heat and brown the ground beef, breaking it apart as it cooks, about 5-7 minutes. Drain excess fat if needed.
- Add diced onion and bell pepper to the beef and cook for 2-3 minutes until softened. Stir in taco seasoning and salsa, then simmer for 2 minutes. Season with salt and pepper to taste.
- Lay one tortilla flat on a cutting board and sprinkle half with shredded cheddar cheese, leaving a border around the edges.
- Spoon the beef mixture over the cheese on one half of the tortilla, then top with additional cheese.
- Fold the tortilla in half to create a half-moon shape, pressing gently to seal.
- Heat butter or oil in a skillet over medium heat. Once hot, place the folded quesadilla in the pan and cook for 2-3 minutes until golden and crispy.
- Carefully flip the quesadilla and cook the other side for another 2-3 minutes until equally crispy and cheese is fully melted.
- Transfer to a cutting board, let cool for 1 minute, then cut into triangles and serve immediately with sour cream, guacamole, or additional salsa.
Variations And Substitutions
Swap ground beef for shredded chicken, turkey, or keep it vegetarian with black beans and corn. Add jalapeños, caramelized onions, or fresh cilantro for extra flavor. Use pepper jack cheese for heat, or mix cheddar with Monterey Jack. Include diced tomatoes, green chiles, or pico de gallo for freshness. For a healthier option, use whole wheat tortillas or corn tortillas.
Make-Ahead, Storage, And Serving Tips
Prepare the beef filling up to 2 days ahead and store in an airtight container in the refrigerator. Assemble quesadillas without cooking and refrigerate up to 4 hours, or freeze for up to 1 month on a baking sheet before transferring to freezer bags. Cook from frozen by adding an extra 1-2 minutes per side. Reheat leftover cooked quesadillas in a skillet over medium heat or in a 350°F oven for 5-7 minutes. Serve with classic toppings like sour cream, guacamole, salsa, or pico de gallo on the side.
Final Thoughts
Handheld treats are the perfect solution for any gathering, offering your guests delicious bites without the mess or fuss of plated desserts. Whether you’re hosting a casual backyard BBQ or a more formal garden party, these recipes give you the flexibility to prepare ahead and focus on enjoying time with loved ones. Each option brings its own charm to the table, so you’re sure to find something that fits your style and skill level.
If you’re new to making handheld treats, start with whichever recipe speaks to you most—there’s no wrong choice here. Pick one that uses ingredients you already love or a technique you’ve been wanting to master, and let that be your gateway into stress-free entertaining. Your guests will be impressed, and you’ll discover just how simple it can be to serve something truly special.
Handheld Treats Easy for Parties and BBQs
Ingredients
Method
- Pizza Pockets: Mix flour and butter to form dough, roll out, and cut into circles. Fill each with pizza sauce, mozzarella, and pepperoni.
- Pizza Pockets: Seal edges, brush with egg wash, and bake at 375°F for 20-25 minutes until golden brown.
- Chicken Pot Pie Hand Pies: Prepare pastry dough and fill with cooked chicken, mixed vegetables, and chicken broth mixture in small pie shells.
- Chicken Pot Pie Hand Pies: Bake at 400°F for 25-30 minutes until crust is golden and filling is heated through.
- Buffalo Chicken Quesadilla: Toss shredded chicken with buffalo sauce. Place on flour tortilla with cheddar cheese.
- Buffalo Chicken Quesadilla: Cook in skillet with butter over medium heat for 3-4 minutes per side until cheese melts and tortilla is crispy.
- Cheesy Beef Quesadillas: Brown ground beef with diced onion in skillet, drain excess fat. Place beef mixture and cheddar cheese on flour tortilla.
- Cheesy Beef Quesadillas: Cook in skillet with butter over medium heat for 3-4 minutes per side until cheese melts and tortilla is crispy.
Notes
Chicken Pot Pie Hand Pies Tips: Make filling the day before and assemble pies on party day. Reheat gently before serving.
Buffalo Chicken Quesadilla Tips: Prepare chicken mixture ahead and store in refrigerator. Cook quesadillas fresh to order for best texture.
Cheesy Beef Quesadillas Tips: Brown beef and onions in advance. Assemble and cook quesadillas just before serving for warm, melty results.