No-Bake Icebox Cake Desserts: Chill & Indulge
No-Bake Icebox Cake Desserts: Chill & Indulge
I’m obsessed with no-bake icebox cake desserts because they’re the ultimate shortcut to looking like a dessert genius without spending hours in the kitchen. Whether you’re planning a summer dinner party or just craving something cold and delicious, these recipes deliver that fancy bakery taste with minimal effort. The best part? Most of them come together in under 20 minutes of actual hands-on time.
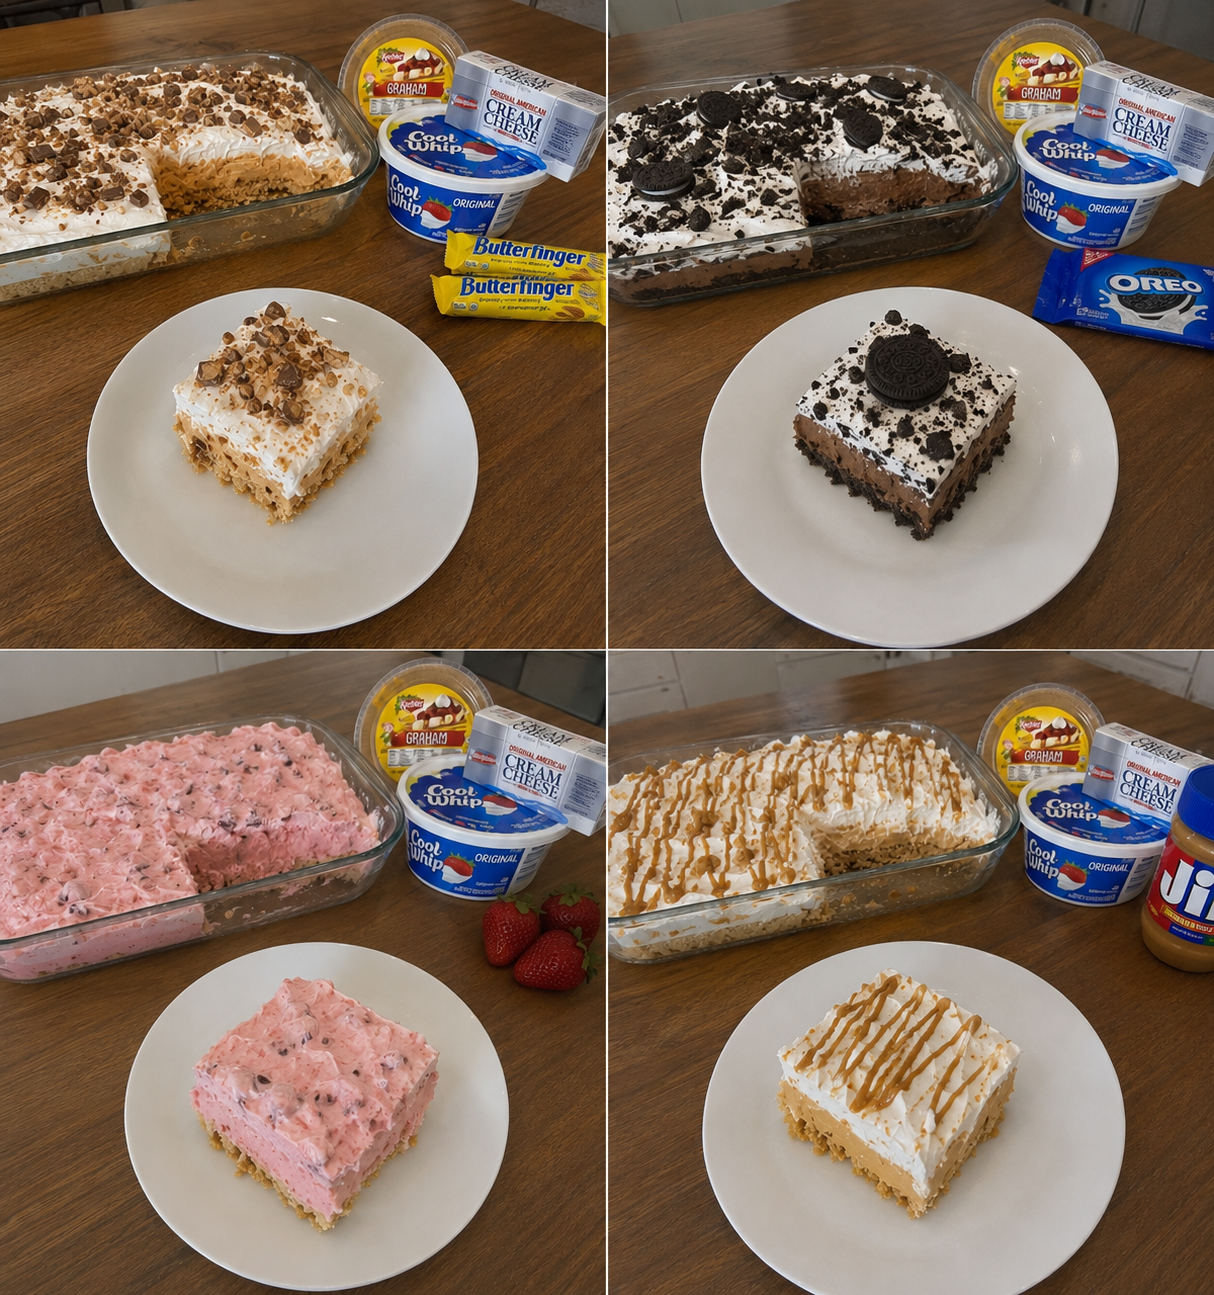
In this roundup, I’m sharing four of my favorite icebox cake recipes that have become absolute staples in my kitchen: Butterfinger, Oreo, Strawberry, and Peanut Butter versions. Each one is different enough to keep things interesting, but they all follow the same simple formula that makes them so reliable. These are the desserts I save for those moments when I need something impressive but don’t want to turn on my oven.
Bookmark this collection because these recipes are lifesavers year-round. They’re perfect for meal prep since they actually taste better after sitting in the fridge overnight, and they’re crowd-pleasers that work for everything from casual weeknight dinners to fancy gatherings. If you love easy desserts as much as I do, Follow me on HaileeRecipes on Pinterest where I’m always sharing more no-fuss recipes that taste like you spent way more time than you actually did.
1. Butterfinger Icebox Cake
This Butterfinger Icebox Cake combines layers of crispy wafer cookies, whipped cream, and crushed Butterfinger candy bars for a dessert that’s both elegant and indulgent. The result is a cake with a delicate, mousse-like texture that softens slightly as it chills, allowing the flavors to meld beautifully. The toffee and chocolate notes from the candy bars shine through every bite, while the wafers provide subtle crunch. This no-bake dessert is perfect for summer gatherings, holiday potlucks, or whenever you want an impressive treat without turning on the oven. It’s ideal for make-ahead entertaining since it actually improves after a night in the refrigerator.
Why You’ll Love It
- Requires no baking, mixing, or special skills—just layer and chill.
- Tastes like a fancy bakery dessert but comes together in under 20 minutes of hands-on time.
- Naturally gluten-free when made with appropriate wafer cookies, and easily customizable for dietary needs.
Ingredients
- 2 cups heavy whipping cream
- 1/4 cup granulated sugar
- 1 teaspoon vanilla extract
- 1 box (about 40) vanilla wafer cookies
- 4 Butterfinger candy bars, crushed into bite-sized pieces
- 2 tablespoons butter, melted
- 1/4 cup toffee bits or additional crushed Butterfinger for topping
How To Make It
- Pour heavy cream, sugar, and vanilla extract into a large mixing bowl. Whip with an electric mixer on medium-high speed until stiff peaks form, about 2 to 3 minutes.
- In a shallow dish, combine crushed Butterfinger pieces with melted butter, stirring gently to coat.
- Spread a thin layer of whipped cream on the bottom of a 9-by-5-inch loaf pan or similar dish.
- Arrange a single layer of vanilla wafer cookies over the cream, breaking them to fit as needed.
- Spread another layer of whipped cream over the cookies, then sprinkle with some of the buttered Butterfinger mixture.
- Repeat layering—cookies, whipped cream, and Butterfinger pieces—until you reach the top of the pan, ending with a whipped cream layer.
- Top with remaining toffee bits or crushed Butterfinger for garnish.
- Cover with plastic wrap and refrigerate for at least 8 hours, preferably overnight, before serving.
Variations And Substitutions
Swap vanilla wafers for chocolate wafers for deeper flavor, or use thin ladyfinger cookies for a more delicate texture. Replace Butterfinger with crushed Heath bars, Skor bars, or even crumbled brownies for different flavor profiles. For a lighter version, use whipped coconut cream instead of heavy cream, or substitute half the cream with Greek yogurt for tanginess. You can also layer in dulce de leche or caramel sauce between the cream layers for extra sweetness and richness.
Make-Ahead, Storage, And Serving Tips
This dessert is best made one to two days ahead, as the wafers soften slightly and flavors deepen. Store covered in the refrigerator for up to three days. Do not freeze, as the texture becomes icy. To serve, let the pan sit at room temperature for five minutes to make slicing easier, then use a warm knife wiped clean between cuts for neat portions. If the cake becomes too soft, return it to the refrigerator for 15 minutes before serving. For individual servings, layer ingredients in small glasses or mason jars instead of a loaf pan.
2. Oreo Icebox Cake
This elegant Oreo Icebox Cake delivers the ultimate cookies-and-cream experience with minimal effort. Layers of whipped cream and crushed Oreos are sandwiched between crispy wafer cookies, creating a dessert with contrasting textures that soften into a dreamy, mousse-like consistency as it chills. The result is a sophisticated yet nostalgic treat that tastes far more impressive than its simple assembly requires. Perfect for dinner parties, potlucks, or whenever you need an impressive dessert that requires no baking, this cake impresses guests while letting you skip the oven entirely.
Why You’ll Love It
- Requires no baking, mixing, or special skills—just layering and chilling.
- The flavors deepen and textures improve as it sits, making it ideal for advance preparation.
- Naturally elegant presentation that looks like you spent hours in the kitchen.
Ingredients
- 30 Oreo cookies, crushed into varying sizes
- 2 cups heavy whipping cream
- 3 tablespoons powdered sugar
- 1 teaspoon vanilla extract
- 24 vanilla wafer cookies
- 3 tablespoons whole milk
- 2 tablespoons cocoa powder for garnish
How To Make It
- Whip the heavy cream, powdered sugar, and vanilla extract together until stiff peaks form, being careful not to overbeat.
- Crush the Oreos into a mixture of fine crumbs and larger chunks, reserving about one-quarter cup of the finest crumbs for garnish.
- Brush each vanilla wafer lightly with milk on both sides to soften them slightly.
- Spread a thin layer of whipped cream on the bottom of a 9-by-5-inch loaf pan or similar dish.
- Layer wafers, whipped cream, and crushed Oreos in repeating order, starting and ending with wafers, until the pan is full.
- Cover the top with remaining whipped cream and sprinkle reserved Oreo crumbs and cocoa powder over the surface.
- Refrigerate for at least 8 hours, preferably overnight, so the wafers absorb moisture and flavors meld.
- Slice with a warm, wet knife for clean portions and serve chilled.
Variations And Substitutions
Swap vanilla wafers for chocolate wafers for a deeper cocoa flavor, or use crushed gingersnaps for a spiced twist. Replace some Oreos with crushed chocolate sandwich cookies for variety. For a lighter version, use whipped coconut cream or mascarpone mixed with whipped cream. Add a tablespoon of coffee liqueur or espresso powder to the whipped cream for a mocha-inspired version. Line the pan with plastic wrap for easy removal and cleaner slicing.
Make-Ahead, Storage, And Serving Tips
This cake actually improves when made 1-2 days ahead, allowing wafers to fully soften and flavors to develop. Store covered in the refrigerator for up to 4 days. For best results, slice while still cold and serve directly from the refrigerator. If the cake becomes too soft, freeze it for 30 minutes before slicing. You can also freeze the assembled cake for up to 2 weeks; thaw in the refrigerator for 4-6 hours before serving. The cake won’t slice cleanly if too warm, so keep it chilled until the moment you serve.
3. Strawberry Icebox Cake
This elegant strawberry icebox cake combines fresh berries with creamy layers for a sophisticated no-bake dessert that tastes like summer. Layers of whipped cream, crushed graham crackers, and macerated strawberries create a light yet indulgent texture that’s perfect for warm weather entertaining. The cake requires minimal effort but delivers restaurant-quality results, making it ideal for dinner parties, potlucks, or whenever you want an impressive dessert without turning on the oven. The flavors deepen as it chills, and the graham crackers soften into a cake-like consistency.
Why You’ll Love It
- No baking required, making it perfect for hot days when you want to keep the kitchen cool.
- Can be assembled in under 20 minutes with ingredients you likely have on hand.
- Naturally gluten-free option if you use gluten-free graham crackers.
Ingredients
- 2 pounds fresh strawberries, hulled and sliced
- 1/4 cup granulated sugar
- 2 cups heavy whipping cream
- 3 tablespoons powdered sugar
- 1 teaspoon vanilla extract
- 2 cups graham cracker crumbs
- 4 tablespoons melted butter
- Fresh mint leaves for garnish (optional)
How To Make It
- Toss sliced strawberries with granulated sugar in a bowl and let sit for 30 minutes to release their juices.
- Combine graham cracker crumbs with melted butter in a separate bowl, stirring until the mixture resembles wet sand.
- In a large bowl, whip heavy cream with powdered sugar and vanilla extract until stiff peaks form.
- In a 9-by-13-inch dish, spread a thin layer of whipped cream, then add a layer of graham cracker mixture.
- Add half of the macerated strawberries with their juice, spreading evenly.
- Repeat layers: whipped cream, graham crackers, remaining strawberries, then finish with a final layer of whipped cream.
- Sprinkle remaining graham cracker crumbs on top and garnish with fresh mint if desired.
- Refrigerate for at least 4 hours or overnight before serving.
Variations And Substitutions
Swap strawberries for raspberries, blackberries, or a mixed berry combination for different flavor profiles. Use honey or maple syrup instead of granulated sugar for a subtle depth. Replace graham crackers with crushed vanilla wafers, digestive biscuits, or even pound cake crumbles for texture variety. Add a tablespoon of strawberry liqueur or balsamic vinegar to the berries for sophisticated complexity. For a no-dairy version, substitute coconut cream whipped with coconut milk for the heavy cream.
Make-Ahead, Storage, And Serving Tips
Assemble this dessert up to 24 hours in advance, making it ideal for entertaining. Store covered in the refrigerator for up to 3 days. If the cake becomes too soft, freeze it for 2 hours before serving for a firmer texture. For best results, serve chilled but not frozen, and cut with a hot knife dipped in water between each slice to prevent the layers from sliding. If you prefer crunchier graham crackers, add them just 2 hours before serving rather than overnight.
4. Peanut Butter Icebox Cake
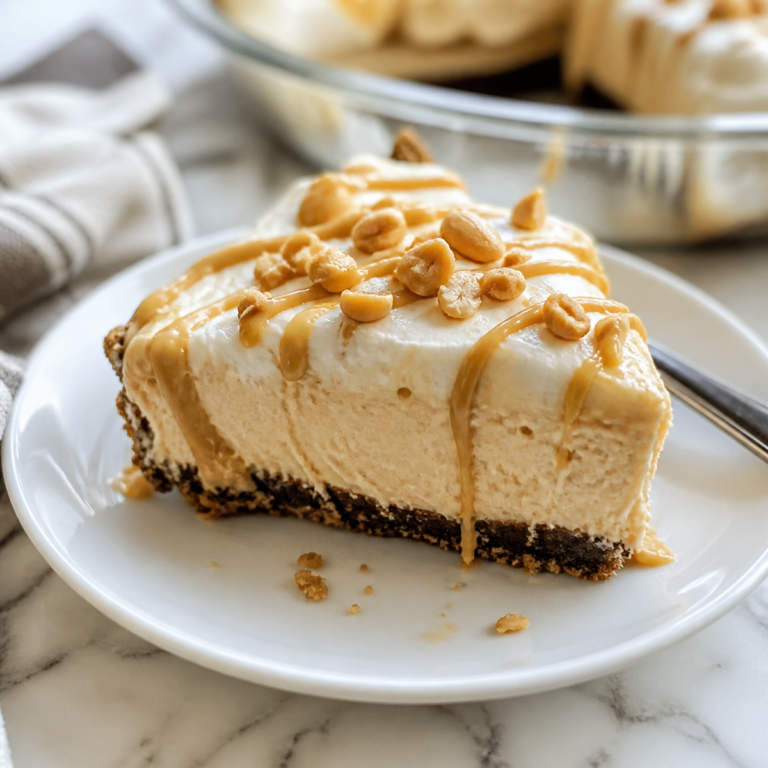
This creamy peanut butter icebox cake combines layers of crispy graham crackers with a rich, no-bake peanut butter filling and whipped cream, creating a dessert that’s both indulgent and surprisingly light. The smooth peanut butter layer contrasts beautifully with the crunchy crackers that soften slightly as the cake chills, creating an irresistible texture. Perfect for summer gatherings or when you want an elegant dessert without turning on the oven, this cake delivers classic peanut butter flavor with minimal effort and impressive results.
Why You’ll Love It
- No baking required, making it perfect for hot weather entertaining
- Rich peanut butter flavor that satisfies chocolate and peanut butter lovers alike
- Can be assembled in under 20 minutes with most ingredients from your pantry
Ingredients
- 1 cup creamy peanut butter
- 8 ounces cream cheese, softened
- 1 cup powdered sugar
- 2 cups heavy whipping cream
- 2 tablespoons vanilla extract
- 1 box honey graham crackers
- 3 tablespoons butter, melted
- Pinch of salt
How To Make It
- Beat together softened cream cheese and peanut butter until smooth and well combined, about 2 minutes
- Add powdered sugar and vanilla extract, mixing until fully incorporated and no lumps remain
- In a separate bowl, whip heavy cream to stiff peaks using an electric mixer
- Gently fold the whipped cream into the peanut butter mixture in two additions until no white streaks remain
- Brush one side of graham crackers lightly with melted butter and arrange a single layer in the bottom of a 9×13-inch dish
- Spread half of the peanut butter filling evenly over the cracker layer
- Add another layer of graham crackers, then top with remaining peanut butter filling
- Finish with a final layer of graham crackers, cover with plastic wrap, and refrigerate for at least 6 hours or overnight
Variations And Substitutions
For a chocolate twist, drizzle melted chocolate over the crackers before adding the filling, or layer in chocolate whipped cream alongside the peanut butter mixture. Swap regular graham crackers for chocolate ones for added depth. Use natural peanut butter for a less sweet option, or substitute almond butter for a different nutty flavor. Add a teaspoon of cinnamon or espresso powder to the filling for subtle complexity.
Make-Ahead, Storage, And Serving Tips
This cake actually improves after a day as flavors meld and crackers soften to the perfect texture, so prepare it up to 2 days ahead. Store covered in the refrigerator for up to 3 days. Cut with a hot, wet knife for clean slices. If the filling seems too soft when serving, let the cake sit in the coldest part of your refrigerator for 15 minutes before cutting. Serve chilled, optionally topped with chopped peanuts or a drizzle of chocolate sauce.
Final Thoughts
No-bake icebox cakes are the perfect dessert solution when you want something impressive without spending hours in the kitchen. Whether you’re drawn to the classic elegance of a chocolate wafer cake, the fruity freshness of a berry version, or something more adventurous like a salted caramel creation, there’s a recipe here that’s calling your name. The beauty of these desserts is that they actually improve as they chill, making them ideal for entertaining or meal planning ahead.
If you’re new to icebox cakes, we recommend starting with whichever flavor combination makes your mouth water the most. Don’t overthink it—these desserts are forgiving, fun to assemble, and absolutely delicious. Pick one recipe this week, gather your ingredients, and let your refrigerator do the work while you enjoy the anticipation of something truly special.
Butterfinger Icebox Cake
Ingredients
Method
- In a large bowl, whip heavy cream with powdered sugar and vanilla extract until stiff peaks form.
- Crush 5 Butterfinger bars into small pieces and fold into the whipped cream mixture, reserving some larger chunks for topping.
- In a shallow dish, combine milk, melted butter, and salt. Quickly dip each vanilla wafer cookie into the mixture for 1-2 seconds per side.
- Arrange a layer of dipped wafers on the bottom of a 9x5 inch loaf pan or similar container.
- Spread half of the Butterfinger whipped cream mixture over the wafer layer.
- Add another layer of dipped wafers, then top with the remaining cream mixture.
- Crush the remaining Butterfinger bar and sprinkle over the top along with reserved chunks.
- Cover with plastic wrap and refrigerate for at least 8 hours or overnight.