Peanut Butter Pie
Peanut Butter Pie
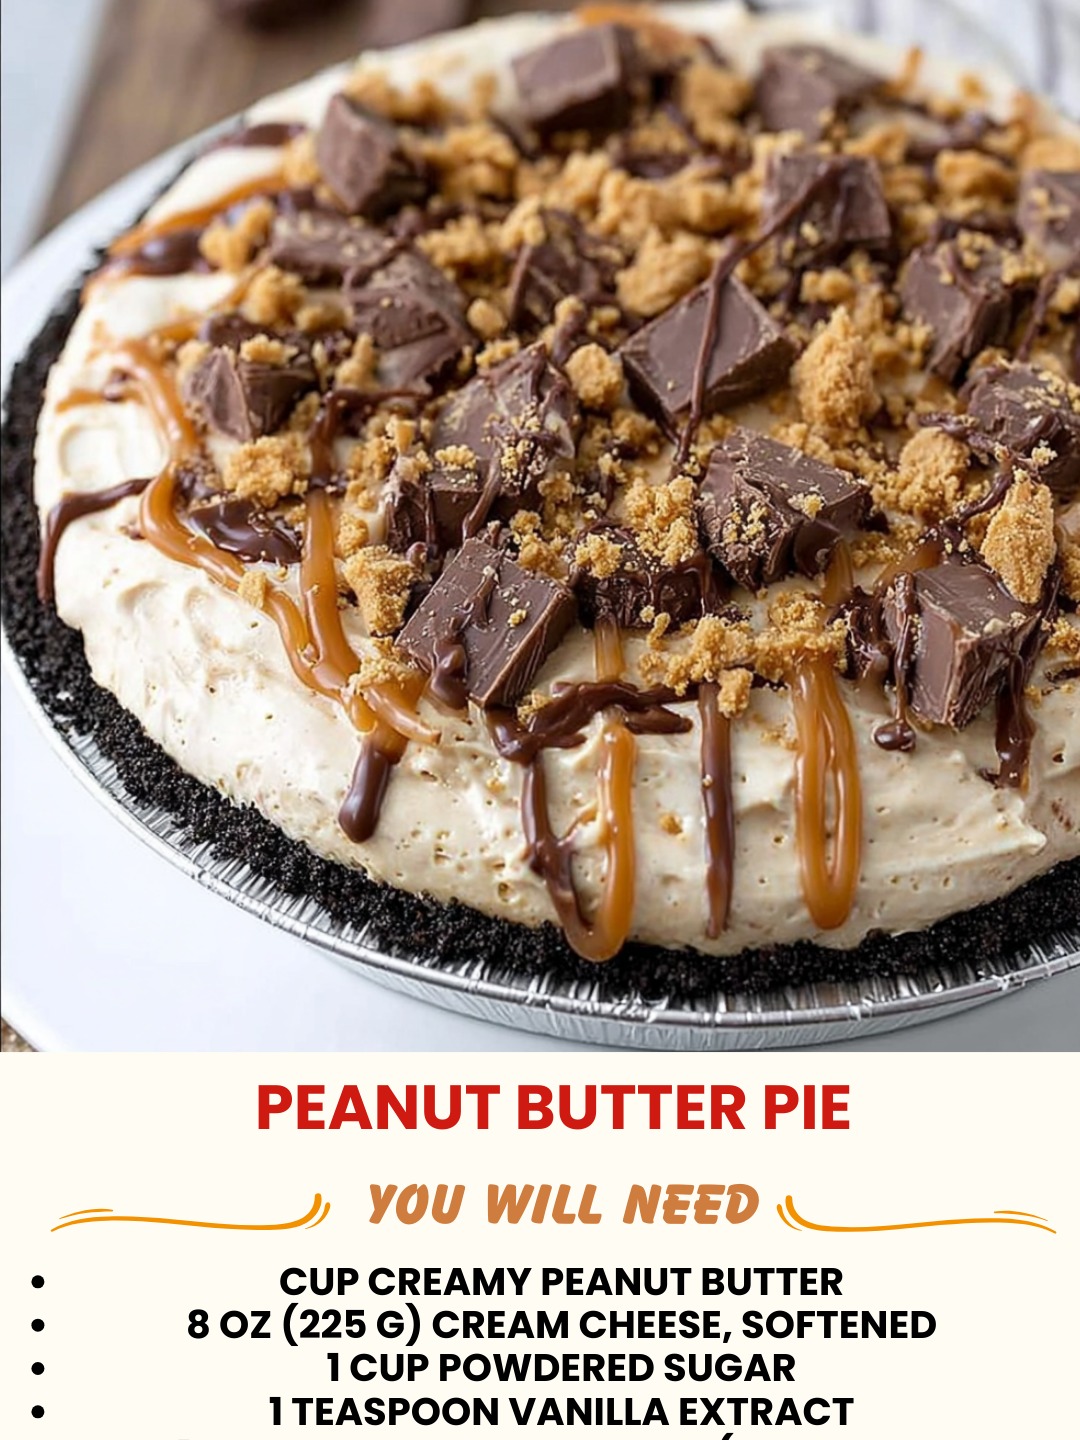
Peanut Butter Pie: The Dessert That Feels Like a Hug
I have this memory of being about eight years old, sitting at my grandmother’s kitchen table on a rainy Tuesday afternoon. She’d just pulled a Peanut Butter Pie out of the fridge—this gorgeous, glossy thing with a chocolate crust and this ridiculously creamy filling that looked like it was made from clouds. One bite and I was completely done for. I remember thinking, “This is what heaven tastes like.” I’m not exaggerating.
Fast forward twenty-something years, and I still think about that pie. The thing is, I was intimidated by it for way too long. I assumed it required some fancy culinary degree or a trip to a professional bakery. Then one day I finally just… made it. And you know what? It was easier than I expected, and honestly, mine turned out just as good as my grandmother’s—maybe even a tiny bit better, but don’t tell her I said that.
This Peanut Butter Pie has become my go-to dessert for literally everything. Dinner parties, potlucks, quiet nights when I just need something comforting, even breakups (we don’t judge here). It’s the kind of dessert that looks fancy enough to impress people but is forgiving enough that you won’t stress yourself out making it. The filling is silky, the crust is crispy, and the whole thing comes together in about twenty minutes of actual work—the rest is just chilling time, which honestly, we all need more of anyway.
If you’re a peanut butter lover like me, or if you just want a dessert that tastes homemade and feels special without the fuss, this recipe is for you. I’ve made it dozens of times now, tweaked it, messed it up, fixed it, and I’m so excited to walk you through exactly how to make it in your own kitchen. Follow me on HaileeRecipes on Pinterest for more cozy desserts like this one.
Why You’ll Love This Recipe
Let me be real with you: this isn’t a complicated recipe. It’s not even medium-complicated. It’s actually pretty straightforward, which is exactly why I love it.
The filling comes together with just a handful of ingredients you probably already have in your pantry. Creamy peanut butter, butter, cream cheese, powdered sugar, and heavy cream—that’s basically it. No weird techniques, no standing mixer running for fifteen minutes, no wondering if you did it right.
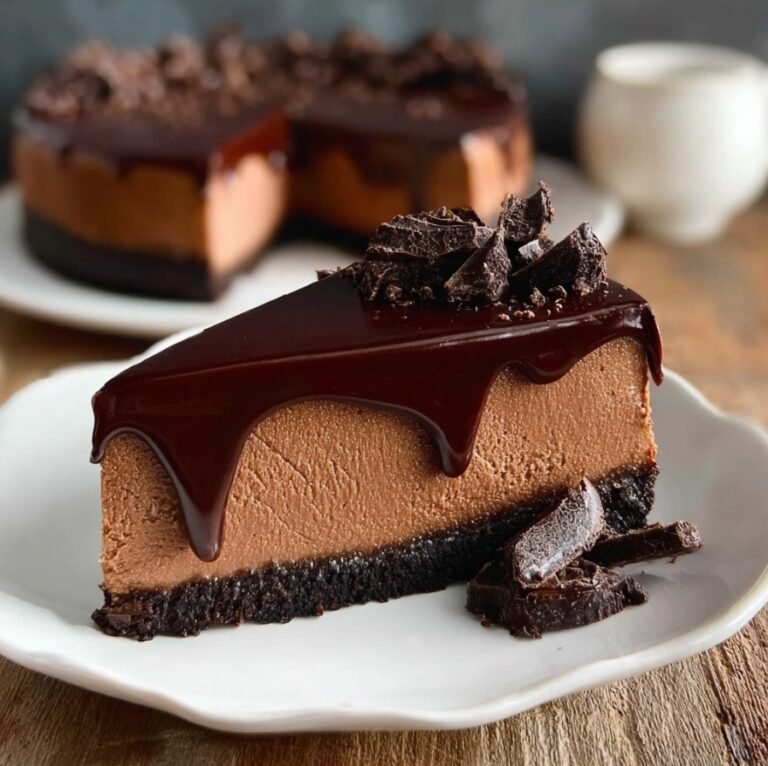
The flavor is pure comfort. It’s rich but not heavy, sweet but not cloying, and it has this incredible depth that makes people ask for the recipe immediately. The chocolate crust adds this nice contrast that keeps each bite interesting. And the texture? Silky smooth, almost mousse-like, with just enough substance to hold itself together.
Plus, it’s genuinely impressive-looking. When you bring this to a gathering, people think you spent way more time on it than you actually did. I’m not mad about that.
Ingredients
For the Chocolate Crust
- 1 1/2 cups chocolate cookie crumbs (like Oreos, filling removed)
- 4 tablespoons melted butter
- 2 tablespoons sugar
- Pinch of sea salt
For the Peanut Butter Filling
- 1 cup creamy peanut butter (natural or regular, your choice)
- 4 ounces cream cheese, softened to room temperature
- 1/2 cup unsalted butter, softened to room temperature
- 1 1/2 cups powdered sugar
- 1 teaspoon vanilla extract
- 1/4 teaspoon sea salt
- 1 cup heavy whipping cream
- 2 tablespoons granulated sugar (for whipping the cream)
For Topping (Optional but Recommended)
- Chocolate shavings or cocoa powder
- Crushed peanuts
- Extra peanut butter drizzle
Hailee’s Tip: Let your cream cheese and butter sit on the counter for at least thirty minutes before you start. Cold cream cheese will make your filling lumpy, and trust me, you don’t want that. I learned this the hard way during my first attempt.
Hailee’s Tip: Use natural peanut butter if you want a more sophisticated flavor, but regular peanut butter works beautifully too. Just make sure it’s creamy and not the chunky kind—we want smoothness here.
Optional Add-Ins and Variations
This is where you get to play around and make the pie your own. I love this part because there’s really no wrong answer.
- Espresso powder: Add 1 teaspoon to the filling for a subtle coffee note that makes the peanut butter taste even richer
- Cinnamon: A quarter teaspoon adds warmth without being obvious
- Maple syrup: Swap half the powdered sugar for maple syrup for a more complex sweetness
- Salted caramel: Drizzle it on top or swirl it into the filling before chilling
- Bourbon or rum: One tablespoon adds sophistication (adults only, obviously)
- Chocolate chunks: Fold mini chocolate chips into the filling for extra texture
Step-by-Step Method
Making the Crust
1. Crush your cookies: I put the Oreos (without the filling) into a food processor and pulse until they’re fine crumbs. If you don’t have a food processor, put them in a sealed bag and go at them with a rolling pin. It’s weirdly therapeutic.
2. Mix the crust: Combine the cookie crumbs, melted butter, sugar, and salt in a bowl. Stir until it looks like wet sand. This should take about a minute.
3. Press into the pan: Pour the mixture into a 9-inch pie dish and press it firmly into the bottom and up the sides. I use the bottom of a measuring cup to get it even. Don’t stress about perfection—it doesn’t need to be flawless.
4. Chill the crust: Pop it in the fridge while you make the filling. This helps it set and prevents it from getting too soft when you add the filling.
What I Messed Up: The first time I made this, I didn’t chill the crust and my filling melted right into it. The second time, I over-pressed the crust and it became too dense. Now I press just firmly enough that it holds together, and I always chill it first.
Making the Filling
5. Beat the base: In a large bowl, combine the softened peanut butter, cream cheese, and butter. Use an electric mixer on medium speed for about 2-3 minutes until it’s light and fluffy. This is important—you’re incorporating air, which makes the filling silky.
6. Add the dry ingredients: Gradually add the powdered sugar, vanilla, and salt while mixing on low speed. Scrape down the sides of the bowl as you go. Once it’s combined, increase the speed to medium and beat for another minute until it’s really smooth and creamy.
7. Whip the cream: In a separate bowl, whip the heavy cream with the granulated sugar until soft peaks form. This takes about 2-3 minutes with an electric mixer. You want it whipped but not stiff—it should still be a little fluffy and cloud-like.
8. Fold it together: This is the gentle part. Using a rubber spatula, fold the whipped cream into the peanut butter mixture in two additions. Fold gently—don’t stir vigorously or you’ll deflate all that lovely air you just whipped in. The filling should be light, airy, and mousse-like.
What I Messed Up: I once forgot to whip the cream separately and just threw it in the mixer with everything else. The result was dense and heavy instead of fluffy. Don’t do that. The separate whipping step matters.
Putting It All Together
9. Fill the pie: Spoon the filling into your chilled crust and smooth the top with a spatula. It should be thick and creamy.
10. Chill thoroughly: Cover with plastic wrap and refrigerate for at least 4 hours, but ideally overnight. This is when the magic happens—the flavors meld and the texture becomes perfectly set.
11. Add toppings: Just before serving, add chocolate shavings, cocoa powder, crushed peanuts, or whatever sounds good to you.
Common Mistakes to Avoid
Using cold cream cheese and butter: This is the number one culprit for a lumpy filling. Seriously, let them sit out. I set a timer on my phone now so I don’t forget.
Over-mixing the filling: Mix until it’s combined, but don’t go crazy. You’re not making whipped cream at this point—you just want everything incorporated.
Skipping the whipped cream step: I know it seems like extra work, but this is what makes the filling light and fluffy instead of dense. Don’t skip it.
Not chilling long enough: Four hours is the minimum. Overnight is better. Patience here pays off in texture.
Pressing the crust too hard: A light, even press is all you need. Over-pressing makes it dense and hard to bite through.
My Tested Substitutions
For the peanut butter: You can use almond butter, cashew butter, or sunflower seed butter in a 1:1 ratio. The flavor will be different but equally delicious. I’ve made it with almond butter for a friend with a peanut allergy and it was fantastic.
For the crust: Graham cracker crumbs work beautifully, as do digestive biscuits if you can find them. You could even use crushed vanilla wafers for something milder. The ratio stays the same: 1 1/2 cups crumbs to 4 tablespoons butter.
For the heavy cream: Coconut cream works in a pinch, though the flavor will shift slightly. Whipped coconut cream is thinner than dairy cream, so use a bit less—maybe 3/4 cup instead of 1 cup.
For the cream cheese: Mascarpone gives a slightly tangier result but works well. Use the same amount. Greek yogurt makes it lighter but less rich—I’d recommend using half cream cheese and half Greek yogurt if you go this route.
For powdered sugar: Coconut sugar or maple syrup can replace some of it, though the texture will be slightly different. I’d recommend keeping at least half the powdered sugar for the best results.
How to Customize
This recipe is honestly a blank canvas. Want to make it more decadent? Add a layer of chocolate ganache on top. Want it lighter? Use half the filling and add more whipped cream. Want it richer? Drizzle melted peanut butter on top.
You could make mini pies in a muffin tin for individual servings. You could make it in a springform pan for a fancier presentation. You could even make it as a no-bake cheesecake-style dessert by baking the crust first for extra crispness.
The beauty of this recipe is that it’s forgiving and adaptable. Make it your own.
Serving Ideas
Serve it cold straight from the fridge with a cup of coffee or cold milk. Pair it with fresh berries for color and tartness—raspberries and blackberries are especially nice. A dollop of whipped cream on the side never hurt anyone. Drizzle with hot fudge sauce for something extra indulgent. Serve alongside vanilla ice cream for a more decadent dessert. Crumble a slice over vanilla yogurt for breakfast (I don’t judge).
Meal Prep and Storage
This pie actually gets better after a day or two as the flavors develop. You can make it up to 3 days ahead, which is perfect for entertaining. Just keep it covered in the fridge.
Leftover slices keep in an airtight container in the fridge for up to 5 days. I’ve never had it last that long in my house, but theoretically it would.
You can freeze the whole pie for up to 2 months. Wrap it well in plastic wrap and foil. Thaw it in the fridge overnight before serving. The texture stays pretty much the same, which is amazing.
The crust can be made a day ahead and kept covered in the fridge. The filling can be made a few hours ahead and kept in the fridge until you’re ready to assemble and chill.
Nutritional Breakdown
Keep in mind that this is a rich dessert, and the nutritional info is per slice (assuming 8 slices per pie):
- Calories: approximately 520
- Protein: 12g
- Carbohydrates: 45g
- Fat: 32g
- Fiber: 2g
- Sugar: 38g
Peanut butter brings protein and healthy fats to the table, which is nice. The cream cheese and butter add richness. This isn’t health food, but it’s not nutritionally empty either. Enjoy it, savor it, and don’t overthink it.
Final Thoughts
Making a Peanut Butter Pie is one of those small joys in life that reminds me why I love cooking. It’s not complicated, but it feels special. It’s indulgent without being pretentious. It brings people together and makes them happy.
I hope you make this pie and that it becomes as meaningful to you as it is to me. I hope you share it with people you love, or maybe just keep it all for yourself—no judgment here. I hope it tastes like comfort and feels like home, whatever that means to you.
If you make it, I’d genuinely love to hear how it turns out. Drop me a note, tell me what you added, tell me if you messed something up and how you fixed it. That’s what cooking is really about—the trying, the learning, the sharing.
Happy baking, friend.
—
Peanut Butter Pie
Ingredients
Method
- Crush chocolate cookies (without filling) into fine crumbs using a food processor or by hand in a sealed bag.
- Mix cookie crumbs with melted butter, sugar, and sea salt until the mixture resembles wet sand.
- Press the mixture firmly into the bottom and sides of a 9-inch pie dish.
- Chill the crust in the refrigerator for at least 15 minutes while preparing the filling.
- In a large bowl, beat softened peanut butter, cream cheese, and butter together with an electric mixer on medium speed for 2-3 minutes until light and fluffy.
- Gradually add powdered sugar, vanilla extract, and sea salt while mixing on low speed. Scrape down the sides of the bowl and beat on medium for another minute until smooth and creamy.
- In a separate bowl, whip heavy cream with