Rice Krispie Treat Cheesecake
Rice Krispie Treat Cheesecake
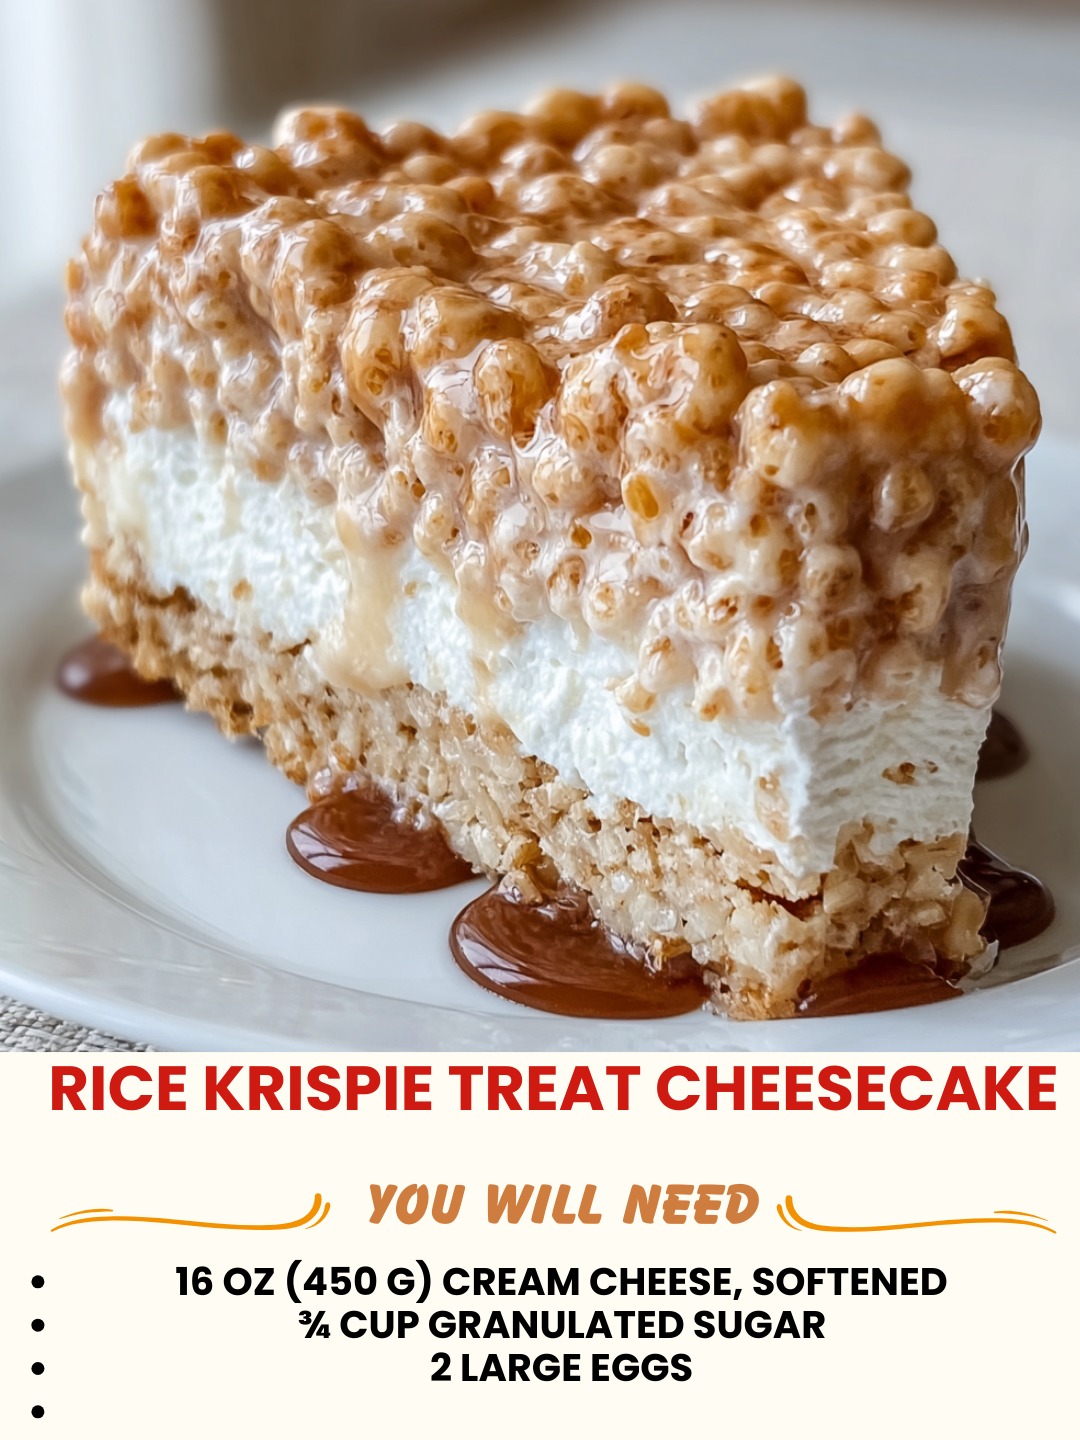
Rice Krispie Treat Cheesecake: A Match Made in Dessert Heaven
I was standing in my kitchen at 10 PM on a Tuesday, staring into my pantry like it held the secrets of the universe, when it hit me: what if I combined two of my absolute favorite things? Rice Krispie treats—that nostalgic, crispy-sweet childhood memory—and creamy, dreamy cheesecake. I know, I know. It sounds a little wild. But hear me out.
I’ve been making desserts for years, and I’ve learned that the best recipes come from those “what if” moments when you’re not overthinking it. This Rice Krispie Treat Cheesecake is exactly that: a no-fuss, showstopping dessert that tastes like someone spent way more time on it than they actually did. The crunchy, buttery Rice Krispie base gives way to the smoothest, tangiest cheesecake filling, and honestly? It’s become my go-to when I want to impress people without stressing myself out.
This recipe is for anyone who loves a good textural contrast, who gets excited about easy desserts, or who just wants to make something a little different from the standard cheesecake. It’s not pretentious. It’s not complicated. It’s just really, really good. And if you’re the kind of person who appreciates a dessert that looks fancy but doesn’t require a culinary degree, you’re going to love it.
If you want to save this for later, follow me on HaileeRecipes on Pinterest where I share all my tested recipes and kitchen adventures.
Why You’ll Love This Recipe
Let me be honest: cheesecake can be intimidating. Water baths, cracks, the fear that it won’t set properly—it’s a lot. But this version? It’s forgiving, and it actually works every single time I make it.
The Rice Krispie base is a game-changer. Instead of a traditional graham cracker crust, you get that satisfying crunch and buttery flavor that feels nostalgic and fun. Plus, it’s way easier to press into a pan than crumbs ever were.
The filling is straightforward cream cheese, sour cream, and a touch of vanilla. No weird ingredients, no fussy techniques. Just good, classic cheesecake that tastes like it came from a bakery. And because you’re not dealing with a water bath here, the whole process feels way less stressful.
It also travels well, stores beautifully, and actually tastes better the next day when the flavors have settled. That’s the kind of dessert I want in my life.
Ingredients
For the Rice Krispie Crust:
- 3 tablespoons unsalted butter
- 4 cups Rice Krispies cereal
- 3 tablespoons granulated sugar
- Pinch of salt
For the Cheesecake Filling:
- 16 ounces cream cheese, softened to room temperature
- ½ cup granulated sugar
- ¼ cup sour cream
- 2 large eggs, room temperature
- 1 teaspoon vanilla extract
- ¼ teaspoon salt
Optional Topping:
- Extra Rice Krispie treats (crushed or whole pieces) for garnish
- A drizzle of caramel or chocolate sauce
Hailee’s Tip: Room temperature cream cheese and eggs are non-negotiable here. Cold ingredients won’t blend smoothly, and you’ll end up with lumps. I usually take my cream cheese out of the fridge about 30 minutes before I start, and I run my eggs under warm water for a minute. It’s a small step that makes a huge difference.
Hailee’s Tip: Don’t skip the salt in the crust. I know it sounds tiny, but that pinch of salt makes the buttery flavor pop and balances the sweetness beautifully.
Optional Add-Ins and Variations
The beauty of this recipe is how flexible it is. Here are some of my favorite ways to make it your own:
- Brown Butter Base: Brown your butter before mixing the crust. It adds this incredible nutty depth that elevates the whole thing.
- Cinnamon Swirl: Mix a tablespoon of cinnamon into the filling for a cozy twist.
- Chocolate Drizzle: Melt some dark chocolate and swirl it into the filling before baking for a marbled effect.
- Marshmallow Mix-In: Fold mini marshmallows into the filling to lean into that Rice Krispie treat vibe.
- Caramel Swirl: Drizzle caramel sauce into the filling and gently swirl it with a knife before baking.
- Lemon Zest: Add the zest of one lemon to the filling for brightness and tang.
Step-by-Step Method
1. Prep Your Pan
Preheat your oven to 325 degrees Fahrenheit. Line a 9-inch springform pan with parchment paper on the bottom and sides. This makes removal so much easier. Trust me on this one.
2. Make the Crust
Melt your butter in a small saucepan over medium heat. Once it’s melted, add the Rice Krispies, sugar, and salt. Stir until every piece of cereal is coated in buttery goodness. It should look like wet sand.
What I Messed Up: The first time I made this, I pressed the mixture into the pan way too hard. It compacted into a dense brick instead of a crust. Press gently and evenly, using the bottom of a measuring cup to help you along. You want it to hold together, not turn into concrete.
Press this mixture firmly but gently into the bottom of your prepared pan. Bake for 5 minutes just to set it slightly. Remove and let it cool while you make the filling.
3. Prepare the Filling
In a large bowl, beat the softened cream cheese with an electric mixer for about 2 minutes until it’s smooth and creamy. Scrape down the sides of the bowl.
Add the sugar and beat for another minute. The mixture should look light and fluffy. Seriously, don’t skip this step. It incorporates air into the filling, which helps it bake evenly.
Add the sour cream and vanilla extract. Mix until just combined. Then add the eggs one at a time, beating on low speed after each addition. This is important: don’t overmix once the eggs are in. Overmixing can incorporate too much air, which causes cracks. I mix just until I don’t see any streaks of egg white.
Add the salt and give it a final gentle stir.
4. Combine and Bake
Pour the filling over your cooled crust. Smooth the top with a spatula. Place the springform pan on a baking sheet (this catches any drips and makes it easier to move in and out of the oven).
Bake for 30 to 35 minutes. The cheesecake is done when the edges are set but the center still jiggles slightly when you gently shake the pan. It should look like it has about a 2-inch diameter circle of slight jiggle in the very center. This is the sweet spot.
What I Messed Up: I used to bake cheesecake until it looked completely set, and then I’d get cracks. Now I know that slight jiggle is your friend. It means it will set perfectly as it cools.
5. Cool Slowly
Turn off the oven and crack the door open about 3 inches. Let the cheesecake sit in the warm oven for 1 hour. This gradual temperature change prevents the dreaded cracks.
After an hour, remove it from the oven and let it cool to room temperature on the counter, about 2 hours.
6. Chill
Once cooled, refrigerate for at least 4 hours, but ideally overnight. This is when the flavors really settle and the texture becomes perfectly creamy.
Common Mistakes to Avoid
Using Cold Cream Cheese: I cannot stress this enough. Cold cream cheese won’t blend smoothly, and you’ll have a lumpy filling. Leave it out for 30 minutes.
Overmixing the Filling: Once the eggs are in, mix gently. Overmixing incorporates air, which causes cracks as the cheesecake bakes and cools.
Baking Until Completely Set: That slight jiggle in the center is not a mistake. It’s exactly what you want. A completely set cheesecake will crack.
Skipping the Slow Cool: I know it’s tempting to just take it out of the oven and let it cool on the counter, but that oven-cracking step really does prevent cracks. Give it the time.
Pressing the Crust Too Hard: You want a crust that holds together, not a dense, compact layer. Press gently and evenly.
My Tested Substitutions
For the Crust: If you don’t have Rice Krispies, you can use Cocoa Krispies for a chocolate version, or even crushed cornflakes. The texture will be slightly different, but it still works beautifully.
For the Filling: Full-fat Greek yogurt can replace up to half of the sour cream for a tangier filling. Use regular cream cheese; reduced-fat versions don’t have the same creamy texture.
For the Eggs: I haven’t tested this with flax eggs or other substitutes, so I can’t confidently recommend them here. Eggs play a structural role in cheesecake, and I want you to have success.
For the Sugar: You can use coconut sugar or brown sugar instead of granulated sugar. Brown sugar will add a slight molasses note, which is actually delicious.
How to Customize
Want to make this your own? Here are some easy customizations:
Flavor Profile: Add almond extract, maple extract, or even a teaspoon of instant espresso powder to the filling for depth.
Texture: Mix crushed Rice Krispie treats directly into the filling for extra crunch throughout.
Size: This recipe works in a mini muffin tin for individual cheesecakes. Just reduce the baking time to 12 to 15 minutes.
Toppings: After it’s fully set, top with fresh berries, caramel sauce, chocolate ganache, or even a sprinkle of sea salt.
Serving Ideas
Serve this cheesecake chilled, cut into slices with a hot knife (dip it in hot water and wipe it dry between cuts for clean slices). A simple drizzle of caramel sauce on the plate looks elegant and tastes amazing.
It pairs beautifully with coffee or tea. If you’re serving it at a gathering, you can slice it ahead of time and arrange the pieces on a platter with small forks.
For a fun twist, crumble a slice over vanilla ice cream for an impromptu sundae.
Meal Prep and Storage
Make-Ahead: You can make this cheesecake up to 3 days in advance. Just keep it covered in the fridge. The flavors actually improve as it sits.
Freezing: Wrap individual slices tightly in plastic wrap and aluminum foil, then freeze for up to 2 months. Thaw in the refrigerator for about 4 hours before serving.
Storage: Keep the whole cheesecake covered in the fridge for up to 5 days. If you’ve sliced it, store the slices in an airtight container.
Hailee’s Tip: Don’t store it uncovered. It’ll absorb odors from your fridge and dry out slightly. Cover it well.
Nutritional Breakdown
This recipe makes 12 servings. Here’s what each slice contains:
- Calories: 285
- Protein: 5g
- Carbohydrates: 28g
- Fat: 17g
- Fiber: 0g
- Sugar: 24g
Keep in mind that these are estimates and can vary based on your specific ingredients and how you measure. If you’re tracking macros closely, I’d recommend using a nutrition calculator with your exact brands.
Final Thoughts
Making this Rice Krispie Treat Cheesecake has genuinely become one of my favorite kitchen moments. There’s something so satisfying about combining two beloved textures and flavors into one dessert that actually works.
What I love most about this recipe is that it doesn’t require fancy techniques or hard-to-find ingredients. It’s approachable, it’s forgiving, and it tastes like you spent way more time on it than you actually did. That’s the kind of recipe I want to share with you.
The first time you make it, follow the recipe as written. Once you’ve nailed it, play around. Add your favorite flavors, try different toppings, make it smaller or bigger. This recipe is a foundation for your creativity, not a rigid set of rules.
I’d love to hear how it turns out for you. If you make it, enjoy every creamy, crunchy, delicious bite. And remember: the best dessert is the one made with a little love and a lot of butter.
—
Rice Krispie Treat Cheesecake
Ingredients
Method
- Preheat oven to 325 degrees Fahrenheit. Line a 9-inch springform pan with parchment paper. Melt butter in a small saucepan. Add Rice Krispies, sugar, and salt. Stir until coated. Press gently into the bottom of the prepared pan. Bake for 5 minutes and remove to cool. In a large bowl, beat softened cream cheese with an electric mixer for 2 minutes until smooth. Add sugar and beat for 1 minute. Add sour cream and vanilla extract and mix until combined. Add eggs one at a time on low speed, mixing gently after each addition. Add salt and stir gently. Pour filling over cooled crust. Smooth the top. Place springform pan on a baking sheet. Bake for 30 to 35 minutes until edges are set but center jiggles slightly when gently shaken. Turn off oven and crack door open 3 inches