Perfectly Grilled Cheeseburger
Perfectly Grilled Cheeseburger
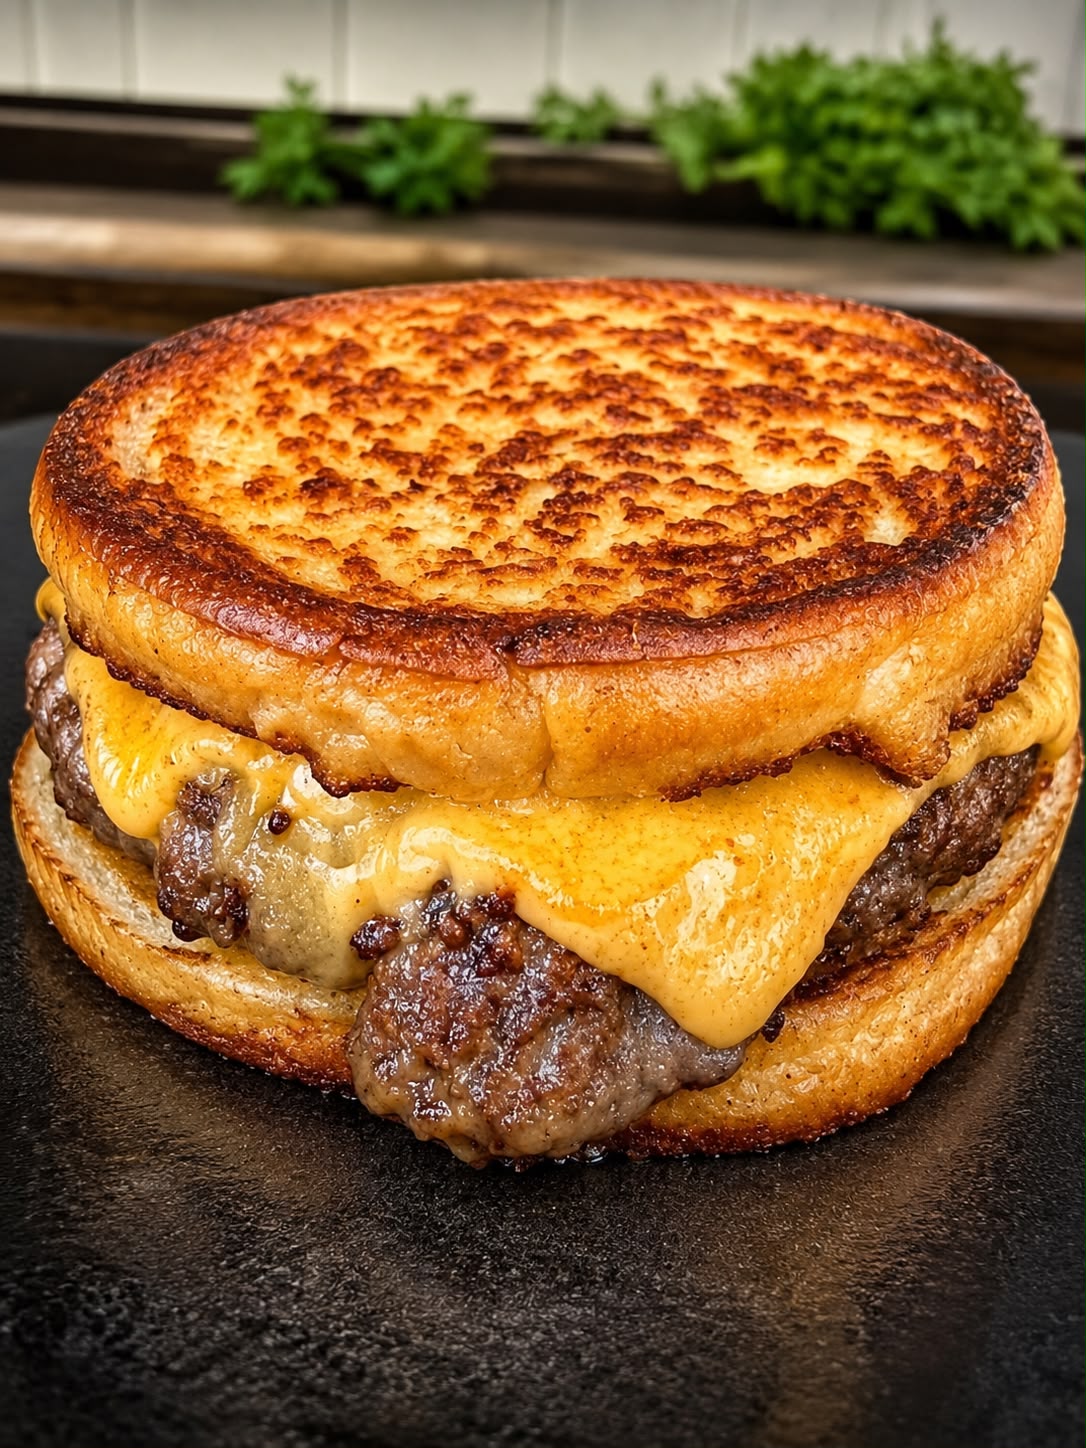
Perfectly Grilled Cheeseburger: A Recipe That Actually Tastes Like Summer
You know that feeling when you’re standing in front of your grill on a Saturday afternoon, and suddenly you’re hit with this almost primal craving for a really, truly good cheeseburger? That’s the moment this recipe was born.
I grew up watching my dad flip burgers on our old charcoal grill, and honestly, I thought I understood the assignment. Meat, heat, cheese, done. Except it wasn’t done. It was dry. It was overworked. It was sad. So I spent years—and I mean actual years—figuring out what separates a forgettable burger from one that makes you close your eyes and just enjoy the moment.
This perfectly grilled cheeseburger is the result of that journey. It’s not complicated, but it is intentional. The secret isn’t some fancy ingredient or a technique that requires culinary school. It’s about respecting the meat, getting your grill temperature right, and knowing when to stop fussing with things. I’ve burned them, I’ve served them raw in the middle, I’ve squeezed them into hockey pucks. But this method? This one works every single time.
Whether you’re feeding your family on a lazy weekend, hosting a casual cookout, or just desperately wanting something delicious for dinner tonight, this recipe is for you. It takes about 15 minutes from start to finish, and I promise you’ll taste the difference.
If you’re looking for more grilling inspiration, follow me on HaileeRecipes on Pinterest where I share all my favorite outdoor cooking ideas.
Why You’ll Love This Recipe
First, let’s talk about what makes a cheeseburger actually worth eating. A good one should have a flavorful, juicy patty with a nice crust on the outside. The cheese should be melted but not rubbery. The bun should be toasted so it doesn’t get soggy. And nothing—absolutely nothing—should taste like it came from a fast-food freezer.
This recipe delivers all of that. Here’s why:
- Juicy, flavorful patties: We’re using ground beef with enough fat content to stay moist, plus a simple seasoning that doesn’t overpower the meat itself.
- Perfect crust: High heat and minimal handling create that golden, slightly charred exterior that makes your mouth water.
- Properly melted cheese: We’re using a method that melts the cheese evenly without making it greasy or weird.
- Toasted buns: This might sound small, but it changes everything. A toasted bun is a bun that stays sturdy through the whole meal.
- Customizable: Once you nail the basic method, you can add toppings, experiment with cheese types, or switch up the bun. The foundation is solid.
Ingredients
- 1 pound ground beef (80/20 blend is ideal)
- 1 teaspoon kosher salt
- ½ teaspoon freshly ground black pepper
- ¼ teaspoon garlic powder
- 4 slices cheese (cheddar, American, or your preference)
- 4 burger buns
- 2 tablespoons butter (for toasting buns)
- Optional: lettuce, tomato, onion, pickles, condiments of choice
Hailee’s Tip: The 80/20 ground beef blend is crucial here. If you go too lean, your burger will be dry no matter what you do. The fat is what keeps things juicy and flavorful. Ask your butcher to grind it fresh if you can—it makes a noticeable difference.
Hailee’s Tip: Don’t skip the kosher salt. It’s coarser than table salt, so it seasons more evenly. If you only have table salt, use about ¾ teaspoon instead.
Hailee’s Tip: I use American cheese most of the time because it melts like a dream, but cheddar works beautifully too. Just avoid pre-sliced cheese from the deli counter if possible—it often has anti-caking agents that prevent smooth melting.
Optional Add-Ins and Variations
Once you’ve made this burger a few times, you’ll start getting ideas. Here are some of my favorites:
- Caramelized onions: Make these ahead and pile them on top. They add sweetness and depth.
- Crispy bacon: Cook it separately and lay it under or over the cheese. Game changer.
- Sautéed mushrooms: Earthy and delicious, especially with Swiss cheese.
- Jalapeños and pepper jack cheese: If you like a little heat, this combo is incredible.
- Fried egg: Sounds fancy, tastes amazing. Cook it while your burger rests.
- Special sauce: Mix mayo, ketchup, relish, and a tiny bit of hot sauce. Spread it on the toasted bun.
Step-by-Step Method
Step 1: Prep Your Grill and Ingredients
Heat your grill to medium-high heat (about 375-400°F if you have a thermometer). You want it hot enough that you can only hold your hand over the grates for about 2-3 seconds before it gets uncomfortable. While the grill heats, take your ground beef out of the fridge. Cold meat is harder to work with, and you want it to cook evenly.
Hailee’s Note: I used to crank my grill to the absolute max, thinking hotter meant better. Nope. Too high and the outside burns before the inside cooks. Medium-high is the sweet spot.
Step 2: Form Your Patties
Gently divide your pound of ground beef into four equal portions. Don’t squeeze or overwork the meat—this is where a lot of people go wrong. Just use your hands to loosely shape each portion into a patty about ¾ inch thick. Make a small indent in the center of each patty with your thumb. This prevents them from puffing up like little domes as they cook.
Hailee’s Note: I learned the indent trick from a burger joint in Portland, and it genuinely changed my life. The burger cooks more evenly, and it looks more professional too.
Step 3: Season Just Before Grilling
Season both sides of each patty with salt, pepper, and garlic powder. Do this right before they hit the grill, not earlier. Salting meat too far in advance can draw out moisture, which sounds counterintuitive but is actually a real thing.
Step 4: Grill the Patties
Place the patties on the hot grill. Don’t move them. Don’t poke them. Don’t flip them constantly. Let them sit for about 3-4 minutes until you see a nice brown crust forming on the bottom. Then flip once and cook for another 2-3 minutes. The whole process should take about 6-7 minutes for medium burgers.
Hailee’s Note: This is where I used to mess up constantly. I’d flip the burger three times, squeeze it with the spatula, and basically torture it. Just flip once. Trust the process.
Step 5: Add the Cheese
During the last minute of cooking, place a slice of cheese on top of each patty. If your grill has a lid, close it for about 30 seconds to help the cheese melt. If not, just let it sit for a minute. The residual heat will do the job.
Step 6: Toast the Buns
While the cheese is melting, butter the cut sides of your buns and place them on the grill, cut-side down, for about 1-2 minutes until they’re golden and crispy. Watch them carefully—buns burn fast.
Step 7: Assemble and Serve
Place each cheeseburger on a toasted bun and add your toppings. I usually go simple: lettuce, tomato, pickles, and a little mayo on the bottom bun. Serve immediately while everything is warm.
Common Mistakes to Avoid
Overworking the meat: The more you handle ground beef, the tougher your burger becomes. Mix it just enough to combine, then shape gently.
Making patties too thick: A burger thicker than 1 inch is hard to cook through without burning the outside. Stick with ¾ inch.
Flipping too much: Every time you flip, you interrupt the crust-forming process. One flip is enough.
Pressing down on the burgers: I see people do this all the time, and it squeezes out all the juices. Let the burger cook in peace.
Using lean ground beef: It sounds healthier, but it makes dry, disappointing burgers. The fat is your friend.
Forgetting to season: Don’t rely on toppings to add flavor. Season the meat itself properly.
Skipping the bun toast: A soft bun gets soggy and falls apart. Toast it.
My Tested Substitutions
Ground beef alternatives: If you want to use ground turkey or chicken, add a tablespoon of olive oil per pound to keep it moist. The cook time stays the same. Ground lamb also works beautifully, especially with feta cheese and cucumber.
Cheese options: Cheddar, Swiss, pepper jack, provolone, and even a good blue cheese all work. Stay away from sliced processed cheese if you can—it’s not the same.
Bun substitutions: Brioche buns are my go-to, but pretzel buns, ciabatta rolls, or even thick slices of sourdough work great. Just adjust toasting time based on thickness.
Condiment swaps: Instead of plain mayo, try aioli. Instead of ketchup, try sriracha or barbecue sauce. Instead of mustard, try whole grain or spicy brown.
How to Customize
The beauty of a grilled cheeseburger is how adaptable it is. Here are some ways I customize mine depending on my mood:
The Classic: Cheddar cheese, lettuce, tomato, pickles, onion, ketchup, and mustard. Sometimes I add mayo. Nothing fancy, but it never gets old.
The Fancy: Swiss cheese, caramelized onions, arugula, and a smear of Dijon mustard on a brioche bun.
The Spicy: Pepper jack cheese, jalapeños, crispy bacon, and sriracha mayo.
The Gourmet: Blue cheese, crispy bacon, a fried egg, and some sautéed mushrooms.
The Breakfast: American cheese, a fried egg, crispy bacon, and a little mayo on a toasted English muffin instead of a regular bun.
Serving Ideas
A perfectly grilled cheeseburger is delicious on its own, but here’s what I usually serve alongside:
- Crispy fries: Homemade or frozen, it doesn’t matter. Fries are essential.
- Coleslaw: Tangy and cool, it balances the richness of the burger.
- Grilled corn: Brushed with butter and seasoned with salt and pepper.
- Pickles: Dill or bread-and-butter, they cut through the richness.
- Tomato salad: Especially good in summer when tomatoes are at their peak.
- Baked beans: Classic cookout side that nobody ever complains about.
For drinks, I go with cold lemonade, iced tea, or a crisp beer. Something that cleanses your palate between bites.
Meal Prep and Storage
You can prepare the patties ahead of time if you want. Form them, cover them with plastic wrap, and refrigerate for up to 24 hours. Some people even freeze them for up to three months. Just thaw in the fridge before grilling.
Leftover cooked burgers can be refrigerated for up to three days, but honestly, they’re best eaten fresh. If you do have leftovers, you can reheat them gently on the grill or in a low oven, but they won’t be quite the same.
The cheese, buns, and toppings should all be prepped and ready to go before you start grilling, so everything comes together quickly once the patties are done.
Nutritional Breakdown
Here’s what’s in one perfectly grilled cheeseburger with cheese, on a regular bun, with basic toppings (lettuce, tomato, pickles, mayo):
- Calories: approximately 550-600
- Protein: 28-30g
- Carbohydrates: 35-38g
- Fat: 30-35g
- Fiber: 1-2g
Keep in mind these numbers vary based on your specific cheese choice, condiments, and toppings. A burger with extra bacon and special sauce will be higher in calories and fat.
Final Thoughts
There’s something really special about making a perfectly grilled cheeseburger at home. It’s not just about the food—though the food is delicious. It’s about taking a few minutes to do something well, to respect the ingredients, and to create something that brings people together.
I think back to my dad at that old charcoal grill, and I realize he was onto something. He wasn’t trying to impress anyone or follow some complicated recipe. He was just making something good for the people he loved.
That’s what this recipe is about. It’s simple, it’s reliable, and it tastes like care.
So fire up your grill, grab some good ground beef, and make yourself a burger. You deserve it.
—
Recipe Card
Perfectly Grilled Cheeseburger
Ingredients
Method
- Heat grill to medium-high heat (375-400°F). Let ground beef sit at room temperature for 5 minutes.
- Gently divide beef into 4 equal portions and shape into patties about 3/4 inch thick. Make a small indent in the center of each with your thumb.
- Season both sides of patties with salt, pepper, and garlic powder right before grilling.
- Place patties on hot grill and cook without moving for 3-4 minutes until a crust forms.
- Flip patties once and cook for 2-3 minutes more until cooked to your preference (medium is about 160°F internal temperature).
- During the last minute, place a slice of cheese on each patty. Close the grill lid for 30 seconds to melt.
- While cheese melts, butter the cut sides of buns and toast on grill for 1-2 minutes until golden.
- Place each cheeseburger on a toasted bun and add desired toppings. Serve immediately.