Santa Claus Christmas Cookies Recipe
Santa Claus Christmas Cookies Recipe
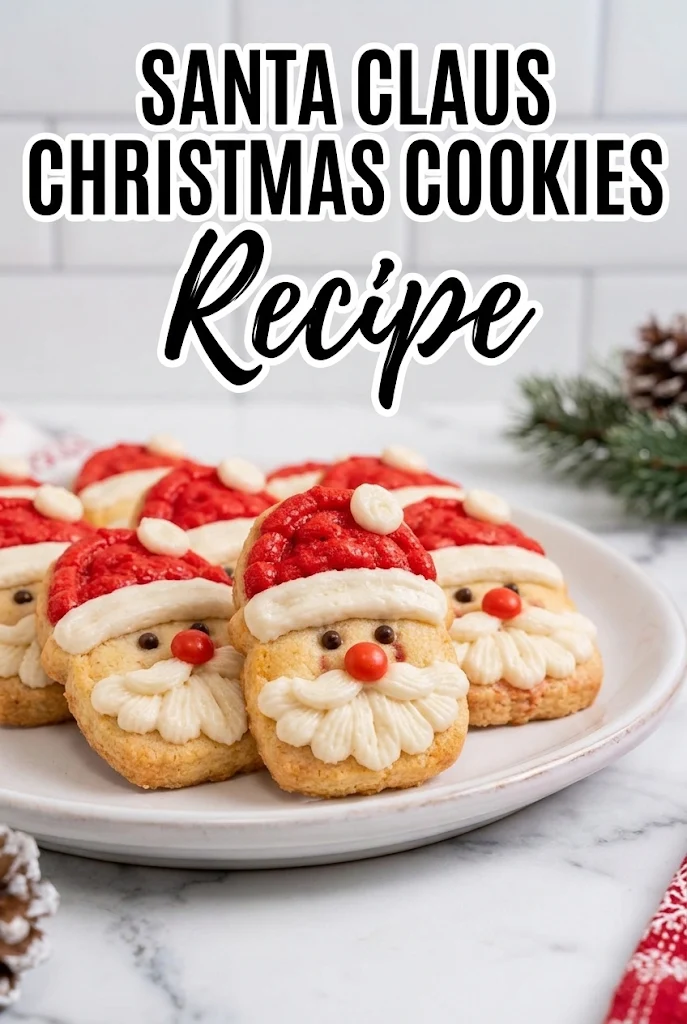
These Santa Claus Christmas Cookies feature a tender, buttery sugar cookie base topped with fluffy white frosting beards and festive red hats made from gel icing.
Ingredients
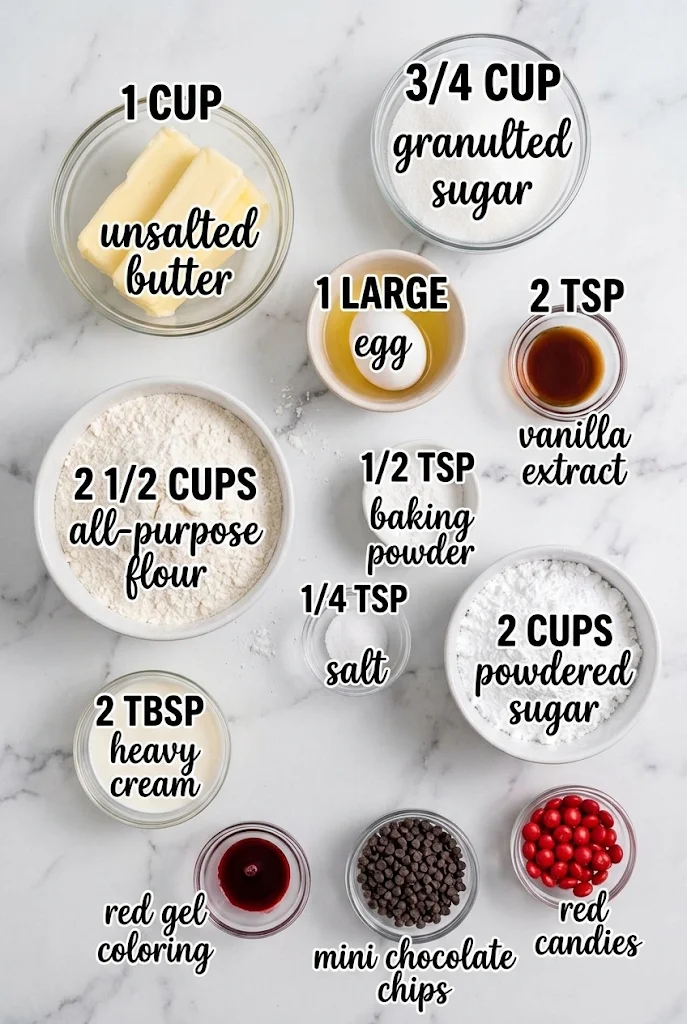
To create the perfect batch of these holiday treats, precise measurements are key to ensuring the dough holds its shape while remaining soft. The following ingredients form the complete core recipe for this festive dessert.
- 1 cup unsalted butter: Softened to room temperature is essential for proper creaming; cold butter will not incorporate air effectively.
- 3/4 cup granulated sugar: Provides sweetness and helps create a slightly crisp edge on the cookies as they bake.
- 1 large egg: Acts as a binder to hold the dough together and adds richness to the texture.
- 2 tsp vanilla extract: Enhances the overall flavor profile and balances the sweetness of the sugar.
- 2 1/2 cups all-purpose flour: The structural foundation of the cookie; do not substitute with cake flour as it may make the cookies too delicate to hold the decorations.
- 1/2 tsp baking powder: A small amount to give the cookies a slight lift without making them cakey.
- 1/4 tsp salt: Crucial for balancing the sweet flavors and enhancing the taste of the butter.
- 2 cups powdered sugar: Used specifically for the frosting; ensure it is sifted if there are any lumps before mixing.
- 2 tbsp heavy cream: Adds richness and creates a smooth, pipeable consistency for the frosting.
- Red gel coloring: To taste; gel coloring is preferred over liquid food coloring to maintain the thickness of the frosting.
- Mini chocolate chips: To taste; used as eyes for the Santa faces.
- Red candies: To taste; typically small round candies used to create the nose.
How To Make Santa Claus Christmas Cookies Recipe
- Cream the Butter and Sugar
Begin by placing the softened unsalted butter and granulated sugar into a large mixing bowl. Using an electric hand mixer or a stand mixer fitted with the paddle attachment, beat the mixture on medium speed until it becomes light in color and fluffy in texture. This process, known as creaming, incorporates air bubbles into the fat, which is vital for the cookie’s tenderness. Once the mixture looks pale and airy, add the large egg and vanilla extract. Continue mixing just until the egg is fully incorporated and the mixture is uniform. Avoid overmixing at this stage, as it can lead to tough cookies later.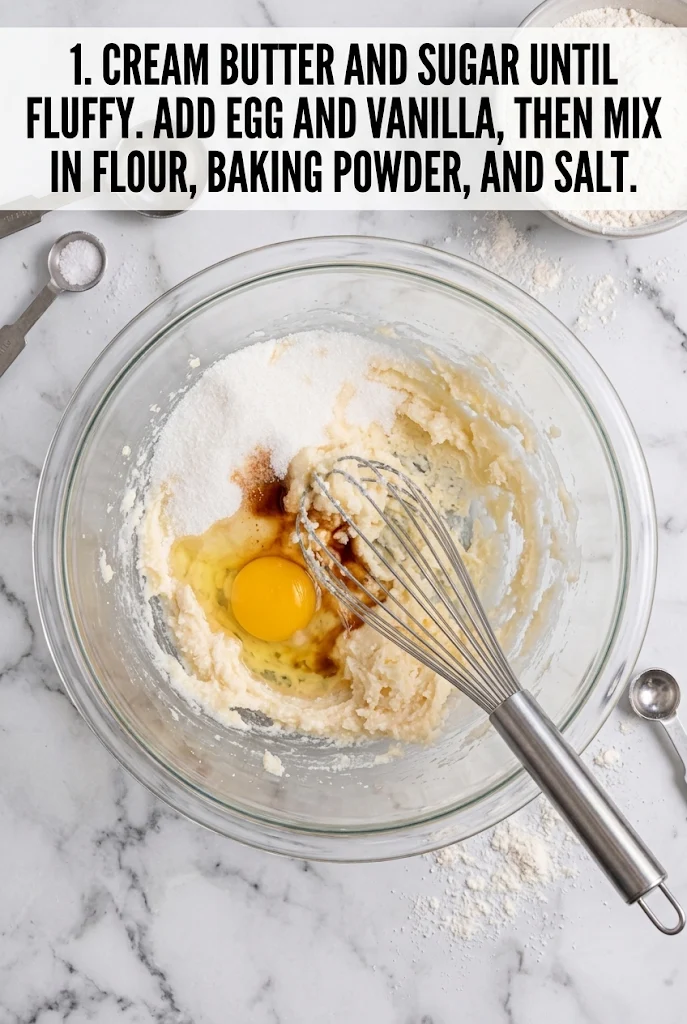
- Combine Dry Ingredients and Form Dough
In a separate medium bowl, whisk together the all-purpose flour, baking powder, and salt to ensure even distribution of the leavening agent. Gradually add the dry ingredients to the wet butter mixture, switching to low speed on your mixer or using a spatula to fold gently. Mix only until the flour streaks disappear and a cohesive dough forms. Overworking the gluten in the flour will result in a chewy, tough cookie rather than the desired tender crumb. Once combined, remove the dough from the bowl and place it on a clean work surface. - Roll and Cut the Shapes
Divide the dough into two equal portions to make rolling easier. On a lightly floured surface, roll one portion of the dough out to a consistent thickness of 1/4 inch. Use a rounded square cookie cutter to cut shapes from the dough. You want a shape that is wide enough at the bottom to resemble a face but has a distinct top section for the hat. Place the cut cookies onto a baking sheet lined with parchment paper or a silicone baking mat, spacing them about 1 inch apart to allow for slight spreading. Repeat with the second portion of dough. If the dough becomes too warm and sticky while working, chill it in the refrigerator for 10 minutes before continuing.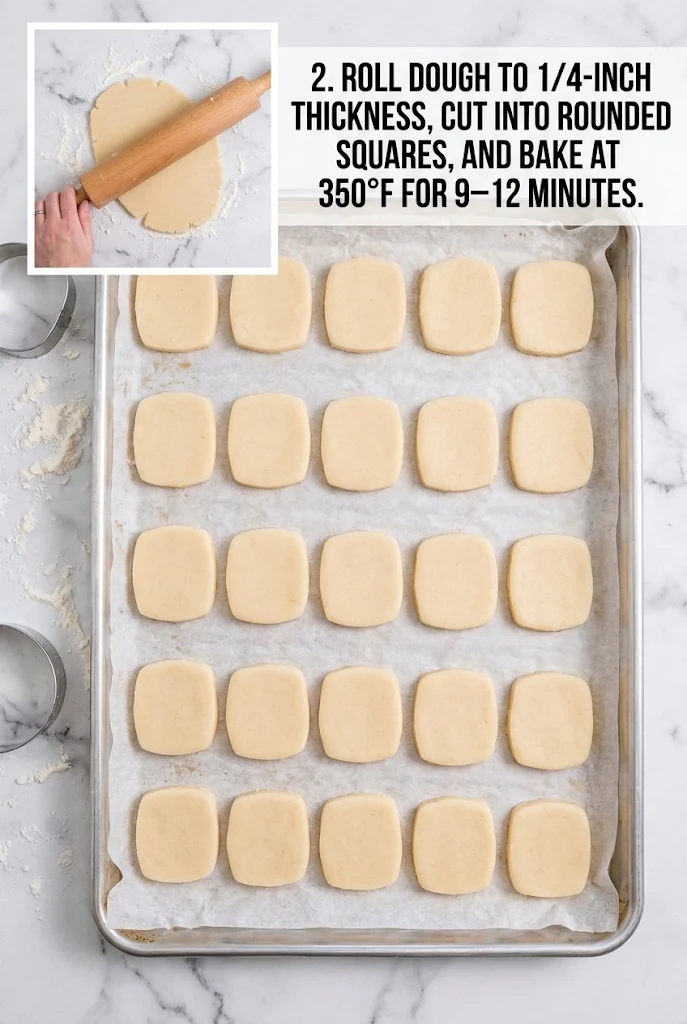
- Bake Until Golden Edges
Preheat your oven to 350°F (175°C) before you begin cutting the cookies. Once the oven is hot, place the baking sheets in the center rack. Bake the cookies for 9 to 12 minutes. Watch closely toward the end of the time range; the cookies are done when the edges turn a very light golden brown, but the centers should still look slightly soft. Do not overbake them until they are fully brown, as they will continue to firm up as they cool. Remove the trays from the oven and let the cookies rest on the baking sheet for 5 minutes to set before transferring them to a wire rack to cool completely. Decorating warm cookies will cause the frosting to melt and slide off. - Prepare the Frosting and Decorate Hats
While the cookies cool, prepare the frosting by beating the powdered sugar and heavy cream together in a clean bowl until the mixture is smooth and fluffy. Divide the frosting into two bowls. Leave one bowl white for the beard and trim. Add red gel coloring to the second bowl, adding it drop by drop until you achieve a vibrant, deep red shade suitable for the hat. Transfer the white frosting to a piping bag fitted with a small round tip and the red frosting to a separate piping bag. Pipe a triangular red hat onto the top third of each cooled cookie, leaving a small border at the bottom. Pipe a thin line of white frosting along the bottom edge of the red triangle to create the hat trim, and finish with a small white pom-pom at the peak.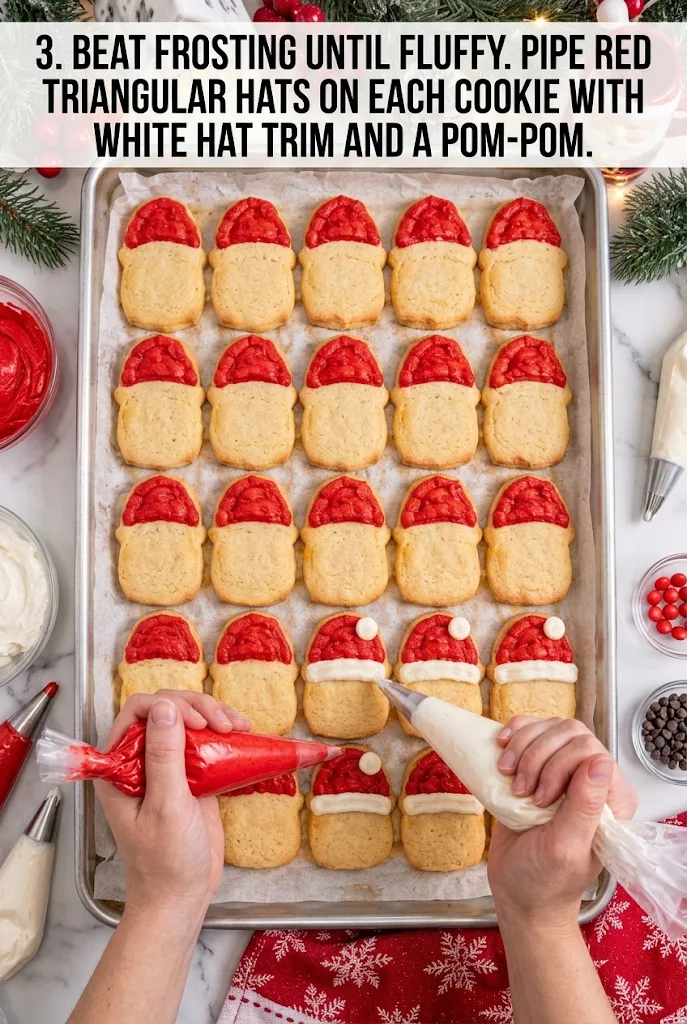
- Add Facial Features
Using the remaining white frosting, pipe a fluffy, rounded beard covering the lower half of the cookie face. Create a mustache shape above the beard area. Finally, carefully place two mini chocolate chips side-by-side to serve as the eyes and position a single red candy in the center between the eyes to act as the nose. Allow the decorated cookies to sit at room temperature for about 15 minutes so the frosting sets firmly before serving or packaging.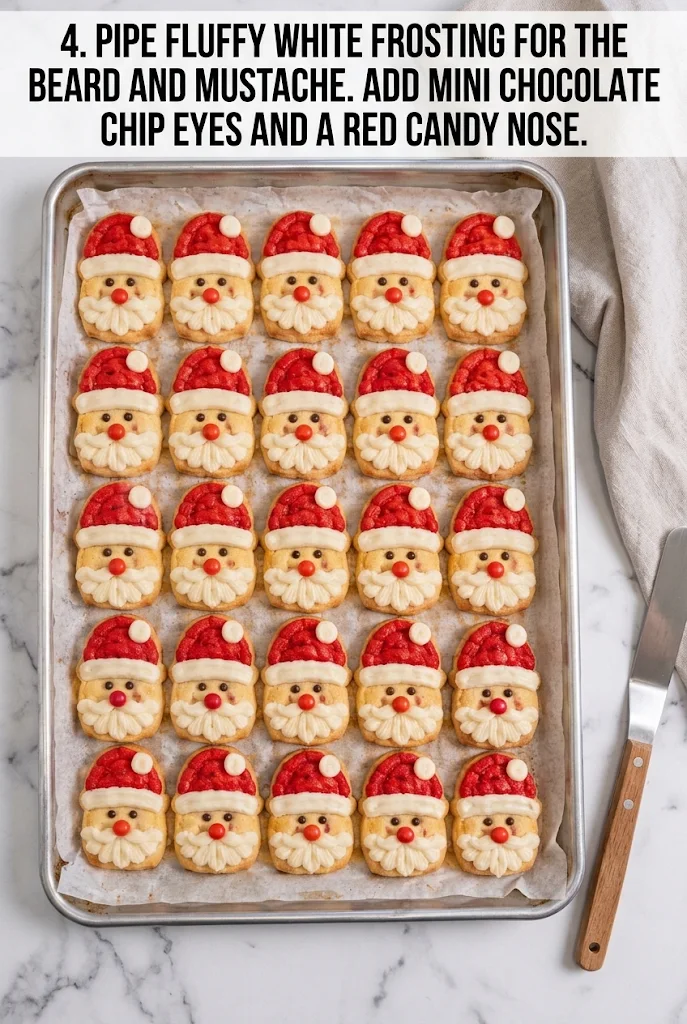
Why This Recipe Works
The success of these Santa Claus Christmas Cookies relies on the balance between the structural integrity of the dough and the stability of the frosting. By using a moderate amount of baking powder and keeping the dough chilled during the rolling process, the cookies maintain their specific rounded square shape without spreading too much, which ensures the facial features stay in proportion. The use of gel food coloring rather than liquid dye is critical here; gel colors provide intense pigmentation without thinning the frosting, allowing you to pipe sharp lines for the hat and beard without the icing running. Additionally, the ratio of butter to flour creates a shortbread-like texture that is sturdy enough to support the weight of the decorations without becoming soggy.
Doneness And Troubleshooting
If your cookies spread too flat during baking, your butter was likely too warm when mixed, or the oven temperature was inaccurate. Always verify your oven temperature with a standalone thermometer. Conversely, if the cookies remain pale and raw in the center after 12 minutes, extend the baking time by 1-2 minute increments, checking frequently. For the frosting, if it is too stiff to pipe easily, add a teaspoon more of heavy cream. If it is too runny and slides off the cookie, add a tablespoon more of powdered sugar. When decorating, ensure the cookies are completely cool; any residual heat will melt the butter in the frosting, causing the design to lose definition.
Substitutions And Variations
For a dairy-free version, you can substitute the unsalted butter with a high-quality plant-based butter stick that contains no water, though the texture may be slightly less rich. In the frosting, coconut cream can replace heavy cream, but note that it may impart a subtle coconut flavor. While the recipe calls for mini chocolate chips for eyes, you could use black sprinkles or edible ink markers for a different look. If you prefer a sweeter treat, you can increase the granulated sugar in the dough by up to 2 tablespoons, but be aware this may encourage more spreading. Always keep substitutions within reason to maintain the structural integrity required for the detailed decoration.
Serving Suggestions
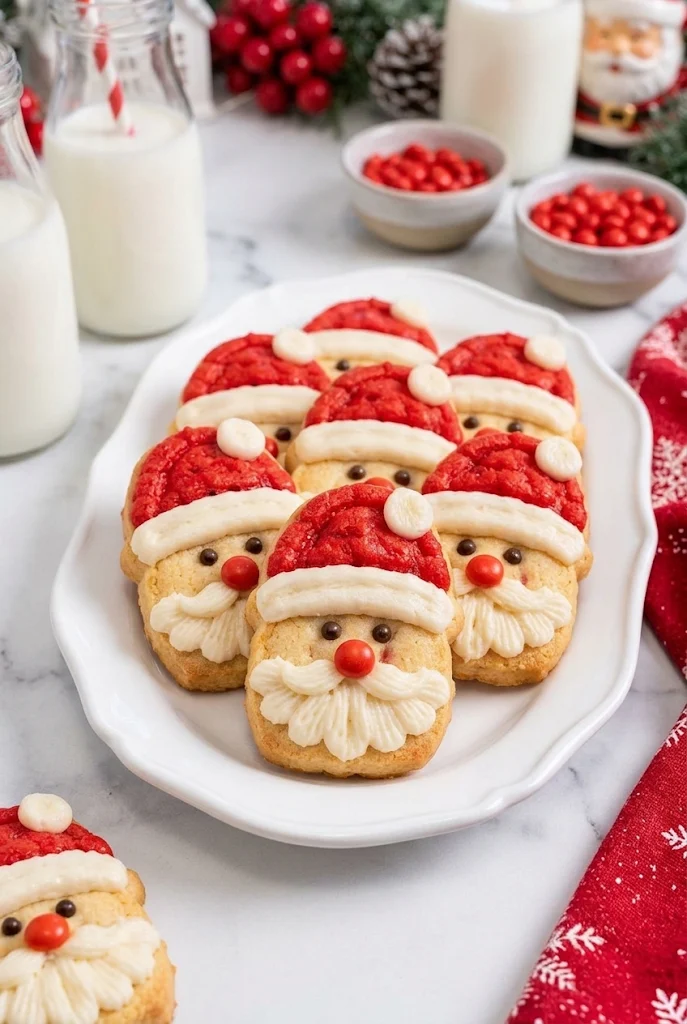
These cookies are ideal for holiday parties, school events, or as part of a Christmas cookie exchange platter. They pair beautifully with a glass of cold milk or a warm cup of hot cocoa. Arrange them on a tiered serving stand alongside other gingerbread men or snowflake cookies for a colorful display. Because the frosting sets quickly, these cookies travel well in airtight containers, making them excellent gifts for neighbors or friends.
Storage And Reheating
Store the fully decorated cookies in an airtight container at room temperature for up to 5 days. Place a sheet of parchment paper between layers if stacking them to prevent the frosting from sticking to the lid or other cookies. If you need to store them longer, you can freeze the undecorated baked cookies for up to 3 months. Thaw them at room temperature before decorating. Do not attempt to freeze the fully decorated cookies, as the moisture in the frosting can become icy and ruin the appearance upon thawing. There is no need to reheat these cookies; they are best enjoyed fresh at room temperature.
Creating these festive treats is a wonderful way to bring holiday cheer to your kitchen table. For more seasonal inspiration and easy-to-follow guides, Follow Hailee Recipes on Pinterest.
Santa Claus Christmas Cookies Recipe
Ingredients
Method
- Cream butter and sugar until fluffy, then mix in egg and vanilla.
- Mix in flour, baking powder, and salt until just combined.
- Roll dough to 1/4-inch thickness, cut into rounded squares, and bake at 350°F for 9-12 minutes.
- Beat frosting until fluffy, pipe red triangular hats with white trim and pom-poms.
- Pipe white frosting for beard and mustache, add chocolate chip eyes and red candy nose.