Sawdust Pie Delight Recipe
Sawdust Pie Delight Recipe
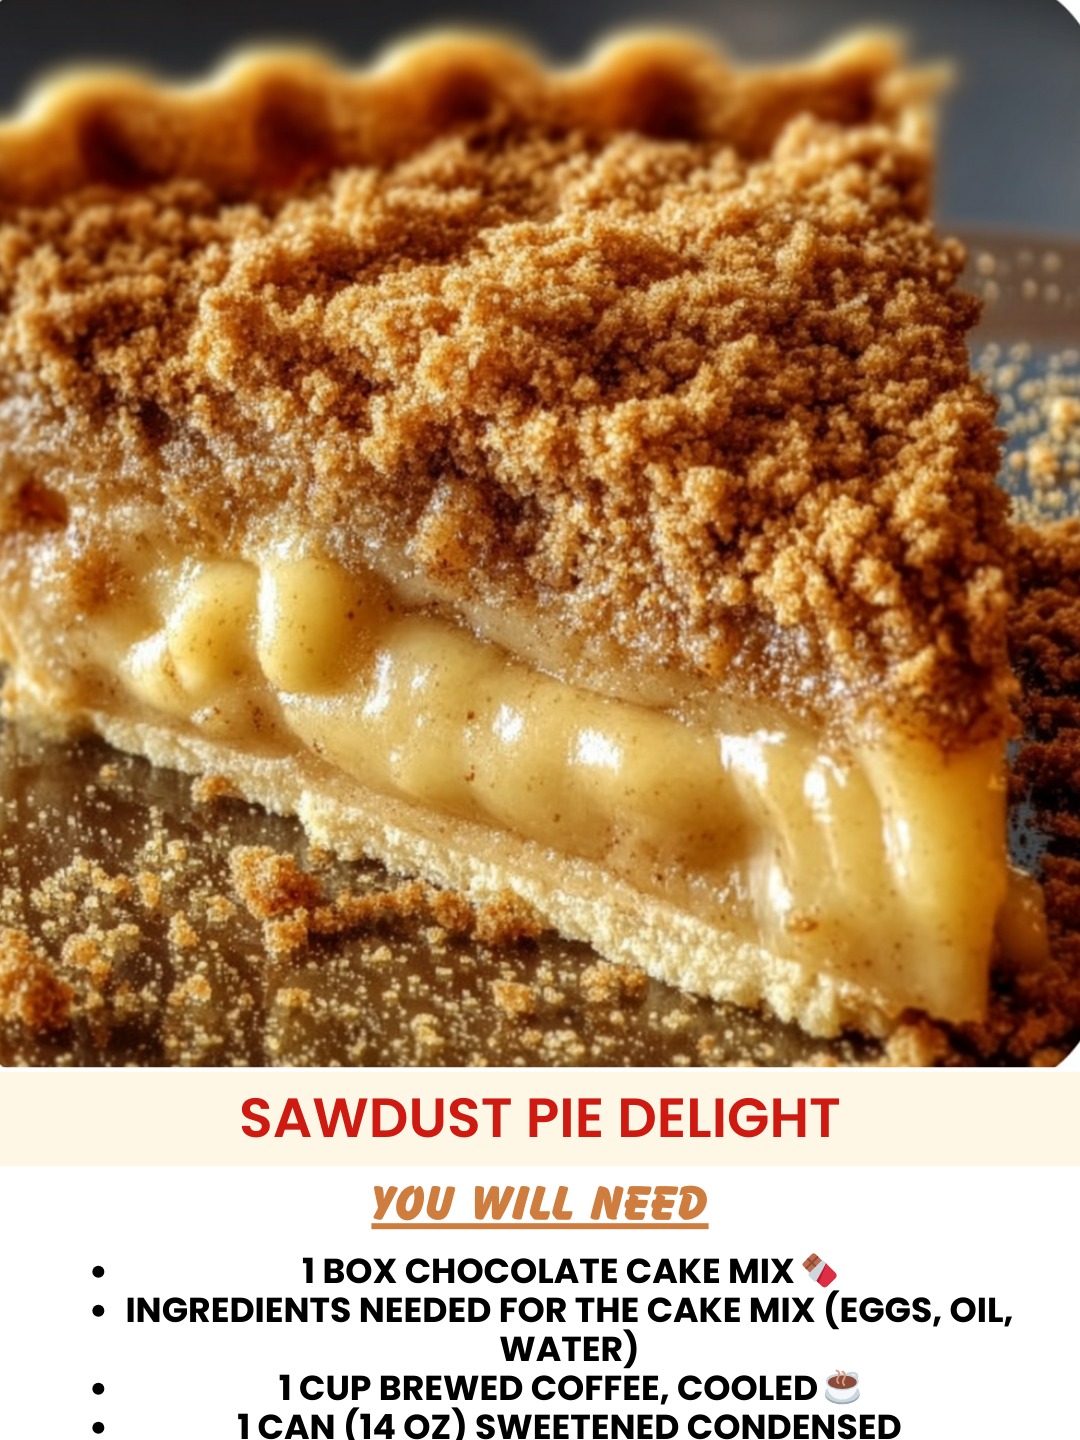
Sawdust Pie Delight Recipe: A Cozy Classic That Feels Like Home
I first encountered Sawdust Pie at my grandmother’s kitchen table on a rainy Sunday afternoon. I remember being absolutely mystified by the name. Sawdust? In a pie? But one bite of that golden, nutty filling with its almost-caramel undertones, and I was completely sold. My grandmother laughed at my confused face and explained that the coconut in the filling creates this wonderfully textured, sawdust-like appearance—hence the quirky name that somehow stuck around for generations.
What I love most about this recipe is how it bridges nostalgia with simplicity. It’s the kind of dessert that doesn’t require fancy techniques or hard-to-find ingredients, yet it tastes like you spent hours fussing over it. The filling is basically a custard-meets-coconut situation that bakes up into this gorgeous, slightly jiggly center with crispy edges. It’s comfort food in pie form, and honestly, I think more people should know about it.
The Sawdust Pie Delight Recipe is perfect for anyone who loves coconut desserts, wants something a little different from the usual apple-or-cherry routine, or is looking for a showstopper that won’t stress them out in the kitchen. It’s also incredibly forgiving—even if your pie isn’t picture-perfect, it’s going to taste amazing. If you’re craving something warm, cozy, and utterly delicious, this is your recipe. Follow me on HaileeRecipes on Pinterest for more recipes like this one that feel like a warm hug.
Why You’ll Love This Recipe
Let me be real with you: this pie is special because it doesn’t try too hard. There’s something genuinely magical about how the simple ingredients transform into this silky, almost pudding-like filling that somehow manages to be both rich and light at the same time.
- It’s nostalgic without being boring. This isn’t a trendy dessert, and that’s exactly why it works. It tastes like Sunday dinners and family gatherings.
- Minimal prep work. You’re not making a complicated custard or tempering chocolate. You’re just mixing, pouring, and letting the oven do the heavy lifting.
- Budget-friendly ingredients. Coconut, butter, sugar, eggs, and a pie crust—nothing here is going to break the bank or require a specialty store trip.
- Impressive presentation. It looks way fancier than it actually is, which means you can serve it to guests without feeling like you’re cutting corners.
- Naturally gluten-free option available. If you use a gluten-free crust, this pie works beautifully for anyone with dietary restrictions.
- The texture is absolutely addictive. It’s custardy, nutty, slightly chewy, with these little pockets of toasted coconut throughout. Every bite feels a little different.
Ingredients
Here’s what you’ll need to make this beauty. I’ve included my notes on each ingredient because I know you want to understand the why behind everything.
- 1 unbaked 9-inch pie crust — Store-bought is totally fine, or make your own if you’re feeling ambitious. I won’t judge either way.
- 4 tablespoons unsalted butter — Melted. This creates that rich, almost caramel-like flavor in the filling.
- 1 cup shredded coconut (unsweetened or sweetened—your call) — This is the star ingredient. Unsweetened gives you more control over sweetness; sweetened makes it more indulgent.
- 1 cup granulated sugar — Standard white sugar works best here.
- 3 large eggs — Room temperature if you can remember to take them out ahead of time. If not, room temperature is a nice-to-have, not a must-have.
- 1 tablespoon all-purpose flour — Just enough to help bind everything together without making it dense.
- 1 teaspoon vanilla extract — Adds warmth and depth to the filling.
- Pinch of salt — Trust me on this. It makes everything taste better.
- 1 cup whole milk — This creates that custard-like texture. Don’t skip it or substitute it with something else—this is one ingredient that really matters.
Hailee’s Tip: If you’re using sweetened coconut, reduce the sugar to three-quarters cup. I learned this the hard way after making a pie that was essentially candy. Not that I complained while eating it, but my dentist would have.
Hailee’s Tip: Buy your coconut from the bulk section if your grocery store has one. It’s fresher, cheaper, and you can grab exactly how much you need.
Optional Add-Ins and Variations
The beautiful thing about this recipe is how flexible it is. Here are some ways I like to play around with it:
- Almond extract. Use half a teaspoon instead of vanilla, or combine both. It adds this subtle, sophisticated nuttiness.
- Toasted coconut. Toast your shredded coconut in a dry skillet for a few minutes before adding it to the filling. The flavor becomes deeper and more complex.
- A splash of rum or coconut rum. Add one tablespoon to the filling for a tropical twist. It bakes off but leaves behind this lovely warmth.
- Lime zest. A teaspoon of lime zest makes this feel like a completely different dessert—bright, tropical, and summery.
- Cinnamon or nutmeg. Just a quarter teaspoon of either spice adds unexpected depth.
- Chocolate drizzle on top. After the pie cools, drizzle melted dark chocolate over the surface. It’s not traditional, but it’s definitely delicious.
Step-by-Step Method
Alright, let’s make this happen. I’m going to walk you through this like I’m standing right next to you in your kitchen.
1. Preheat your oven to 350 degrees Fahrenheit. Get this going first so your oven is ready when you need it. If you’re using a frozen pie crust, you don’t need to thaw it—just pop it straight into a 9-inch pie dish.
2. Melt your butter. I use the microwave—about 45 seconds usually does it. You want it melted and slightly warm, not smoking hot.
3. In a large mixing bowl, combine the melted butter, coconut, sugar, flour, and salt. Mix this together really well. The mixture should look kind of like wet sand at this point. This is where the “sawdust” texture starts to come together.
4. In another bowl, whisk together your eggs, milk, and vanilla extract. Get these really well combined. The eggs should be fully beaten in, not just mixed halfway.
5. Pour the wet ingredients into the dry ingredients and stir until everything is combined. You should have a thick, coconutty mixture that looks almost like a very wet batter. It’s okay if it looks a little lumpy—that’s normal.
What I messed up: The first time I made this, I tried to over-mix the batter thinking I needed it to be perfectly smooth. I ended up with a dense, gluey filling. Resist the urge. Mix until just combined, then stop.
6. Pour the filling into your unbaked pie crust. Don’t be shy—you want all of that lovely filling in there. It will look like it’s going to overflow, but trust the process. The filling will settle and actually shrink a bit as it bakes.
7. Place the pie on a baking sheet. This is a smart move because sometimes the filling bubbles over slightly, and you don’t want that mess on your oven floor. I speak from experience.
8. Bake for 45 to 55 minutes. The pie is done when the edges are set and slightly golden, but the center still has just a tiny bit of jiggle to it—like maybe a one-inch circle in the very middle. It will continue to set as it cools. If the top is browning too quickly, tent it loosely with foil after about 35 minutes.
What I messed up: I once baked this pie until it was completely firm throughout, thinking that meant it was done. It ended up a bit dry and cake-like instead of that gorgeous custardy texture. Slightly underbaked is your friend here.
9. Remove from the oven and let it cool on a wire rack. This is important—don’t skip it. As the pie cools, the filling sets up perfectly. It will take at least two hours to cool completely, but you can serve it warm if you’re impatient like me. Just know that it’ll be a little softer and more custardy when warm, and firmer when chilled.
Common Mistakes to Avoid
Let me save you some trial and error. Here are the things I’ve seen go wrong:
- Overbaking the pie. This is the biggest culprit. You want that slight jiggle in the center. Overbaking turns it into a dense, dry cake instead of a silky custard.
- Using coconut milk instead of regular milk. I know coconut milk sounds right, but it changes the texture entirely. Stick with regular whole milk.
- Skipping the pie crust. I had someone ask if they could bake this in a cake pan without a crust. Technically yes, but you lose that beautiful pastry element that makes this special.
- Not letting it cool completely. I get it—it smells amazing and you want to eat it immediately. But cooling time is when the magic happens. The filling sets into that perfect texture.
- Forgetting to put it on a baking sheet. This pie can bubble over. Protect your oven.
My Tested Substitutions
Sometimes you need to work with what you have, and that’s okay. Here’s what I’ve successfully swapped:
- Coconut oil instead of butter. Use the same amount. The flavor shifts slightly—it becomes more tropical—but it works beautifully.
- Almond milk or oat milk instead of whole milk. These both work fine. The pie might be slightly less rich, but it’s still delicious.
- Brown sugar instead of white sugar. Use the same amount. You’ll get a deeper, more molasses-forward flavor.
- A gluten-free pie crust. The filling itself is naturally gluten-free, so just use a GF crust and you’re good to go.
- Half the coconut, plus half cup of chopped pecans or walnuts. This creates a different texture but is equally good.
How to Customize
Want to make this recipe truly your own? Here’s where you can play:
- Make it tropical. Add lime zest and a splash of coconut rum. Serve with fresh pineapple on the side.
- Make it spiced. Add a quarter teaspoon of cinnamon, nutmeg, and a tiny pinch of cayenne pepper for warmth and complexity.
- Make it chocolate-coconut. Stir a quarter cup of cocoa powder into the filling. It becomes more decadent and almost brownie-like.
- Make it a tart instead of a pie. Use a tart pan with a removable bottom instead of a pie dish. Everything else stays the same. It looks fancier and is easier to slice.
- Make it mini. Divide the filling among muffin tins lined with small pie crust circles. Bake for 20 to 25 minutes. You’ll have individual portions that are perfect for gifting.
Serving Ideas
This pie is beautiful on its own, but here are some ways I like to serve it:
- Warm with vanilla ice cream. The contrast between the warm pie and cold ice cream is absolutely heavenly.
- Chilled with a dollop of whipped cream. After it’s cooled completely, top with lightly sweetened whipped cream and maybe a sprinkle of toasted coconut.
- With a cup of strong coffee. The richness of the pie pairs beautifully with black coffee.
- Alongside fresh fruit. Berries, sliced mango, or fresh pineapple add brightness and cut through the richness.
- With a drizzle of caramel sauce. Warm caramel over a slice of this pie is absolutely indulgent.
Meal Prep and Storage
The good news is that this pie keeps really well, which means you can make it ahead and not stress.
- Room temperature storage. Keep the pie covered loosely with plastic wrap or foil on the counter for up to two days. It tastes great at room temperature, and honestly, I often prefer it this way.
- Refrigerator storage. Store it covered in the fridge for up to four days. It becomes firmer when chilled, which some people prefer.
- Freezer storage. Wrap the cooled pie tightly in plastic wrap and then foil. It freezes beautifully for up to three months. Thaw it overnight in the fridge before serving, or let it sit at room temperature for a few hours.
- Make-ahead tip. You can assemble the pie (fill the unbaked crust) and refrigerate it for up to eight hours before baking. Just add five to ten minutes to the baking time since it’ll be starting from a colder temperature.
Nutritional Breakdown
Here’s what you’re looking at per serving, assuming eight servings per pie:
- Calories: approximately 380
- Protein: 5g
- Carbohydrates: 45g
- Fat: 20g
- Fiber: 2g
- Sugar: 38g
Keep in mind that these are estimates and can vary based on your specific ingredients and serving size. If you use a store-bought pie crust, check the label as those can vary significantly in their nutritional content.
Final Thoughts
The Sawdust Pie Delight Recipe is one of those recipes that reminds me why I love cooking in the first place. It’s not complicated, it’s not trendy, but it’s absolutely delicious and it brings people together. Every time I make this, I think of my grandmother’s kitchen and that rainy afternoon when I first discovered it.
I hope you make this pie soon. I hope it becomes a favorite in your home the way it has in mine. And I hope that when you bite into that first slice, with its golden crust and silky coconut filling, you understand why this recipe has stuck around for generations.
If you do make it, I’d love to hear how it goes. Come back and let me know what you thought, or if you tried any of the variations. That’s the stuff that makes my day.
Happy baking, friend. You’ve got this.
—
Sawdust Pie Delight Recipe
Ingredients
Method
- Preheat oven to 350 degrees Fahrenheit. Place pie crust in a 9-inch pie dish.
- Melt butter in microwave, about 45 seconds.
- In a large mixing bowl, combine melted butter, coconut, sugar, flour, and salt. Mix until well combined.
- In another bowl, whisk together eggs, milk, and vanilla extract until fully combined.
- Pour wet ingredients into dry ingredients and stir until combined.
- Pour filling into unbaked pie crust.
- Place pie on a baking sheet.
- Bake for 45 to 55 minutes until edges are set and golden but center still has