Strawberry Banana Pudding Dream
Strawberry Banana Pudding Dream
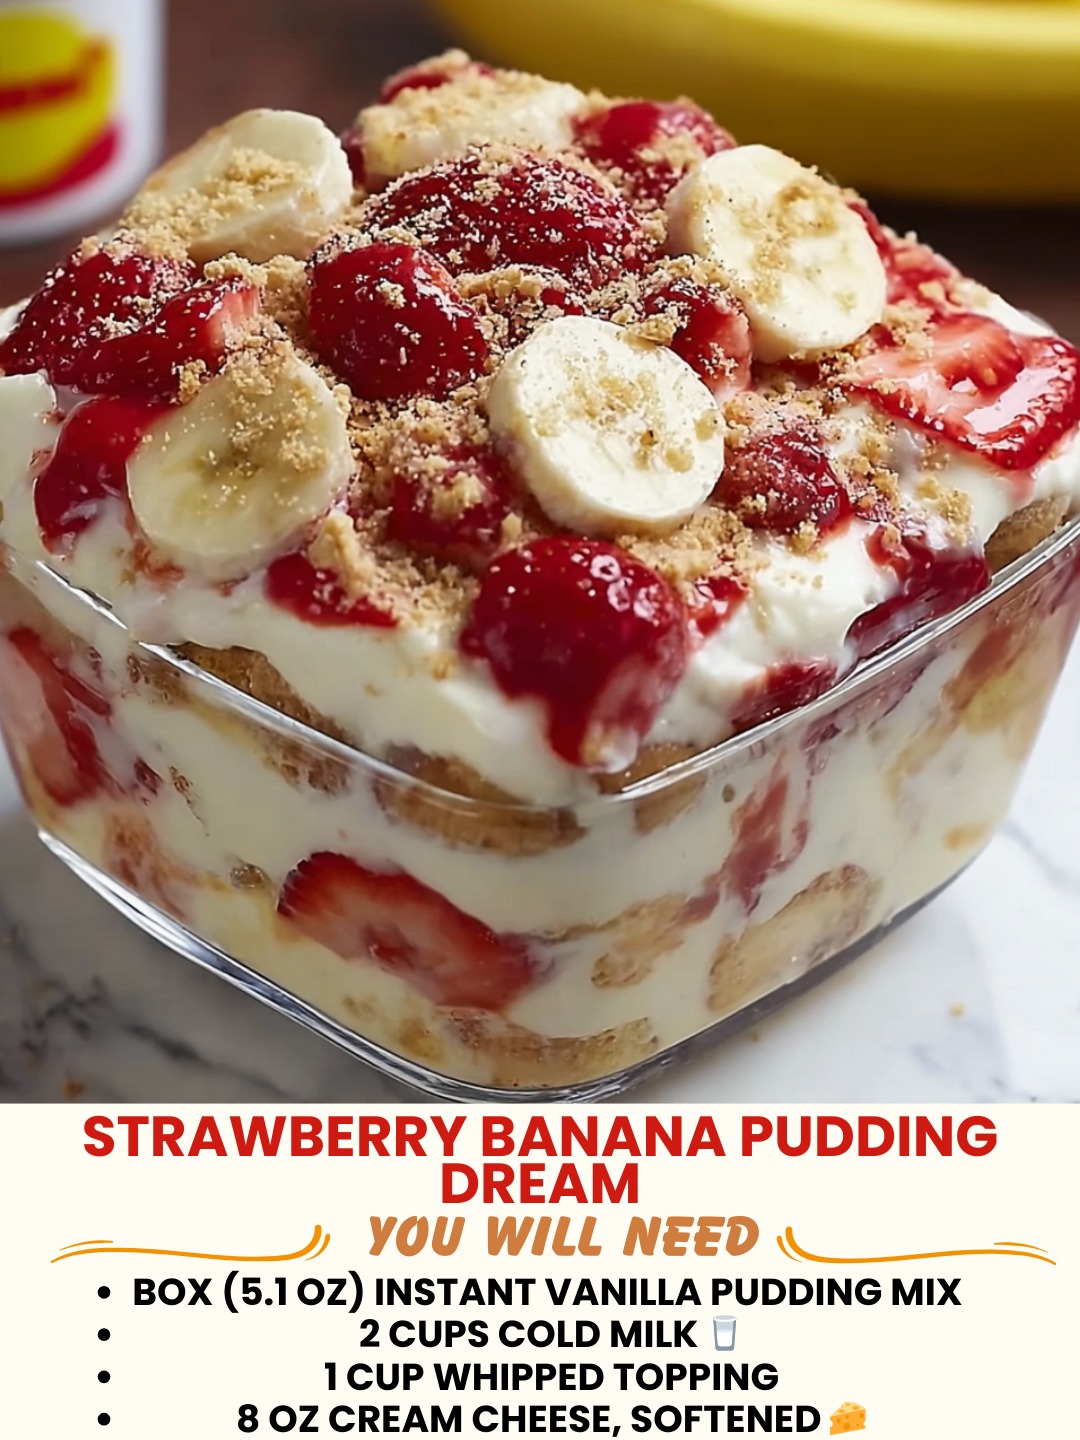
Strawberry Banana Pudding Dream: A Cozy Dessert That Feels Like a Hug
I created this Strawberry Banana Pudding Dream on a rainy Tuesday night when I was craving something that tasted like summer but felt like comfort. You know that feeling? When you want dessert that’s not too heavy, not too fussy, but absolutely satisfying? That’s this recipe.
I was scrolling through my phone, half-watching a show, and I kept thinking about my grandmother’s old pudding cups she’d make for us. But I wanted something more interesting, something that combined two of my favorite flavors in a way that actually made sense. So I started layering fresh strawberries with creamy banana pudding, added some buttery vanilla wafers, and honestly? I couldn’t stop eating it straight from the dish.
My roommate came home, saw me sitting on the kitchen counter with a spoon, and just laughed. “That good?” she asked. I slid her a spoon and we finished half the bowl that night. The next morning, I made it again because I knew I’d stumbled onto something special.
Here’s what makes this recipe so reliable: it comes together in about fifteen minutes, tastes like you spent way more time than you did, and works for literally any occasion. Dinner party? Yes. Weeknight treat? Absolutely. Bringing something to a potluck? People will ask for the recipe. I promise.
The Strawberry Banana Pudding Dream is basically layers of creamy vanilla pudding, fresh fruit, and crispy-yet-soft vanilla wafers that somehow stay the perfect texture. It’s not too sweet, it’s not complicated, and it’s the kind of dessert that makes you feel taken care of. Whether you’re cooking for yourself or feeding a crowd, this one delivers. Follow me on HaileeRecipes on Pinterest for more recipes like this that actually work in real life.
Why You’ll Love This Recipe
Let me be honest: this isn’t some fancy, Instagram-worthy dessert. It’s better than that. It’s the kind of thing you make when you want to feel good, and you want other people to feel good too.
- It’s fast. Seriously, fifteen minutes from start to finish. No baking, no stress, no complicated techniques.
- It tastes homemade in the best way. Fresh strawberries, real bananas, actual vanilla—nothing artificial or weird.
- It’s forgiving. You can’t really mess this up. If your pudding is slightly thinner or thicker, it still works. If your bananas are slightly less ripe, it still works.
- It’s customizable. Want to add chocolate? Do it. Want to use different berries? Go ahead. Want to make it dairy-free? I’ve got you covered.
- It feeds a crowd or just you. The recipe scales up or down without any fussing, and it keeps well in the fridge.
- It actually tastes like the name suggests. Creamy, fruity, dreamy, and not overly complicated. No weird aftertaste, no regrets.
Ingredients
- 2 cups whole milk
- 1 package (3.4 ounces) instant vanilla pudding mix
- 1/2 cup heavy cream or whipped cream (I use heavy cream and whip it myself, but store-bought works)
- 2 tablespoons powdered sugar
- 1 teaspoon vanilla extract
- 25 to 30 vanilla wafer cookies (about one sleeve of a standard box)
- 3 medium bananas, sliced into 1/4-inch rounds
- 1 pound fresh strawberries, hulled and halved (or quartered if they’re huge)
- 2 tablespoons fresh lemon juice
- 1 tablespoon granulated sugar (for the berries)
- Pinch of salt
Hailee’s Tip: Buy strawberries that are bright red all the way through, not white or pale in the middle. That’s how you know they’re actually ripe and flavorful. I learned this the hard way after one too many disappointing batches.
Hailee’s Tip: Don’t slice your bananas until you’re ready to layer the dessert. They oxidize and turn brown pretty quickly, and while they still taste fine, they look less appetizing. I usually prep everything else first, then do the bananas last.
Hailee’s Tip: If you can’t find instant vanilla pudding, you can make pudding from scratch, but honestly, the instant stuff is totally fine here. No judgment from me. Real life is busy.
Optional Add-Ins and Variations
This is where the fun starts. The base recipe is solid, but here’s where you make it yours.
- A drizzle of chocolate: Melt 2 ounces of dark chocolate and drizzle it between layers. Completely changes the vibe but in a good way.
- Coconut flakes: Toast some unsweetened coconut and sprinkle it on top. Adds texture and a subtle tropical note.
- A splash of liqueur: If you’re making this for adults, a tablespoon of Chambord or raspberry liqueur mixed into the pudding is lovely.
- Crushed graham crackers: Instead of or in addition to vanilla wafers, for a s’mores-adjacent vibe.
- Mint leaves: Fresh mint on top adds brightness and looks fancy without being fussy.
- A pinch of cardamom: In the whipped cream layer. Sounds weird, tastes incredible.
Step-by-Step Method
Step 1: Make the pudding base. Pour 2 cups of cold milk into a medium bowl. Add the instant vanilla pudding mix and whisk vigorously for about two minutes. It’ll start out lumpy and then suddenly come together. Don’t overthink it. Set it aside for a minute while you prep everything else. The pudding will thicken as it sits.
What I messed up: I used to whisk the pudding for like five minutes thinking it would get better. Nope. Two minutes is perfect. Anymore and it gets weirdly thick and weird.
Step 2: Make the whipped cream layer. Pour 1/2 cup of heavy cream into a clean bowl and whip it with an electric mixer until soft peaks form, about two to three minutes. Add 2 tablespoons of powdered sugar and 1 teaspoon of vanilla extract, then whip for another thirty seconds. Fold this gently into your pudding until you have a mousse-like consistency. It should be creamy and light, not dense.
What I messed up: I used to make the pudding and whipped cream separately and layer them, which was fine but messier. Folding them together creates a more cohesive, dreamier texture. Hence the name.
Step 3: Prepare the fruit. While your pudding is setting, toss your halved strawberries with 1 tablespoon of granulated sugar and 2 tablespoons of fresh lemon juice. Let them sit for five minutes. This draws out their natural juices and makes them taste even more strawberry-like. Slice your bananas right before you’re ready to assemble.
Step 4: Assemble in a large bowl or individual glasses. Here’s where you get to be creative. I usually do this in a large trifle bowl so people can see all the pretty layers, but individual glasses are gorgeous too and feel more elegant.
Start with a thin layer of pudding mixture on the bottom. Then add a layer of vanilla wafers (you can break them up or leave them whole—I usually break some and leave some whole for texture variety). Add a layer of banana slices, then a layer of strawberries with their juice. Repeat until you reach the top of your dish or glasses, finishing with fruit on top so it looks beautiful.
What I messed up: My first attempt, I used way too many wafers and they got soggy and weird. Now I use fewer wafers and more pudding and fruit. The wafers soften a little, which is perfect, but they don’t turn into mush.
Step 5: Chill and serve. Cover with plastic wrap and refrigerate for at least thirty minutes, but honestly, two to four hours is ideal. This gives the flavors time to get to know each other and the wafers time to soften just right.
Common Mistakes to Avoid
Using overripe bananas: They’ll turn brown and mushy. Slightly underripe is actually better here. You want them to hold their shape.
Not draining your strawberries enough: If they’re too wet, they’ll make the whole thing soggy. That said, a little juice is good—it adds flavor. Just don’t drown it.
Forgetting to chill before serving: I know it’s tempting to eat it right away, but those thirty minutes make a real difference. The flavors meld and the texture becomes more cohesive.
Using wafers that are already stale: Check the expiration date. Fresh wafers stay crispy longer and taste so much better.
Making it too far in advance: More than about six hours and the wafers start to get mushy in a sad way, not a good way. Make it the morning of or the night before, but not days ahead.
My Tested Substitutions
For the pudding: Butterscotch instant pudding is surprisingly good here. Banana pudding mix is obvious but also delicious. I’ve even used French vanilla and it works. Pick whatever sounds good to you.
For the cream: If you don’t have heavy cream, you can use Greek yogurt mixed with a little milk and honey. It’s tangier but in a nice way. You can also use store-bought whipped cream in a pinch, though it’s not quite as good.
For the wafers: Gingersnaps are surprisingly good here. So are shortbread cookies. Basically any crispy cookie that won’t completely fall apart works.
For the fruit: Raspberries, blackberries, or a mix of berries all work beautifully. I’ve even done this with peaches in the summer. Blueberries are lovely too.
For dairy-free: Use coconut milk or oat milk for the pudding, and coconut cream whipped with a little powdered sugar instead of heavy cream. It’s slightly different but honestly still delicious.
How to Customize
The beauty of this recipe is that it’s a framework, not a strict formula. Here’s how I think about customizing it:
If you want it richer: Add a layer of chocolate pudding or a drizzle of chocolate sauce. Use more whipped cream. Add a splash of liqueur.
If you want it lighter: Use low-fat milk and skip some of the whipped cream. Add more fruit and fewer wafers. Use Greek yogurt instead of heavy cream.
If you want it more interesting: Add a pinch of cinnamon or cardamom to the pudding. Use different cookies. Toast your coconut. Add fresh herbs like mint.
If you want to make it ahead for a crowd: Make it in individual glasses instead of a big bowl. It’s easier to grab and serve, and it feels fancy.
Serving Ideas
This Strawberry Banana Pudding Dream is incredibly versatile. Serve it:
- As a simple weeknight dessert with a cup of tea or coffee
- At a dinner party in individual glasses for a fancy presentation
- At a potluck in a big bowl with serving spoons
- For brunch, because honestly, it’s not too heavy and it’s delicious in the morning
- As a make-ahead dessert when you’re hosting and don’t want to stress
- For a date night at home when you want to impress someone without trying too hard
- With a dollop of extra whipped cream and a wafer cookie on the side
Meal Prep and Storage
This is one of those recipes that actually gets better after a few hours in the fridge.
Storage: Keep it covered with plastic wrap in the refrigerator for up to four days. I don’t recommend keeping it longer than that because the wafers eventually get too soft and the fruit starts to look sad.
Make-ahead strategy: You can make the pudding mixture and store it separately for up to three days. You can prep the fruit the morning of. Then assemble everything a few hours before you want to serve it. This gives you maximum flexibility.
Can you freeze it? Technically, yes, but I don’t recommend it. The texture changes in a way that’s not great. The wafers get weird and the fruit gets icy. Just make it fresh.
Individual portions: If you make this in individual glasses, you can cover each one and grab them as needed. Perfect for busy weeks when you want a nice dessert without fussing.
Nutritional Breakdown
This recipe makes about six generous servings, though it really depends on how much you eat.
- Calories: approximately 280 per serving
- Protein: 4 grams
- Carbohydrates: 45 grams
- Fat: 9 grams
- Fiber: 2 grams
- Sugar: 28 grams (mostly from fruit and pudding mix)
This is a dessert, so it’s not exactly a health food, but it’s not crazy indulgent either. The fruit adds fiber and vitamins, the pudding has some calcium, and the whole thing is portion-controlled if you’re eating it from individual glasses.
Final Thoughts
I love this recipe because it reminds me why I started cooking in the first place. It’s not about impressing people with complicated techniques or fancy ingredients. It’s about taking simple things—fruit, pudding, cookies—and combining them in a way that makes people happy.
Every time I make this Strawberry Banana Pudding Dream, someone asks for the recipe. And I always give it to them, because that’s the whole point. Good food should be shared, and recipes should be accessible and actually work when you make them at home.
So make this. Make it tonight if you want. Make it for someone you care about. Make it for yourself on a Tuesday night when you just want something that tastes like summer and feels like a hug. It won’t let you down.
—
Strawberry Banana Pudding Dream
Ingredients
Method
- Whisk together milk and instant vanilla pudding mix in a medium bowl for two minutes until thickened. Set aside.
- In a separate bowl, whip heavy cream with an electric mixer until soft peaks form, about two to three minutes. Add powdered sugar and vanilla extract, whip for another thirty seconds.
- Fold whipped cream gently into pudding mixture until combined and mousse-like.
- Toss strawberries with granulated sugar and lemon juice. Let sit for five minutes.
- Slice bananas right before assembling.
- In a large bowl or individual glasses, layer pudding mixture, vanilla wafers, banana slices, and strawberries with juice. Repeat layers until dish is full, finishing with fruit on top.
- Cover with plastic wrap and refrigerate for at least thirty minutes before serving.