Strawberry Cream Cake Recipe
Strawberry Cream Cake Recipe
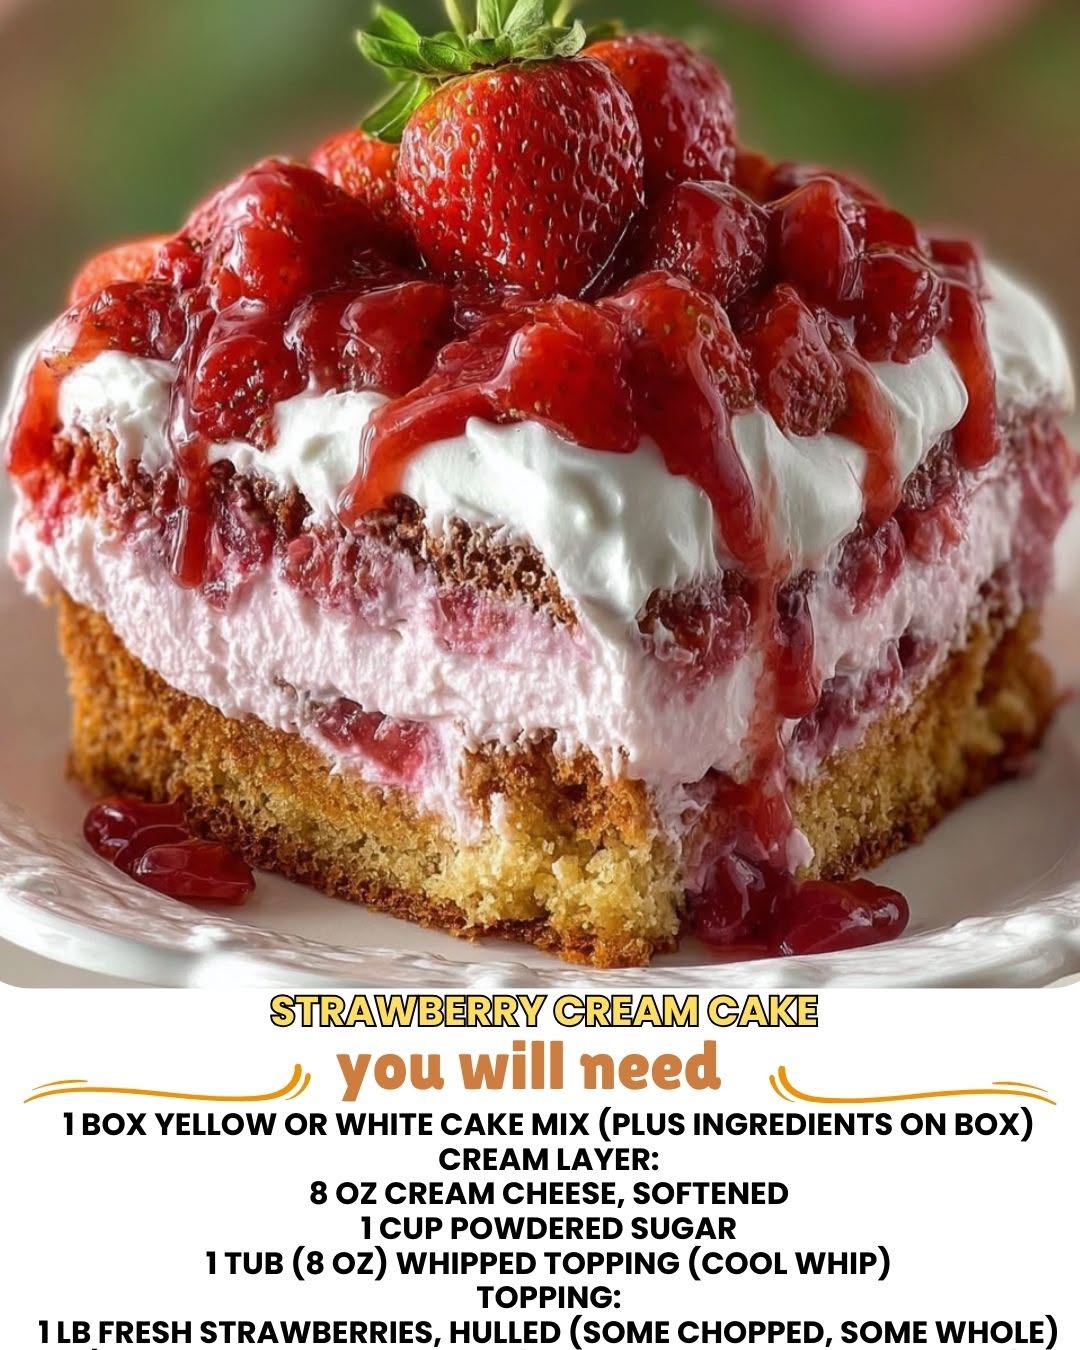
Strawberry Cream Cake Recipe: The One That Changed My Summer
I remember the exact moment I decided to bake this strawberry cream cake recipe. It was a sweltering July afternoon, and my mom had just called asking if I could bring dessert to our family dinner. I had maybe three hours, a half-melted stick of butter on the counter, and zero inspiration. But then I walked past my farmers market haul—this gorgeous pile of ruby-red strawberries practically glowing in their basket—and something clicked.
I wanted to make something that tasted like summer itself. Not overly fussy, not requiring a culinary degree, but genuinely impressive enough to make people close their eyes on the first bite. That’s when this strawberry cream cake came to life. It’s tender, it’s elegant, and honestly? It’s way more forgiving than you’d think.
This isn’t one of those recipes that demands you own fancy equipment or raid three specialty stores. It’s built on simple ingredients you probably already have—flour, eggs, butter, fresh strawberries, and good cream. The magic is in how they come together: a soft, barely-sweet vanilla cake layered with clouds of whipped cream and topped with those gorgeous berries. It’s the kind of dessert that makes you look like you spent all day in the kitchen, when really you’ve got it done in under two hours.
I’m sharing this with you because I genuinely believe everyone deserves to make a cake that tastes this good. Whether you’re baking for a special occasion or just because Tuesday needs a little joy, this recipe works. And if you love finding recipes like this one, Follow me on HaileeRecipes on Pinterest where I share all my cozy kitchen adventures.
Why You’ll Love This Recipe
Let me be real with you—I’ve made a lot of cakes. Some were beautiful disasters. Some tasted incredible but looked like they’d been through a windstorm. This strawberry cream cake hits that sweet spot where it’s genuinely easy to execute, looks stunning without requiring you to be a pastry chef, and tastes absolutely incredible.
The cake itself is light and moist, almost like a cross between a sponge cake and a traditional butter cake. It doesn’t dry out, even if you make it a day ahead. The cream filling is thick enough to hold everything together but fluffy enough that it doesn’t feel heavy. And those fresh strawberries on top? They’re the show-stopper that requires zero special skills.
People always ask me, “Hailee, isn’t layering a cake complicated?” Honestly, not this one. The structure is forgiving. The layers are sturdy. Even if your frosting isn’t perfectly smooth, the fresh berries make it look intentionally rustic and charming.
Ingredients
For the Cake
- 2 cups all-purpose flour — I use unbleached, but bleached works fine too
- 2 teaspoons baking powder — this gives you that tender crumb
- 1/2 teaspoon salt — trust me on this; it makes everything taste better
- 1/2 cup unsalted butter, softened — room temperature is key here
- 1 cup granulated sugar
- 2 large eggs — also room temperature
- 1 teaspoon vanilla extract — real vanilla makes a difference
- 3/4 cup whole milk — I use 2%, but whole milk gives richer flavor
Hailee’s Tip: Room temperature ingredients blend so much more smoothly. Pull your butter and eggs out of the fridge about 30 minutes before you start. I know it sounds fussy, but it genuinely changes the texture of your cake.
For the Cream Filling
- 2 cups heavy whipping cream — cold, straight from the fridge
- 3 tablespoons powdered sugar
- 1 teaspoon vanilla extract
Hailee’s Tip: Cold cream whips faster and holds better. If your kitchen is warm, stick your mixing bowl in the freezer for five minutes before you start whipping.
For Assembly and Topping
- 1.5 pounds fresh strawberries — ripe but still firm
- 2 tablespoons granulated sugar — optional, for macerating berries
- Fresh mint leaves — for garnish, if you want to get fancy
Hailee’s Tip: Buy your strawberries the day you plan to bake. They’re best when they’re fresh and firm. If they’re already soft, they’ll weep too much liquid into your cream.
Optional Add-Ins and Variations
Here’s what I love about this recipe—it’s a beautiful canvas. You can keep it simple and classic, or you can play around.
- Almond extract: Use 1/2 teaspoon in the cake batter instead of (or in addition to) vanilla for subtle nuttiness
- Lemon zest: Add 1 tablespoon of zest to the cake batter for brightness
- Strawberry jam: Spread a thin layer between the cake and cream for extra strawberry flavor
- Mascarpone cream: Replace half the whipped cream with mascarpone for richness
- Chambord or strawberry liqueur: Brush each cake layer with 1 tablespoon before frosting (adults only, obviously)
Step-by-Step Method
Preparing Your Pans
Preheat your oven to 350°F. Grab two 8-inch round cake pans and line the bottoms with parchment paper. I butter the pans first, then press the parchment in—it stays put that way. Dust with a little flour and tap out the excess. This step is your insurance policy against stuck cake.
Making the Cake Batter
Step 1: In a medium bowl, whisk together your flour, baking powder, and salt. Set aside. I do this first so I’m not scrambling later.
Step 2: In a large bowl, cream together your softened butter and sugar. This takes about 3 minutes with an electric mixer. You want it light, fluffy, and pale—that’s when you know you’ve beaten enough air into it. This is what gives your cake that tender crumb.
Step 3: Add your eggs one at a time, beating well after each addition. Then add your vanilla. The mixture should look smooth and slightly fluffy.
Step 4: Now alternate adding your dry ingredients and milk. Start with about a third of the dry mix, beat until just combined. Then add half the milk, beat gently. Then another third of the dry mix, the rest of the milk, and finally the last of the dry ingredients. Don’t overmix at this stage—overmixing develops gluten, which makes cake tough. You want to stop as soon as you don’t see streaks of flour.
What I Messed Up: The first time I made this, I overmixed the batter trying to make it perfectly smooth. The cake came out dense and a little tough. Now I stop mixing even when there are a few tiny streaks of flour visible. Those disappear in the oven, and your cake stays tender.
Step 5: Divide the batter evenly between your prepared pans. I use a kitchen scale for this—it ensures even layers—but you can eyeball it too. Smooth the tops gently with a spatula.
Baking
Step 6: Bake for 28 to 32 minutes. Your cakes are done when a toothpick inserted in the center comes out with just a few moist crumbs (not wet batter, but a little moisture is fine). The tops should be golden and spring back when you gently touch them.
Step 7: Let the cakes cool in the pans for 10 minutes, then turn them out onto wire racks. Peel off the parchment paper. Let them cool completely—this takes about an hour. I know it’s tempting to frost warm cake, but trust me, cold cake is easier to work with and holds together better.
Making the Whipped Cream
Step 8: Pour your cold heavy cream into a chilled bowl. Add powdered sugar and vanilla. Using an electric mixer or whisk, beat on medium-high speed until stiff peaks form. This takes about 3 to 4 minutes with an electric mixer. You’ll know it’s ready when you lift the beaters and the cream stands up in peaks.
What I Messed Up: I once over-whipped cream while distracted by a phone call. It turned into butter. Don’t be me. Watch it carefully in those last 30 seconds.
Preparing the Strawberries
Step 9: Rinse your strawberries and pat them completely dry. Slice them in half lengthwise, keeping some whole for the top. If you want extra strawberry flavor, toss the sliced berries with 2 tablespoons of sugar and let them sit for 15 minutes. They’ll release a little juice, which is delicious.
Assembly
Step 10: Place one cake layer on your serving plate. You can put a few dabs of whipped cream under it to keep it from sliding around. Spread about half of your whipped cream over the first layer, leaving about a half-inch border around the edge.
Step 11: Arrange some of your sliced strawberries over the cream. Then place your second cake layer on top.
Step 12: Frost the top and sides with the remaining whipped cream. Don’t stress about making it perfectly smooth—this is supposed to look homemade and rustic. That’s the charm.
Step 13: Arrange your remaining strawberries on top, pressing them gently into the cream. Add mint leaves if you’re feeling fancy.
Common Mistakes to Avoid
Using room-temperature cream: Warm cream won’t whip properly. It’ll turn into a soupy mess. Keep it cold.
Not cooling the cake completely: Warm cake is fragile and will crumble when you try to frost it. Wait for it to cool all the way down.
Overmixing the batter: I mentioned this already, but it’s worth repeating. Stop mixing as soon as you don’t see dry flour. A few streaks are fine.
Slicing wet strawberries: Wet berries will weep and make your cream soggy. Pat them completely dry before slicing.
Making it too far ahead: This cake is best eaten the same day or the next day. After that, the cake starts absorbing moisture from the cream and gets a little soggy. Not bad, just not at its peak.
My Tested Substitutions
Can I use cake flour instead of all-purpose? Yes, absolutely. Use the same amount—cake flour is more finely milled, so you don’t need to adjust. Your cake will be even more tender.
What if I don’t have heavy cream? You can use heavy whipping cream (same thing, different name), but you can’t substitute with half-and-half or whipped cream in a can. They won’t whip the same way. If you’re stuck, you could make a pastry cream or even use Greek yogurt mixed with a little powdered sugar, though the texture will be different.
Can I use frozen strawberries? Technically yes, but I don’t recommend it for this recipe. Frozen berries are watery when thawed and won’t look as beautiful on top. Save them for jam or smoothies.
Can I make this dairy-free? You could use coconut cream whipped with powdered sugar, but the cake itself has butter and milk. You’d need to substitute those too, which changes the recipe significantly. I’d suggest looking for a dairy-free cake recipe specifically designed for that.
How to Customize
Want to make this your own? Here are my favorite tweaks:
Make it more decadent: Brush each cake layer with a simple syrup made from equal parts sugar and water, cooled. Or use that Chambord I mentioned earlier.
Make it more floral: Add 1/2 teaspoon of rose water to the whipped cream. It’s subtle and gorgeous.
Make it a sheet cake: Bake this in a 9×13 rectangular pan for 35 to 40 minutes. You’ll have one layer instead of two, which is honestly easier for beginners.
Make it mini: Use a muffin tin and bake for 15 to 18 minutes. You’ll get individual cakes that are perfect for portion control (or for showing off).
Serving Ideas
Serve this cake cold, straight from the fridge if possible. The whipped cream stays fluffy and the flavors are brightest when it’s chilled.
A small slice with a cup of tea is my favorite afternoon moment. But it’s also gorgeous at dinner parties, bridal showers, or just because you want to treat yourself on a Tuesday.
If you’re serving a crowd, I like to slice it in the kitchen and plate individual pieces with maybe an extra strawberry on the side. It looks intentional and pretty that way.
Meal Prep and Storage
You can bake the cake layers a day ahead. Wrap them individually in plastic wrap and store at room temperature. Make the whipped cream no more than 4 hours before serving—it starts to separate if it sits too long.
Store the assembled cake in the refrigerator, loosely covered with plastic wrap or in a cake container. It’s best eaten the same day, but it’ll keep for one more day. After that, the cake absorbs too much moisture and gets soggy.
Don’t freeze this cake. The whipped cream doesn’t freeze well, and thawing it creates a watery mess.
Nutritional Breakdown
This is a rough estimate per slice (assuming 8 slices total):
- Calories: 420
- Protein: 5g
- Carbohydrates: 48g
- Fat: 23g
- Fiber: 1g
This isn’t a light dessert, but it’s not meant to be. It’s a celebration. Eat a slice, enjoy it, move on with your day.
Final Thoughts
I hope you make this strawberry cream cake recipe soon. I hope you have a kitchen that smells like vanilla and butter while it bakes. I hope someone you love takes a bite and closes their eyes for just a second. That’s the whole point, really.
Baking doesn’t have to be complicated or stressful. Sometimes the best desserts are the simplest ones—good ingredients, gentle hands, and a little bit of patience. This cake is proof of that.
Let me know how it goes. Seriously. I read every comment, every message, every photo you share. That’s the best part of what I do.
Now go make something delicious.
Hailee
—
Strawberry Cream Cake Recipe
Ingredients
Method
- Preheat oven to 350°F. Line two 8-inch round cake pans with p