Unfetti Sprinkle Pound Cake Recipe
Unfetti Sprinkle Pound Cake Recipe
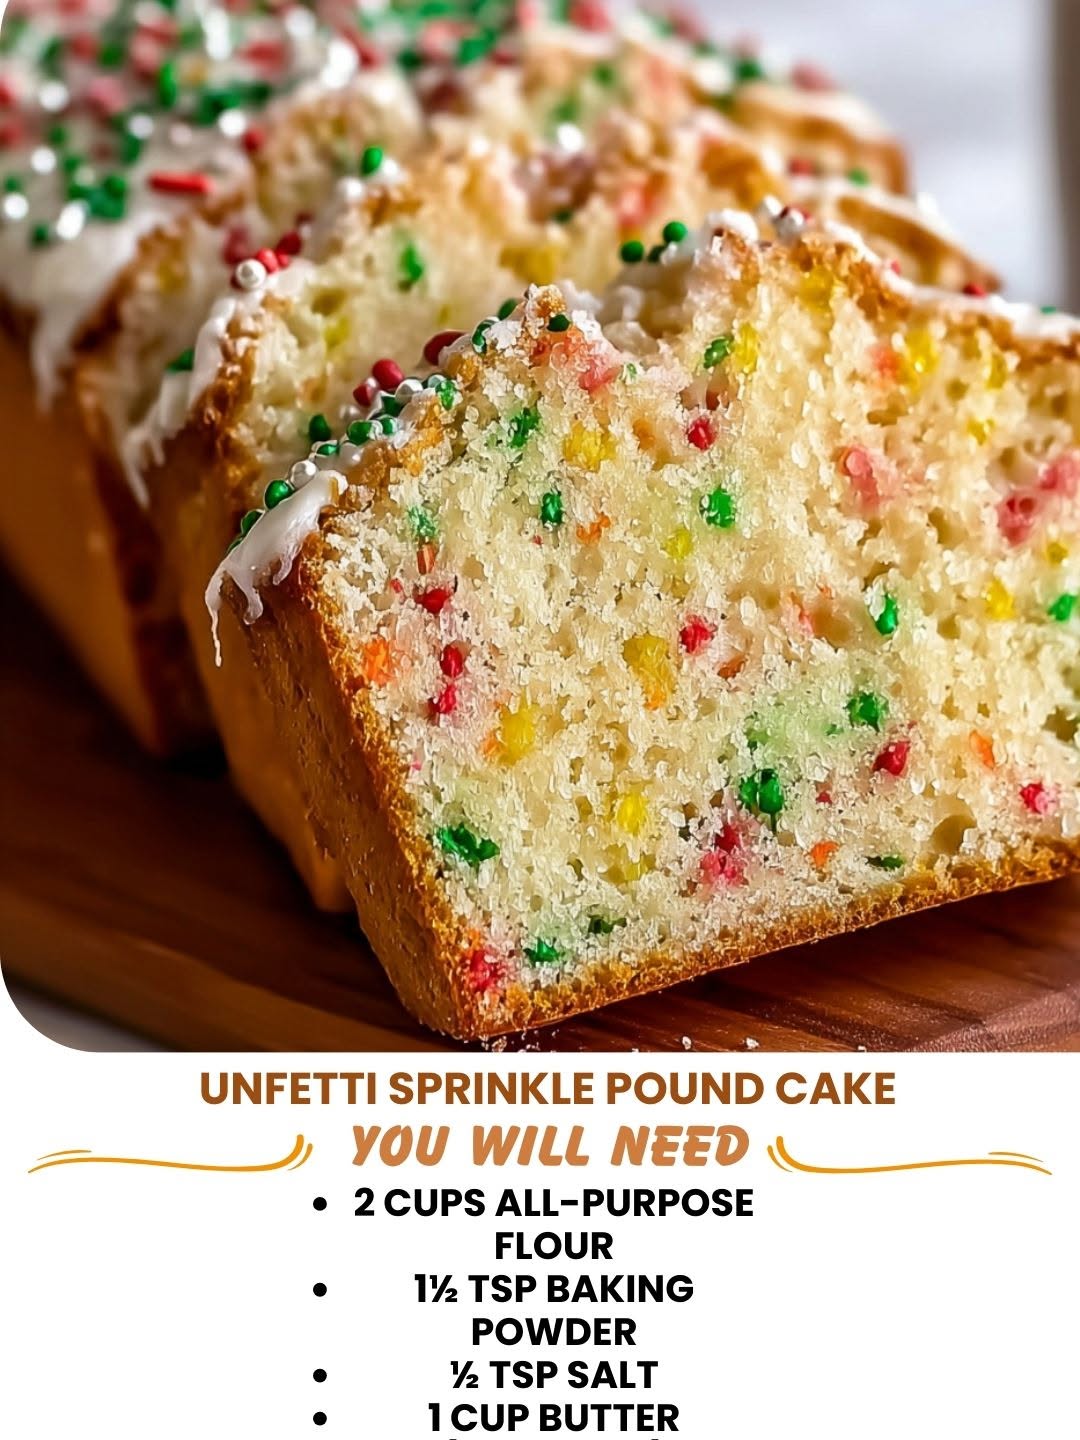
Unfetti Sprinkle Pound Cake Recipe: A Nostalgic Treat That Actually Works
I have this memory of being seven years old, standing on my tippy-toes at the kitchen counter while my mom mixed together a boxed cake mix. She’d dump in the sprinkles—the rainbow kind that bled color everywhere—and I thought she was the most genius baker alive. Fast forward twenty-something years, and I’m still chasing that feeling of pure, uncomplicated joy that comes from a slice of sprinkle-studded cake.
The thing is, most homemade pound cakes I’ve tried feel too dense or too heavy to pair with something as playful as rainbow sprinkles. It felt like a mismatch, you know? So I spent way too much time in my kitchen (my husband can confirm) testing ratios, trying different methods, and figuring out how to make a pound cake that’s actually tender, moist, and worthy of those beautiful little bursts of color and flavor.
This Unfetti Sprinkle Pound Cake Recipe is the answer I’ve been looking for. It’s the grown-up version of that childhood memory—a buttery, from-scratch pound cake with a tender crumb that holds up beautifully to the sprinkles baked right into the batter. No box mix, no shortcuts, but also no fussing over complicated techniques. Just honest, reliable baking that tastes like home.
This cake is for anyone who wants something special but not intimidating. It’s perfect for potlucks, birthday celebrations, or just a Tuesday afternoon when you need something that makes you smile. And if you’re looking for more easy-to-follow recipes like this one, follow me on HaileeRecipes on Pinterest for tons of tested ideas that actually work in a real kitchen.
Why You’ll Love This Recipe
Let me be honest: there are a lot of pound cake recipes out there. But this one has some real advantages that I think you’ll appreciate.
It’s actually tender. Traditional pound cakes can be dense and crumbly. I use a combination of butter and a touch of sour cream to keep the crumb soft and moist without making it feel heavy. You’ll get that perfect slice that holds together but still feels light on your tongue.
The sprinkles stay vibrant. Most bakers worry that baking sprinkles will bleed or lose their color. I’ve figured out the timing and technique to keep them looking gorgeous and tasting bright. Spoiler: it involves a little trick I’ll share in the method section.
It’s foolproof enough for beginners but interesting enough for confident bakers. There’s nothing mysterious happening here. You cream butter and sugar, add eggs, alternate your dry and wet ingredients, fold in sprinkles, and bake. That’s it. But the results look and taste like you spent hours fussing.
It keeps well and tastes even better the next day. Pound cake is one of those magical desserts that actually improves as it sits. The flavors meld, the crumb sets up perfectly, and you get these little flavor surprises from the sprinkles.
Ingredients
- 2 1/4 cups all-purpose flour
- 1/2 teaspoon baking powder
- 1/2 teaspoon salt
- 1 cup (2 sticks) unsalted butter, softened to room temperature
- 1 1/2 cups granulated sugar
- 4 large eggs, room temperature
- 1/2 cup sour cream, room temperature
- 1/4 cup whole milk, room temperature
- 2 teaspoons vanilla extract
- 3/4 cup rainbow sprinkles (plus 2 tablespoons reserved for topping)
Hailee’s Tip: Room temperature ingredients are genuinely important here. Cold butter won’t cream properly, and cold eggs can cause the batter to break. I usually pull everything out about 30 minutes before I start baking. It sounds fussy, but it makes a real difference in your final texture.
Hailee’s Tip: Use quality sprinkles if you can. The cheap ones sometimes taste a little waxy, and honestly, you’re already putting in the effort to make this from scratch. Brands like Wilton or Supernatural make sprinkles that taste as good as they look.
Hailee’s Tip: Don’t skip the sour cream. I know it sounds weird in a sweet cake, but it adds tenderness and a subtle tang that makes all the other flavors pop. It’s not detectable as “sour”—it just makes everything taste more like itself.
Optional Add-Ins and Variations
The beauty of this cake is that it’s a wonderful blank canvas. Here are some directions you could take it:
- Lemon Unfetti: Replace the vanilla with 2 teaspoons of lemon extract and add the zest of one lemon to the batter. The citrus pairs beautifully with the sweet sprinkles.
- Almond Unfetti: Use 1 1/2 teaspoons vanilla and 1/2 teaspoon almond extract. It gives everything a subtle depth.
- Extra Sprinkle-Forward: If you’re a sprinkle enthusiast like me, increase the amount in the batter to 1 full cup. You’ll get more color throughout.
- Birthday Cake Version: Add 1/2 teaspoon of clear almond extract along with the vanilla for that classic birthday cake flavor.
Step-by-Step Method
Step 1: Prep Your Pan and Oven
Preheat your oven to 325 degrees Fahrenheit. I use a loaf pan for this recipe, but a bundt cake pan works beautifully too. Grease it generously with butter or cooking spray, then dust with a light coating of flour. Tap out any excess. This step matters because pound cake can stick if you’re not careful.
Step 2: Whisk Your Dry Ingredients
In a medium bowl, whisk together the flour, baking powder, and salt. Set this aside. I like to whisk rather than sift because it’s less fussy, but either works.
Step 3: Cream the Butter and Sugar
This is where the magic starts. Using an electric mixer (or your arm if you’re feeling ambitious), beat the softened butter and sugar together for about 3 to 4 minutes. You want the mixture to look pale, fluffy, and noticeably lighter than when you started. This is what gives your cake that tender crumb. Don’t rush this step.
What I Messed Up: Early on, I’d skip the full creaming time because I was impatient. The cakes came out dense and heavy. Now I set a timer and actually wait. Your future self will thank you.
Step 4: Add the Eggs
Add the eggs one at a time, beating well after each addition. This takes about a minute per egg. The batter should look smooth and integrated, not separated or curdled.
Step 5: Add Your Wet Ingredients
Here’s where I diverge from traditional pound cake method. Instead of adding everything at once, I alternate: a third of the flour mixture, then half the sour cream and milk mixture (combined together), then another third of flour, then the rest of the sour cream and milk, then the final third of flour. End with the vanilla extract. Mix on low speed just until combined after each addition. Overmixing at this stage can make the cake tough, so be gentle.
What I Messed Up: I used to dump all the flour in at once. The batter would look lumpy and scary, and I’d keep mixing to fix it. That’s how you end up with tough cake. The alternating method prevents that panic.
Step 6: Fold in the Sprinkles (The Important Part)
Here’s my trick for keeping sprinkles vibrant: reserve about 2 tablespoons of your sprinkles. Toss the remaining 3/4 cup in a tiny bit of flour (just a light coating—like 1/2 teaspoon), then fold them gently into the batter using a spatula. The flour coating helps them stay suspended and prevents too much bleeding. Fold gently; don’t stir aggressively.
Pour the batter into your prepared pan and smooth the top. Sprinkle those reserved 2 tablespoons of sprinkles on top right before it goes in the oven. This keeps them looking fresh and colorful.
Step 7: Bake
Bake at 325 degrees for 55 to 65 minutes, depending on your oven and whether you’re using a loaf pan or bundt pan. The cake is done when a toothpick inserted in the center comes out with just a few moist crumbs (not wet batter, but not completely clean either). The top should be golden brown.
If the top is browning too quickly before the inside is done, loosely tent it with foil for the last 15 minutes.
Step 8: Cool
Let the cake cool in the pan for about 15 minutes. Then turn it out onto a wire rack to cool completely. I know you want to eat it immediately—I do too—but letting it cool completely helps the crumb set up properly.
Common Mistakes to Avoid
Using cold ingredients: I mentioned this, but it’s worth repeating. Cold butter won’t cream properly, and cold eggs can cause the batter to look curdled. Give yourself 30 minutes before you start.
Overmixing after adding flour: This is the enemy of tender cake. Mix just until you don’t see dry streaks anymore, then stop. A few small lumps are fine and will disappear in the oven.
Opening the oven door too early: I get it—you want to peek. But opening the door in the first 45 minutes can cause the cake to sink. Wait until at least the 50-minute mark before you even think about checking it.
Skipping the sour cream: I’ve had people ask if they can just use more milk instead. You can, technically, but the cake won’t be as tender or flavorful. The sour cream is doing real work here.
Not letting it cool before slicing: A warm cake will crumble. I know it’s tempting, but give it time to set up. You’ll get much cleaner slices.
My Tested Substitutions
For the sour cream: Greek yogurt works in a pinch, though it’s slightly tangier. Use the same amount. You could also use crème fraîche if you’re feeling fancy.
For the milk: Buttermilk adds a nice tang and works beautifully. Use the same amount. Regular whole milk, low-fat milk, or even oat milk all work fine.
For the eggs: I haven’t found a perfect substitute that maintains the same texture, but if you’re dealing with an allergy, egg replacer (following package directions) is your best bet. The cake will be slightly less tender but still good.
For the sprinkles: This is where you can have fun. Nonpareils (those little ball sprinkles) look gorgeous. Chocolate sprinkles are delicious. Even crushed candy canes work around the holidays. Just avoid anything liquid-filled, as those tend to bleed significantly.
How to Customize
Want to make this cake your own? Here are some ideas:
Change the flavor profile: Swap vanilla for almond extract, add citrus zest, or even a touch of peppermint extract. The base recipe is sturdy enough to handle these changes.
Make it a layer cake: Divide the batter between two greased and floured 8-inch round pans. Bake for 35 to 40 minutes instead. Layer with frosting and more sprinkles.
Add a glaze: A simple powdered sugar and milk glaze drizzled over the cooled cake is lovely. Or go full frosting with a cream cheese frosting.
Make mini versions: Divide the batter among a muffin tin. Bake for 18 to 22 minutes for individual cakes. Perfect for gifting.
Serving Ideas
This cake is delicious completely plain, but here are some ways to serve it:
- With a glass of cold milk (the classic pairing)
- With a dollop of whipped cream and fresh berries
- Toasted and buttered for breakfast (yes, really)
- With vanilla ice cream melting on top
- At a picnic with lemonade
- As an after-dinner dessert with coffee or tea
- Crumbled into a trifle with frosting and whipped cream
Meal Prep and Storage
Room temperature: Wrapped well in plastic wrap or stored in an airtight container, this cake keeps for 3 to 4 days on the counter. The flavor actually improves as it sits.
Refrigerator: You can store it for up to a week in the fridge, wrapped well. It won’t dry out as quickly as you might think.
Freezer: Wrap the cooled cake tightly in plastic wrap and then foil. It freezes beautifully for up to 3 months. Thaw at room temperature for about 2 hours before serving.
Individual slices: If you want to freeze slices, wrap each one individually in plastic wrap, then place them in a freezer bag. Grab one whenever you need a little something sweet.
Nutritional Breakdown
This recipe makes about 12 generous slices. Per slice, you’re looking at approximately:
- Calories: 385
- Protein: 5g
- Carbohydrates: 48g
- Fat: 19g
- Fiber: 0g
These are estimates based on standard ingredients. Actual nutrition will vary slightly depending on your specific brands and how you portion the cake.
Final Thoughts
I love this cake because it’s proof that you don’t need complicated techniques or fancy ingredients to make something that feels special. This Unfetti Sprinkle Pound Cake Recipe is just honest baking—good butter, fresh eggs, and a little bit of joy in the form of rainbow sprinkles.
When you pull this cake out of the oven and see those sprinkles peeking through the golden-brown top, you’re going to feel like a real baker. And you are. The fact that you’re making it from scratch, with your own two hands, using tested methods that actually work—that’s real baking.
I’d love to hear how it turns out for you. Bake this cake, take a photo if you feel like it, and most importantly, enjoy a slice with someone you care about. That’s what this is really all about.
Happy baking, friend.
Hailee
—
Unfetti Sprinkle Pound Cake Recipe
Ingredients
Method
- Preheat oven to 325 degrees Fahrenheit. Grease and flour a loaf pan or bundt cake pan.
- In a medium bowl, whisk together flour, baking powder, and salt. Set aside.
- Using an electric mixer, beat softened butter and sugar together for 3 to 4 minutes until pale and fluffy.
- Add eggs one at a time, beating well after each addition.
- Alternate adding dry ingredients and wet ingredients: one-third flour mixture, half the sour cream and milk mixture, another third flour, remaining sour cream and milk, final third flour. Add vanilla extract at the end. Mix on low speed just until combined after each addition.
- Toss 3/4 cup sprinkles lightly in flour, then fol