Chocolate Cheesecake Brownie Bars
Chocolate Cheesecake Brownie Bars
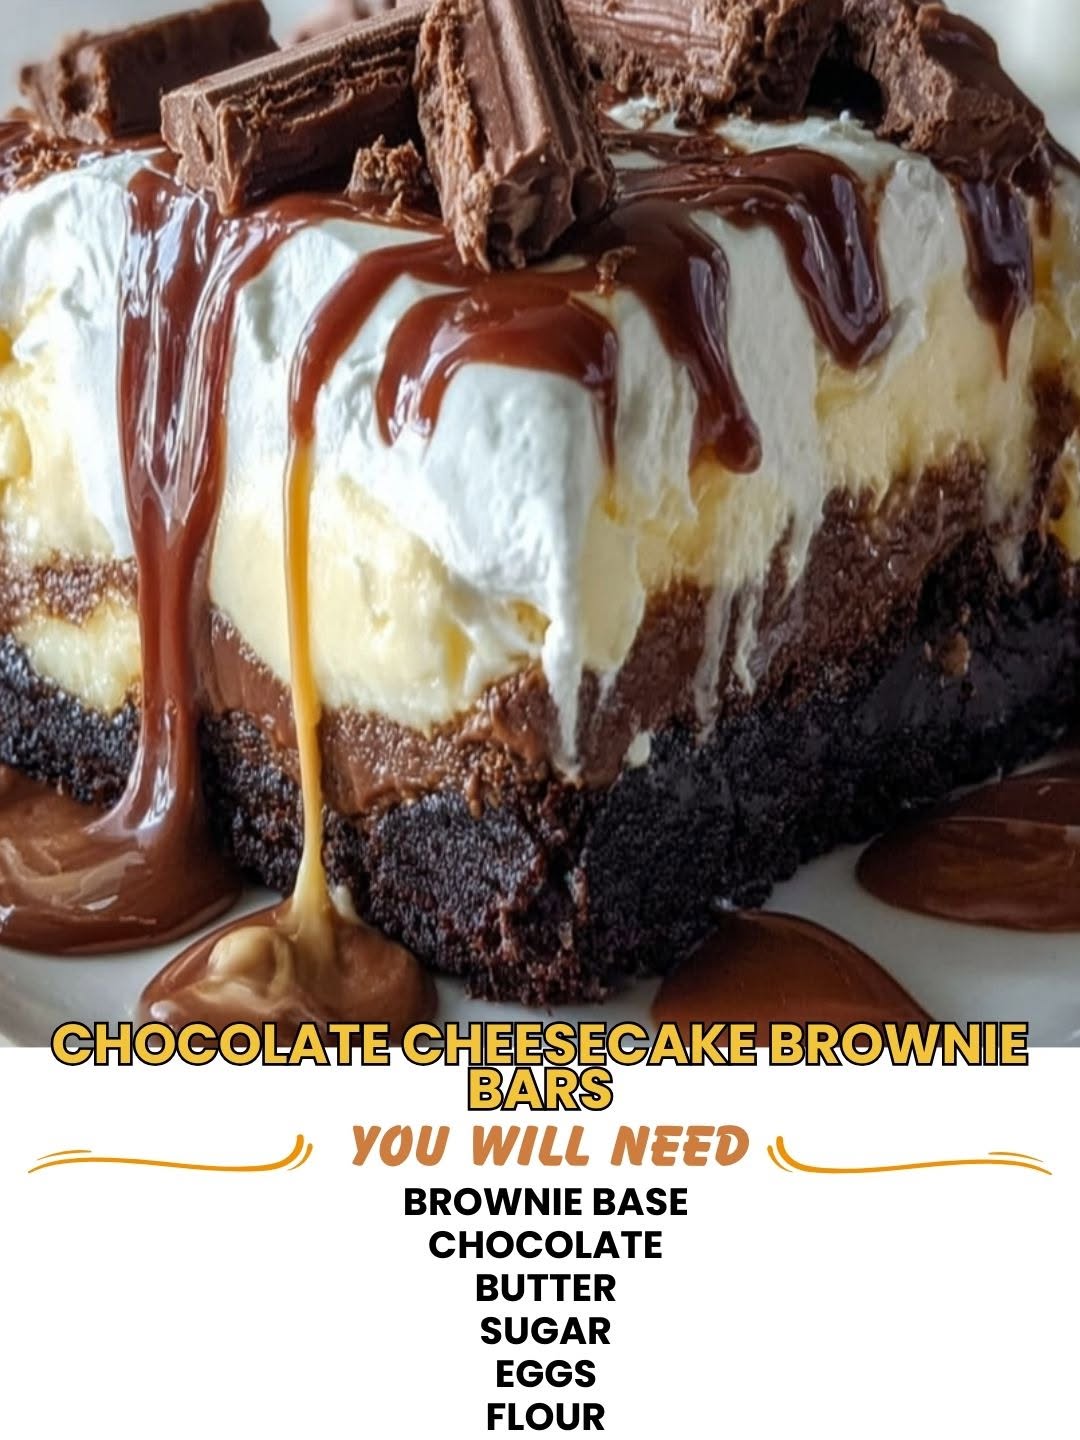
Chocolate Cheesecake Brownie Bars: A Love Letter to Two Desserts
I created these Chocolate Cheesecake Brownie Bars on a Tuesday night when I couldn’t decide between baking brownies or making cheesecake. My husband was sitting at the kitchen counter, half-joking that I should “just combine them already,” and honestly? He was onto something. I spent the next few hours experimenting, and what came out of the oven was this absolutely incredible hybrid dessert that I’ve made at least fifty times since.
Here’s the thing: these bars are fudgy, rich brownie layers sandwiched around a creamy, tangy cheesecake center. The top gets this beautiful marbled effect when you swirl the chocolate batter into the cheesecake. It looks fancy enough to impress your in-laws, but it’s genuinely easy enough that I make it on random weeknights when I’m craving something special. No fancy equipment, no weird ingredients, just good chocolate, cream cheese, and a little patience.
These bars are perfect for people who love chocolate, people who love cheesecake, people who can’t pick a favorite, and honestly, people who just want something that tastes like you spent three hours in the kitchen when you really only spent thirty minutes of actual work. I’ve made them for potlucks, bake sales, quiet Sundays at home, and they’ve never disappointed. If you’re looking for a dessert that feels indulgent but isn’t overly complicated, this is your recipe.
I share recipes like this all the time on my blog, and I’d love to have you follow along. Follow me on HaileeRecipes on Pinterest for more cozy, real-life recipes that actually work.
Why You’ll Love This Recipe
Let me be honest about what makes these bars special, because I don’t want to oversell it. These aren’t just brownies with cheesecake on top. The layers actually work together. The brownie base is dense and fudgy, the cheesecake layer is creamy and slightly tangy, and the brownie top gets just a little bit cakey from being baked over the cheesecake. It’s textural, it’s interesting, and every bite feels intentional.
They’re also incredibly forgiving. Your cheesecake doesn’t have to be perfectly smooth. Your brownie swirl doesn’t need to look like it came from a professional bakery. In fact, the more “homemade” looking they are, the better they taste, because it means you actually made them with your own hands.
Plus, they stay fresh for days. I’m not exaggerating when I say I’ve eaten these for breakfast, lunch, and dessert. They’re good straight from the fridge, they’re good at room temperature, and they’re even good warmed up slightly with a little vanilla ice cream on top.
Ingredients
For the Brownie Base:
- 1/2 cup (115g) unsalted butter
- 4 ounces (115g) semi-sweet or dark chocolate, chopped
- 3/4 cup (150g) granulated sugar
- 2 large eggs
- 1 teaspoon vanilla extract
- 3/4 cup (90g) all-purpose flour
- 1/4 cup (30g) unsweetened cocoa powder
- 1/4 teaspoon salt
- 1/4 teaspoon baking powder
For the Cheesecake Layer:
- 16 ounces (450g) cream cheese, softened to room temperature
- 1/2 cup (100g) granulated sugar
- 2 large eggs
- 1/4 cup (60ml) sour cream
- 1 teaspoon vanilla extract
- Pinch of salt
For the Brownie Top:
- 1/4 cup (60ml) vegetable oil
- 2 ounces (60g) semi-sweet or dark chocolate, chopped
- 1/4 cup (50g) granulated sugar
- 1 large egg
- 1/4 teaspoon vanilla extract
- 1/4 cup (30g) all-purpose flour
- 2 tablespoons (15g) unsweetened cocoa powder
- Pinch of salt
Hailee’s Tip: Room temperature cream cheese is non-negotiable here. If it’s cold, you’ll get lumps, and lumps mean an uneven texture. I usually leave mine on the counter for about an hour before I start baking. If you’re in a rush, cut it into chunks—it’ll soften faster.
Hailee’s Tip: Use chocolate you actually like eating. I know that sounds obvious, but seriously—don’t buy the cheapest chocolate chips you can find. This dessert is 90% chocolate flavor, so it matters. I use good quality semi-sweet or a mix of semi-sweet and dark.
Optional Add-Ins and Variations
This is where you get to make these bars your own. I’ve tested a bunch of additions, and here’s what actually works:
- Espresso powder: Add 1 teaspoon to the cheesecake layer for deeper chocolate flavor. It doesn’t taste like coffee, I promise.
- Peppermint extract: Replace 1/4 teaspoon of vanilla with peppermint extract in the cheesecake layer. Absolutely incredible in December.
- Sea salt: Sprinkle a tiny bit of fleur de sel on top of the brownie layer before baking. The salt-chocolate combo is chef’s kiss.
- Swirled in extras: After you layer everything, you can drop small spoonfuls of Nutella, peanut butter, or caramel sauce and swirl it in with a toothpick.
- Chocolate chunks: Mix in 1/2 cup of chopped chocolate or chocolate chips into the cheesecake layer for extra chocolate texture.
The one thing I don’t recommend adding is liquid flavorings or extracts beyond what’s in the recipe, because they can throw off the texture of the cheesecake. Stick to solids or dry ingredients if you’re experimenting.
Step-by-Step Method
Prep Work: Preheat your oven to 350°F. Line an 8×8-inch baking pan with parchment paper, leaving a little overhang on two sides so you can lift the bars out later. This makes your life so much easier.
Step 1: Make the Brownie Base
Melt the butter and chopped chocolate together. I do this in a microwave-safe bowl in 30-second intervals, stirring between each one, until everything’s smooth. This usually takes about 90 seconds total. Let it cool for a minute or two—you don’t want it piping hot when you add the eggs.
Whisk together the sugar, eggs, and vanilla in a separate bowl until it’s pale and fluffy, about 2 minutes. Then pour in the chocolate mixture and stir until combined. In another bowl, whisk together the flour, cocoa powder, salt, and baking powder. Fold the dry ingredients into the wet ingredients until just combined. Don’t overmix—you want it just barely combined.
Spread this batter into your prepared pan. It’ll be thick and fudgy. Use an offset spatula or the back of a spoon to get it even, but don’t stress if it’s not perfect. Press it down gently so it’s compact.
What I Messed Up: The first time I made these, I spread the brownie base too thin. I thought I was being efficient, but it made the bottom layer cake-like instead of fudgy. Use all of that batter and press it down firmly.
Step 2: Make the Cheesecake Layer
Using an electric mixer (or a lot of arm strength and a whisk), beat the softened cream cheese for about 2 minutes until it’s smooth and creamy. Scrape down the bowl. Add the sugar and beat for another minute. Add the eggs one at a time, beating on low speed after each addition. Add the sour cream, vanilla, and salt, and beat until everything’s combined and smooth.
Pour this mixture over your brownie base and smooth it out with a spatula. It should reach almost to the edges of the pan.
Step 3: Make the Brownie Top
Heat the oil and chopped chocolate together until melted and smooth. Let it cool slightly. Whisk together the sugar, egg, and vanilla in a separate bowl. Pour in the chocolate mixture and stir until combined. Whisk together the flour, cocoa powder, and salt in another bowl, then fold into the wet ingredients.
This batter will be thinner than the base batter. That’s normal. Drop spoonfuls of it over the cheesecake layer and use a toothpick or knife to swirl it around, creating a marbled effect. You can make it as swirly or as simple as you want.
What I Messed Up: I once tried to spread the top batter evenly with a spatula, and I ended up pushing it into the cheesecake layer and creating a muddy mess. Dropping spoonfuls and swirling is actually the way to go here.
Step 4: Bake
Bake for 30 to 35 minutes. The bars are done when the top looks set but still has a tiny bit of jiggle in the center when you gently shake the pan. A toothpick inserted in the brownie top should come out with just a few moist crumbs—not wet batter, but not completely clean either.
Let the bars cool completely in the pan on a wire rack. This takes about an hour. Then refrigerate for at least 4 hours, or overnight if you can wait that long. The cheesecake needs time to set, and the flavors actually improve after a day.
Step 5: Cut and Serve
Use the parchment paper overhang to lift the entire slab out of the pan. Place it on a cutting board. Using a sharp knife (I wipe mine clean between each cut), slice into 9 or 12 bars, depending on how indulgent you’re feeling. Wipe the knife between cuts for clean edges.
Common Mistakes to Avoid
Cold cream cheese: I mentioned this before, but it’s worth repeating. Cold cream cheese won’t mix properly, and you’ll end up with a lumpy cheesecake layer. Room temperature is essential.
Overbaking: This is the biggest mistake I see. These bars continue to cook as they cool, so they should look slightly underbaked when you take them out. If they look completely set and firm in the oven, they’ll be dry and cakey when you eat them. Trust the jiggle test.
Not chilling long enough: I know it’s tempting to cut into these right after they cool, but the cheesecake layer needs time to set. At minimum, 4 hours. Overnight is better. If you cut too early, they’ll fall apart.
Overmixing the batters: Each time you mix, you’re developing gluten, which makes things tough and cakey. Mix just until combined, then stop.
Skipping the parchment paper: Trust me on this. It makes cleanup easier and lifting the bars out of the pan so much simpler.
My Tested Substitutions
Can I use a 9×9 pan instead of 8×8? Yes, but the bars will be thinner and might bake a couple minutes faster. Start checking at 25 minutes instead of 30.
Can I use Greek yogurt instead of sour cream? You can, but the flavor will be slightly different—less tangy. I prefer the sour cream, but Greek yogurt works in a pinch.
What if I don’t have cocoa powder? You can add an extra ounce of chopped chocolate to the brownie batters, but the texture won’t be quite the same. Cocoa powder is really worth having on hand.
Can I use cream cheese substitute? I haven’t had great results with dairy-free cream cheese here. The texture gets weird. If you need a dairy-free version, I’d recommend a completely different recipe.
What about using oil instead of butter in the base? You can use half butter and half oil if you want a fudgier texture, but I wouldn’t go all oil. The butter flavor is important here.
How to Customize
These bars are a great canvas for your own ideas. Here’s how to make them uniquely yours without messing up the structure:
Flavor variations: Add a teaspoon of instant coffee powder to any of the layers for deeper chocolate flavor. Or add 1/2 teaspoon of cinnamon to the brownie layers for a warm, spiced vibe.
Toppings: After baking and before chilling, you can sprinkle the top with crushed Oreos, chopped nuts, or a tiny pinch of sea salt.
Mix-ins: Fold chopped nuts, chocolate chips, or even crushed candy into the cheesecake layer for texture. Just don’t add more than 1/2 cup total, or it’ll affect the baking time.
Chocolate type: I’ve made these with milk chocolate, dark chocolate, and a mix of both. Each one tastes slightly different. Dark chocolate makes them more sophisticated. Milk chocolate makes them sweeter and more approachable.
Serving Ideas
These bars are delicious on their own, but here’s how I actually serve them:
- With vanilla ice cream: Warm a bar slightly and top with a scoop of vanilla ice cream. The contrast of warm and cold is incredible.
- With fresh berries: Raspberries or strawberries cut through the richness beautifully.
- With whipped cream: A dollop of whipped cream on the side makes it feel fancy without much effort.
- With coffee: These are absolutely perfect with a cup of strong coffee or espresso. The bitterness balances the sweetness.
- Straight from the fridge: Honestly, sometimes the best way to serve them is cold, straight out of the fridge, with a cold glass of milk.
Meal Prep and Storage
In the fridge: These bars keep beautifully in the refrigerator for up to 5 days in an airtight container. I usually store them in a single layer with parchment paper between each bar so they don’t stick together.
In the freezer: You can freeze these for up to 3 months. Wrap each bar individually in plastic wrap, then place them in a freezer-safe container. Thaw in the refrigerator for a few hours before eating.
Make-ahead: You can make the brownie base and cheesecake layer the day before, refrigerate them separately, and then assemble and bake the next day. Just let the brownie base come to room temperature before topping with cheesecake.
Baking ahead: I often bake these the day before I need them, because they actually taste better after sitting overnight. The flavors meld, and the texture becomes even more fudgy.
Nutritional Breakdown
These are rich, indulgent bars, so I’m not going to pretend they’re light. One bar (if you cut them into 9 pieces) contains approximately:
- Calories: 380
- Protein: 7g
- Carbohydrates: 35g
- Fat: 24g
- Fiber: 2g
If you cut them into 12 smaller pieces, the numbers adjust accordingly. These are meant to be an occasional treat, not an everyday snack. But when you do have one, make it count.
Final Thoughts
I’ve made these Chocolate Cheesecake Brownie Bars more times than I can count, and I still get excited every single time I pull them out of the oven. There’s something really special about a dessert that combines two of the best things in the world—brownies and cheesecake—into one perfect package.
What I love most about this recipe is that it’s genuinely foolproof, but it doesn’t feel like it. Your friends and family will think you spent hours in the kitchen, when really you just mixed three simple batters and let the oven do the work. That’s the kind of recipe
Chocolate Cheesecake Brownie Bars
Ingredients
Method
- Prep Work: Preheat your oven to 350°F. Line an 8x8-inch baking pan with parchment paper, leaving a little overhang on two sides so you can lift the bars out later. This makes your life so much easier. Step 1: Make the Brownie Base Melt the butter and chopped chocolate together. I do this in a microwave-safe bowl in 30-second intervals, stirring between each one, until everything's smooth. This usually takes about 90 seconds total. Let it cool for a minute or two—you don't want it piping hot when you add the eggs. Whisk together the sugar, eggs, and vanilla in a separate bowl until it's pale and fluffy, about 2 minutes. Then pour in the chocolate mixture and stir until combined. In another bowl, whisk together the flour, cocoa powder, salt, and baking powder. Fold the dry ingredients into the wet ingredients until just combined. Don't overmix—you want it just barely combined. Spread this batter into your prepared pan. It'll be thick and fudgy. Use an offset spatula or the back of a spoon to get it even, but don't stress if it's not perfect. Press it down gently so it's compact. What I Messed Up: The first time I made these, I spread the brownie base too thin. I thought I was being efficient, but it made the bottom layer cake-like instead of fudgy. Use all of that batter and press it down firmly. Step 2: Make the Cheesecake Layer Using an electric mixer (or a lot of arm strength and a whisk), beat the softened cream cheese for about 2 minutes until it's smooth and creamy. Scrape down the bowl. Add the sugar and beat for another minute. Add the eggs one at a time, beating on low speed after each addition. Add the sour cream, vanilla, and salt, and beat until everything's combined and smooth. Pour this mixture over your brownie base and smooth it out with a spatula. It should reach almost to the edges of the pan. Step 3: Make the Brownie Top Heat the oil and chopped chocolate together until melted and smooth. Let it cool slightly. Whisk together the sugar, egg, and vanilla in a separate bowl. Pour in the chocolate mixture and stir until combined. Whisk together the flour, cocoa powder, and salt in another bowl, then fold into the wet ingredients. This batter will be thinner than the base batter. That's normal. Drop spoonfuls of it over the cheesecake layer and use a toothpick or knife to swirl it around, creating a marbled effect. You can make it as swirly or as simple as you want. What I Messed Up: I once tried to spread the top batter evenly with a spatula, and I ended up pushing it into the cheesecake layer and creating a muddy mess. Dropping spoonfuls and swirling is actually the way to go here. Step 4: Bake Bake for 30 to 35 minutes. The bars are done when the top looks set but still has a tiny bit of jiggle in the center when you gently shake the pan. A toothpick inserted in the brownie top should come out with just a few moist crumbs—not wet batter, but not completely clean either. Let the bars cool completely in the pan on a wire rack. This t