Raspberry Cream Layer Cake
Raspberry Cream Layer Cake
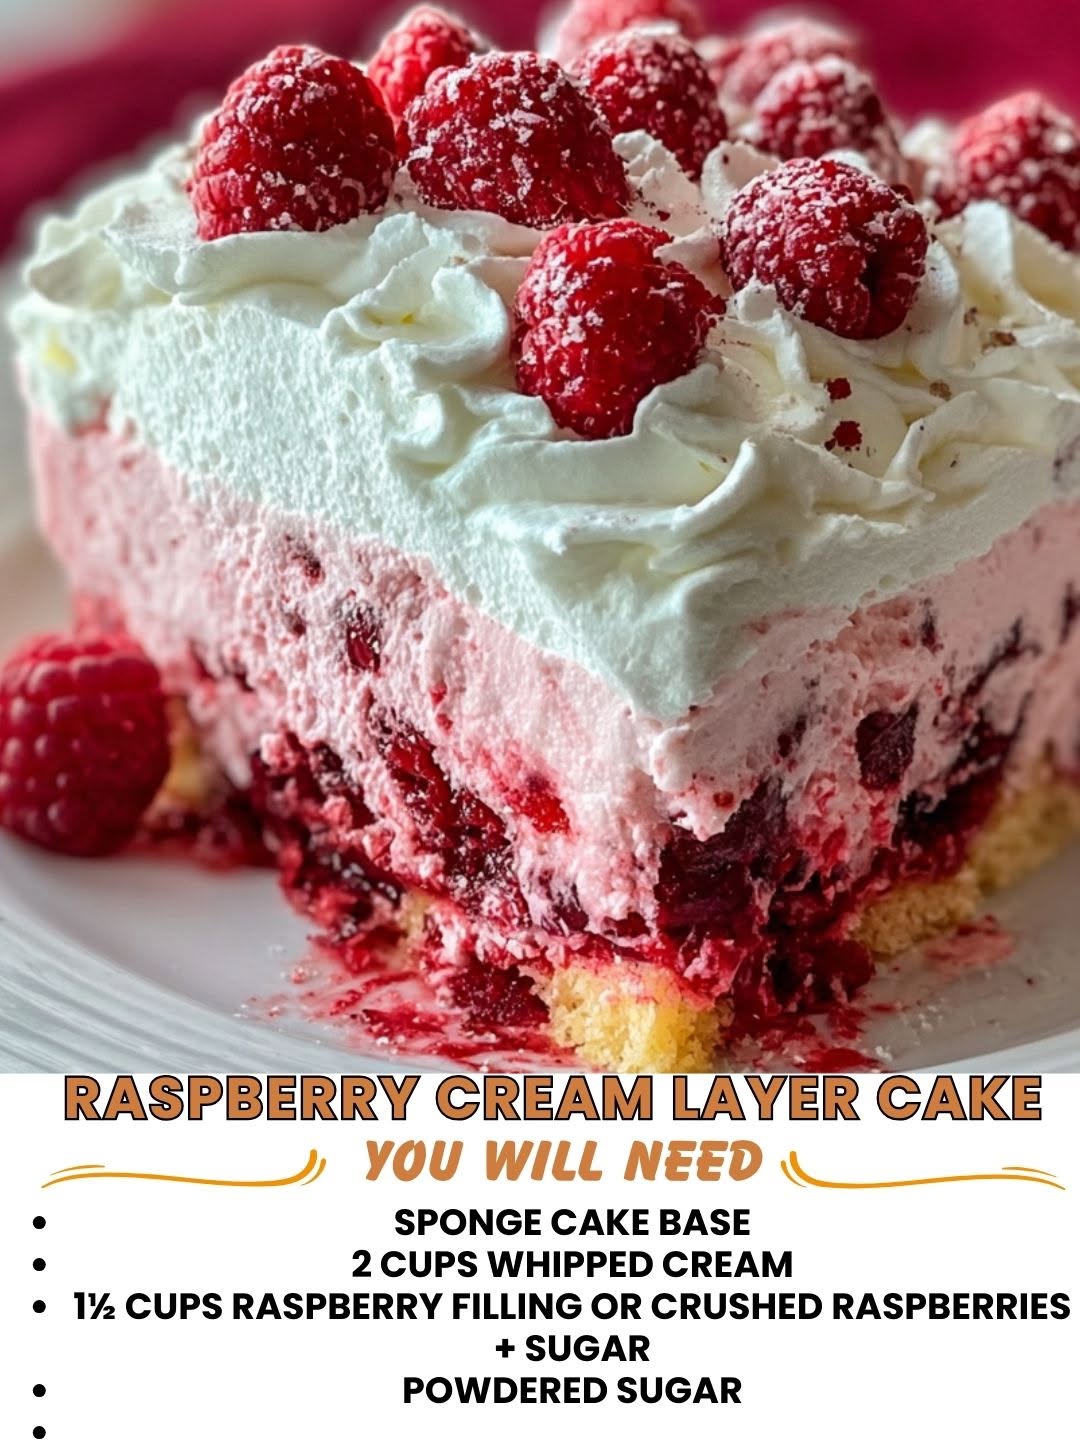
Raspberry Cream Layer Cake: A Recipe That Feels Like a Hug
I made this Raspberry Cream Layer Cake on a Tuesday night when I was craving something that tasted like summer but felt like home. You know that feeling? When you want dessert that’s elegant enough to impress people, but honest enough to eat standing up in your kitchen at 10 PM with a fork straight from the pan?
That’s this cake.
I’ve been baking for years, and I’ve learned that the best recipes are the ones that don’t pretend to be fancier than they actually are. This raspberry cream layer cake is beautiful—genuinely stunning when you slice into those layers—but it’s also forgiving, straightforward, and absolutely doable on a weeknight. The sponge cake is tender and moist. The cream filling is silky without being fussy. The raspberries are there to remind you why you bothered in the first place.
This recipe came together when my mom mentioned she missed the raspberry cake from a bakery that closed down years ago. I spent an afternoon reverse-engineering it in my kitchen, tasting and adjusting until I got it right. Now it’s become my go-to when I want to feel like I’ve really done something special without spending all day in the kitchen.
Whether you’re baking for a birthday, an afternoon gathering, or just because Tuesday deserves a little magic, this cake delivers. It’s impressive without being intimidating. It’s rich without being heavy. And honestly? It’s the kind of dessert that makes people ask for the recipe, and then actually make it.
If you love this kind of approachable, real-life baking, I’d love to have you Follow me on HaileeRecipes on Pinterest for more recipes that taste like they took all day but actually didn’t.
Why You’ll Love This Recipe
Let me be honest about what makes this cake special, because I don’t believe in overselling things.
First, the cake layers themselves are genuinely tender. I use a combination of buttermilk and a touch of almond extract to create this almost-cloud-like crumb that stays moist for days. You’re not getting that dry, sad cake situation that happens when people overbake or use the wrong ratio of ingredients.
Second, the cream filling is thick enough to hold everything together but silky enough that you actually want to eat it. It’s not overly sweet, which means you can have a bigger slice without feeling like your teeth are staging a revolt.
Third—and this is important—the raspberries stay fresh and don’t turn into sad, mushy disappointments. I have a specific technique for this that I’ll share in the method section, and it genuinely makes a difference.
Finally, this cake is actually manageable to make. You’re not doing anything complicated. No tempering, no special equipment, no techniques that require a culinary degree. If you can cream butter and sugar, you can make this cake.
Ingredients
For the Cake Layers:
- 2 cups all-purpose flour
- 1 teaspoon baking powder
- 1/2 teaspoon baking soda
- 1/2 teaspoon salt
- 3/4 cup unsalted butter, softened
- 1 1/2 cups granulated sugar
- 3 large eggs, room temperature
- 1 teaspoon vanilla extract
- 1/2 teaspoon almond extract
- 3/4 cup buttermilk, room temperature
Hailee’s Tip: Room temperature ingredients are your friend here. Cold butter won’t cream properly, and cold eggs won’t incorporate smoothly. Pull everything out of the fridge about an hour before you start baking. I know it feels like an extra step, but it genuinely changes the texture of your cake.
For the Cream Filling:
- 2 cups heavy whipping cream
- 4 tablespoons powdered sugar
- 1 teaspoon vanilla extract
- 4 ounces cream cheese, softened
- 2 tablespoons mascarpone (optional, but I highly recommend it)
Hailee’s Tip: The cream cheese and mascarpone make this filling stable and less likely to weep or separate. If you skip them, your cake will still be good, but the filling won’t hold up quite as long. Also, keep your mixing bowl and beaters in the freezer for 15 minutes before whipping the cream—it makes a real difference in texture.
For Assembly:
- 1 1/2 cups fresh raspberries
- 2 tablespoons raspberry jam (any kind, really)
- 1 tablespoon water
- Extra raspberries and mint for garnish (optional)
Hailee’s Tip: Fresh raspberries are worth buying from a good source. They’re the star here, so don’t grab the sad, mushy ones from the back of the shelf. If you can’t find good ones, frozen raspberries work beautifully too—just thaw them gently first.
Optional Add-Ins and Variations
This is where you can make this recipe your own without breaking anything.
Lemon Variation: Add the zest of one lemon to the cake batter and use lemon juice instead of some of the buttermilk. The tartness plays beautifully with raspberries. I do this probably once a month.
Chocolate Bottom Layer: If you want to get a little fancier, make one layer chocolate and one layer vanilla. It’s stunning when you slice it. Just replace 1/4 cup of flour with cocoa powder in one batch.
White Chocolate Cream: Melt 3 ounces of white chocolate and fold it into your cream filling. It adds richness without being overwhelming.
Boozy Version: Add 1 tablespoon of raspberry liqueur or chambord to the cream filling. Adults tend to appreciate this detail.
Coconut Cream: Use 1/2 cup coconut cream instead of some of the heavy cream. Toast a little coconut to sprinkle on top.
Step-by-Step Method
Step 1: Prepare Your Pans
Preheat your oven to 350°F. Grab two 8-inch round cake pans and line the bottoms with parchment paper. I butter the pans first, then press the parchment in—it stays put that way. Dust the sides with flour and tap out the excess. This is non-negotiable if you want your cakes to come out cleanly.
Step 2: Mix Your Dry Ingredients
In a medium bowl, whisk together flour, baking powder, baking soda, and salt. Set it aside. I like to whisk these together instead of just stirring because it aerates the flour slightly and helps everything distribute evenly. Small thing, big difference.
Step 3: Cream the Butter and Sugar
In a large bowl, beat the softened butter and sugar together for about 3 to 4 minutes. You want this to look pale, fluffy, and almost mousse-like. This is where the air gets incorporated into your cake, so don’t rush it. I usually scrape down the sides halfway through.
What I Messed Up: Early on, I’d skip this step or rush it because it seemed tedious. Then I wondered why my cakes were dense. Turns out, this step actually matters. Now I set a timer and let the mixer do its thing.
Step 4: Add the Eggs
Add your eggs one at a time, beating well after each addition. This takes about a minute per egg. After all three are in, add your vanilla and almond extract. The mixture should look smooth and creamy, not separated or curdled.
Step 5: Alternate Dry and Wet Ingredients
Here’s where people often go wrong. You’re going to add the flour mixture and buttermilk in alternating batches, starting and ending with flour. I do it like this: flour, buttermilk, flour, buttermilk, flour. Always start and end with dry. Beat on low speed after each addition, just until combined. Don’t overmix—you want to stop as soon as you don’t see streaks of flour anymore.
What I Messed Up: I used to dump everything in at once and wonder why my cakes were tough. Turns out, overmixing develops gluten, and that’s not what you want in cake. Now I’m deliberately gentle with this step.
Step 6: Divide and Bake
Divide the batter evenly between your prepared pans. I use a kitchen scale to make sure they’re truly equal—it helps the layers bake evenly. Smooth the tops gently. Bake for 28 to 32 minutes, until a toothpick inserted in the center comes out with just a few moist crumbs. Don’t overbake. Your cake should still be slightly underdone when you pull it out—it’ll continue cooking as it cools.
Step 7: Cool Properly
Let the cakes cool in their pans for about 10 minutes. Then run a thin knife around the edges and turn them out onto wire racks. Let them cool completely—and I mean completely—before you even think about frosting. This usually takes about an hour. I know it’s tempting to frost a warm cake, but warm cake + cold frosting = a sliding, messy situation.
Step 8: Make Your Cream Filling
While the cakes cool, make your filling. In a bowl, beat the heavy cream with powdered sugar and vanilla until it reaches soft peaks. Then, in a separate bowl, beat the softened cream cheese and mascarpone until smooth and combined. Gently fold the cream cheese mixture into the whipped cream. This filling is stable, creamy, and absolutely delicious. Don’t skip the folding—you want to keep it light.
Step 9: Prepare Your Raspberries
In a small saucepan, warm the raspberry jam with water over low heat until it’s thin and pourable. Toss your fresh raspberries gently in this mixture—this is the secret that keeps them from turning to mush. It creates a light glaze that protects them without making them soggy.
Step 10: Assemble the Cake
Place one cake layer on your serving plate or cake board. Spread about half of your cream filling on top. Arrange half of your raspberries over the cream. Place the second cake layer on top. Spread the remaining cream filling on top, then arrange the remaining raspberries. If you want, add some fresh mint for color.
What I Messed Up: I used to frost the sides of this cake, which looked nice but was unnecessary and made it harder to serve cleanly. Now I just do the top, and it looks intentional and beautiful.
Common Mistakes to Avoid
Using Cold Ingredients: This is the number one reason cakes come out dense. Seriously, pull everything out of the fridge ahead of time.
Overmixing the Batter: Mix until just combined after adding wet and dry ingredients. This isn’t bread dough. Overmixing makes tough cake.
Opening the Oven Door: I know you’re curious, but don’t peek constantly. It drops the temperature and can cause uneven baking. Check once around the 25-minute mark if you’re nervous.
Frosting Warm Cake: I mentioned this, but it bears repeating. Wait for complete cooling. I usually make the cake in the morning and frost it in the afternoon.
Skipping the Parchment Paper: Your cakes will stick. Use it. It takes 30 seconds and saves you from heartbreak.
Using Frozen Raspberries Without Thawing: They’ll release water into your cream and make everything watery. Thaw them first, or use the jam glaze I mentioned to protect them.
My Tested Substitutions
No Buttermilk? Mix regular milk with a tablespoon of lemon juice or vinegar and let it sit for 5 minutes. Works perfectly.
No Almond Extract? Use an extra 1/2 teaspoon of vanilla. You’ll lose a subtle flavor note, but the cake will still be delicious.
No Mascarpone? Use all cream cheese, or use Greek yogurt for a slightly tangier filling. Both work.
No Heavy Cream? You can use Greek yogurt mixed with a little milk, but your filling won’t be quite as stable. It’ll still taste good, just handle it gently.
No Fresh Raspberries? Frozen raspberries work beautifully. Thaw them gently and drain excess liquid. Blackberries or blueberries work too, though the flavor profile changes slightly.
How to Customize
This cake is a blank canvas in the best way. You can make it seasonal, dietary, or just exactly what you’re craving.
Make It Strawberry Instead: Use the same cake recipe but swap raspberries for sliced strawberries. Use strawberry jam in your glaze instead of raspberry.
Make It More Decadent: Add a thin layer of dark chocolate ganache between the cake and cream filling. Melt 4 ounces of chocolate with 1/4 cup cream and spread it on the first layer before adding the filling.
Make It Smaller: This recipe makes one 8-inch two-layer cake, which serves about 8 people. You can halve everything and make a smaller cake, or you can make three layers instead of two for a taller cake.
Make It Gluten-Free: Use a quality gluten-free all-purpose flour blend that has xanthan gum already in it. The cake won’t be quite as tender, but it’ll be very good.
Serving Ideas
This cake is perfect on its own, but here are some ways I like to serve it:
- With Afternoon Tea: Slice it thin, serve with hot tea or coffee. It’s elegant without being fussy.
- With a Scoop of Vanilla Ice Cream: Warm cake, cold ice cream, melting cream filling. It’s magic.
- With Fresh Whipped Cream: A dollop on top if you’re feeling generous.
- Deconstructed: Crumble the cake, layer it with cream and raspberries in a glass for a parfait situation.
- For a Crowd: Make it the centerpiece of a dessert table with other small bites around it.
Meal Prep and Storage
How Long Does It Last? This cake stays fresh and delicious for 3 to 4 days in the refrigerator. The cream filling keeps it moist, and the cool temperature actually helps the flavors develop.
How to Store It: Keep it in an airtight container on a shelf in your fridge. Don’t wrap it tightly in plastic wrap—it’ll get condensation and become soggy. A cake keeper or large container works best.
Can You Make It Ahead? Absolutely. You can bake the cake layers a day or two ahead and keep them wrapped in plastic wrap. You can make the cream filling ahead too. Assemble everything the day you want to serve it for the freshest raspberries.
Can You Freeze It? Yes, but only the unfrosted cake layers. Wrap them well and freeze for up to a month. Don’t freeze the assembled cake—the cream filling and raspberries don’t freeze well. Thaw the layers at room temperature before frosting.
Transporting This Cake: If you need to take it somewhere, keep it in a cake carrier on a flat surface. Don’t stack anything on top of it. If you’re worried about the raspberries shifting, you can add a few dabs of cream filling under them to anchor them.
Nutritional Breakdown
Here’s the honest nutritional information per serving (based on 8 servings):
- Calories: approximately 420
- Protein: 5g
- Carbohydrates: 48g
- Fat: 22g
- Fiber: 1g
- Sugar: 38g
Keep in mind that this is an estimate an
Raspberry Cream Layer Cake
Ingredients
Method
- Step 1: Prepare Your Pans Preheat your oven to 350°F. Grab two 8-inch round cake pans and line the bottoms with parchment paper. I butter the pans first, then press the parchment in—it stays put that way. Dust the sides with flour and tap out the excess. This is non-negotiable if you want your cakes to come out cleanly. Step 2: Mix Your Dry Ingredients In a medium bowl, whisk together flour, baking powder, baking soda, and salt. Set it aside. I like to whisk these together instead of just stirring because it aerates the flour slightly and helps everything distribute evenly. Small thing, big difference. Step 3: Cream the Butter and Sugar In a large bowl, beat the softened butter and sugar together for about 3 to 4 minutes. You want this to look pale, fluffy, and almost mousse-like. This is where the air gets incorporated into your cake, so don't rush it. I usually scrape down the sides halfway through. What I Messed Up: Early on, I'd skip this step or rush it because it seemed tedious. Then I wondered why my cakes were dense. Turns out, this step actually matters. Now I set a timer and let the mixer do its thing. Step 4: Add the Eggs Add your eggs one at a time, beating well after each addition. This takes about a minute per egg. After all three are in, add your vanilla and almond extract. The mixture should look smooth and creamy, not separated or curdled. Step 5: Alternate Dry and Wet Ingredients Here's where people often go wrong. You're going to add the flour mixture and buttermilk in alternating batches, starting and ending with flour. I do it like this: flour, buttermilk, flour, buttermilk, flour. Always start and end with dry. Beat on low speed after each addition, just until combined. Don't overmix—you want to stop as soon as you don't see streaks of flour anymore. What I Messed Up: I used to dump everything in at once and wonder why my cakes were tough. Turns out, overmixing develops gluten, and that's not what you want in cake. Now I'm deliberately gentle with this step. Step 6: Divide and Bake Divide the batter evenly between your prepared pans. I use a kitchen scale to make sure they're truly equal—it helps the layers bake evenly. Smooth the tops gently. Bake for 28 to 32 minutes, until a toothpick inserted in the center comes out with just a few moist crumbs. Don't overbake. Your cake should still be slightly underdone when you pull it out—it'll continue cooking as it cools. Step 7: Cool Properly Let the cakes cool in their pans for about 10 minutes. Then run a thin knife around the edges and turn them out onto wire racks. Let them cool completely—and I mean completely—before you even think about frosting. This usually takes about an hour. I know it's tempting to frost a warm cake, but warm cake + cold frosting = a sliding, messy situation. Step 8: Make Your Cream Filling While the cakes cool, make your filling. In a bowl, beat the heavy cream with powdered sugar and vanilla until it reaches soft peaks. Then, in a separate bowl, beat