Better Than STORE-BOUGHT CANDY
Better Than STORE-BOUGHT CANDY
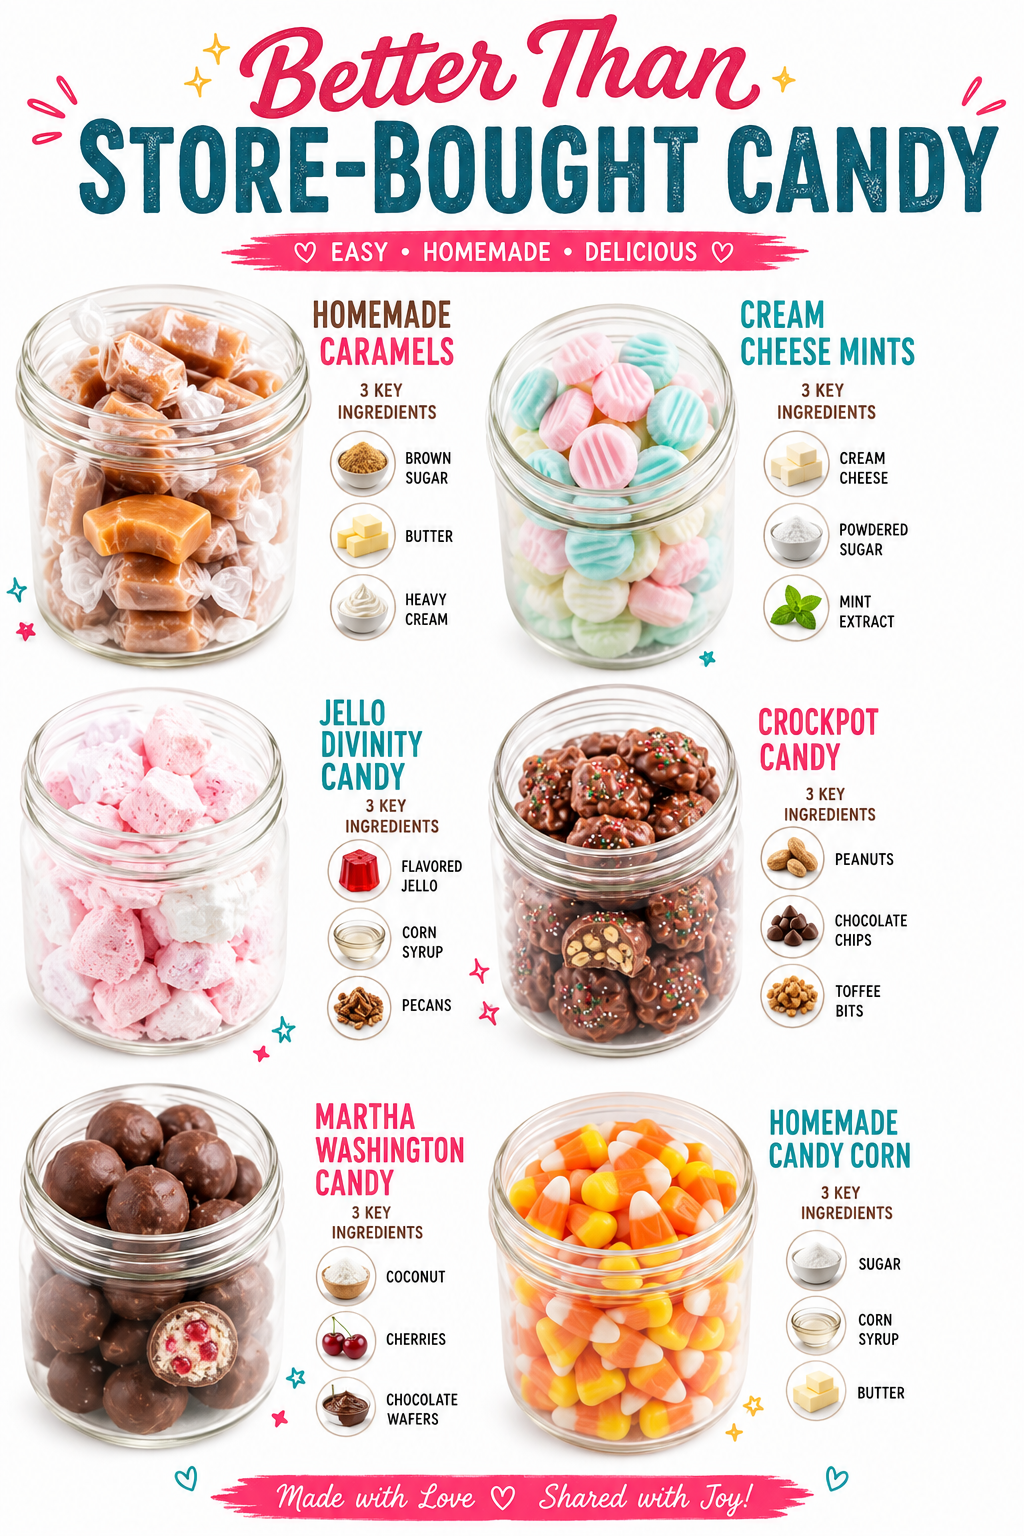
Better Than STORE-BOUGHT CANDY
Making candy at home transforms simple pantry staples into delightful treats that far exceed the texture and flavor of mass-produced options. This roundup gathers six classic recipes, from chewy homemade caramels to fluffy divinity, designed for both beginners and experienced cooks. Whether you are preparing a holiday gift basket or simply craving a sweet treat after dinner, these methods prioritize clear instructions and reliable results. Each recipe includes specific temperatures, timing cues, and storage advice to ensure success every time. For more seasonal inspiration and easy-to-follow guides, Follow me on HaileeRecipes on Pinterest. Save this collection to your favorites board and enjoy the satisfaction of creating something delicious from scratch.
1. Homemade Caramels
These homemade caramels feature a rich, buttery flavor and a soft, chewy texture that melts in your mouth. Unlike store-bought versions that can be overly sticky or hard, these candies offer a smooth consistency perfect for gifting or snacking. They are ideal for autumn holidays or as a sophisticated addition to a dessert charcuterie board.
Why You Will Love It
- Uses simple ingredients like heavy cream, butter, and sugar for a clean taste.
- Customizable thickness by adjusting cooking temperature slightly.
- Wraps beautifully in wax paper for homemade gifts.
Ingredients
- 1 cup (240ml) heavy cream
- 1 cup (2 sticks / 226g) unsalted butter, cubed
- 2 cups (400g) granulated sugar
- 1/2 cup (120ml) light corn syrup
- 1 teaspoon vanilla extract
- Pinch of salt
How To Make It
- Line an 8×8 inch baking pan with parchment paper, ensuring it overhangs the sides for easy removal later.
- In a medium saucepan, combine the heavy cream, butter, sugar, corn syrup, and salt. Heat over medium heat, stirring constantly until the butter melts and the mixture comes to a boil.
- Once boiling, stop stirring and attach a candy thermometer to the side of the pot. Cook until the mixture reaches exactly 245°F (118°C), which is the firm-ball stage.
- Remove from heat immediately and stir in the vanilla extract. Pour the hot caramel into the prepared pan and let it cool completely at room temperature for at least 4 hours.
- Lift the cooled slab out of the pan using the parchment paper and cut into small squares. Wrap individually in wax paper or cellophane bags.
Variations And Substitutions
For a chocolate twist, drizzle melted semi-sweet chocolate over the top before cutting. If you need a dairy-free option, substitute the heavy cream and butter with full-fat coconut milk and refined coconut oil, though the texture may be slightly less creamy.
Tips
Do not skip the candy thermometer; guessing the temperature often leads to caramels that are either too hard or too soft. Store finished caramels in an airtight container at room temperature for up to two weeks.
2. Cream Cheese Mints
Cream cheese mints are a nostalgic favorite known for their smooth, melt-in-your-mouth texture and subtle tang. These no-bake confections are quick to assemble and make excellent party favors or hostess gifts. Their delicate sweetness pairs wonderfully with coffee or tea.
Why You Will Love It
- No cooking required; ready in under 30 minutes.
- Requires only four basic ingredients found in most kitchens.
- Stays fresh for weeks when stored properly.
Ingredients
- 8 oz (226g) cream cheese, softened to room temperature
- 1 teaspoon vanilla extract
- 4 cups (480g) powdered sugar, sifted
- Red food coloring gel (optional)
How To Make It
- In a large mixing bowl, beat the softened cream cheese and vanilla extract together until smooth and free of lumps.
- Add the sifted powdered sugar one cup at a time, beating on low speed until a stiff dough forms. If the mixture feels too sticky, add more sugar; if too dry, add a teaspoon of milk.
- Divide the dough in half. Leave one half white and tint the other half with red food coloring gel until desired shade is reached.
- Scoop small amounts of dough (about 1/2 teaspoon) and roll between your palms to form balls. Place them on a baking sheet lined with parchment paper.
- Refrigerate the mints for at least 1 hour to firm up before serving or packaging.
Variations And Substitutions
You can add a drop of almond extract instead of vanilla for a different flavor profile. For a gluten-free version, ensure your powdered sugar is certified gluten-free, as some brands contain wheat starch.
Tips
Ensure the cream cheese is truly softened to avoid lumps in the final product. If the kitchen is very warm, chill the dough for 15 minutes before rolling to prevent sticking.
3. Jello Divinity Candy
Jello Divinity is a light, airy marshmallow-like candy made with gelatin and egg whites. The addition of lemon Jell-O gives it a bright citrus flavor and a vibrant color that stands out on any plate. This recipe yields a cloud-like texture that is surprisingly easy to whip up.
Why You Will Love It
- Whipped egg whites create an incredibly light and fluffy texture.
- Gelatin provides structure without the need for complex tempering.
- Perfect for spring parties or Easter celebrations.
Ingredients
- 1 envelope unflavored gelatin
- 1/2 cup cold water
- 1 box (3 oz) lemon-flavored gelatin
- 1 cup (240ml) water
- 2 cups (400g) granulated sugar
- 1/2 cup (120ml) light corn syrup
- 4 large egg whites, room temperature
- 1 teaspoon vanilla extract
- 1/2 cup chopped nuts (optional)
How To Make It
- In a small bowl, sprinkle the unflavored gelatin over the 1/2 cup cold water and let it bloom for 5 minutes.
- In a medium saucepan, combine the lemon gelatin, 1 cup water, sugar, and corn syrup. Bring to a boil over medium-high heat, then reduce to a simmer and cook until the mixture reaches 250°F (121°C).
- While the syrup cooks, beat the egg whites in a stand mixer fitted with the whisk attachment until soft peaks form.
- Slowly pour the hot syrup into the beaten egg whites while running the mixer on high speed. Add the bloomed unflavored gelatin and vanilla extract during the mixing process.
- Continue beating on high speed for 7–10 minutes until the mixture becomes thick, glossy, and holds stiff peaks.
- Fold in nuts if using. Drop spoonfuls onto wax paper and let set for 2 hours before serving.
Variations And Substitutions
Swap the lemon gelatin for cherry, lime, or orange flavors to change the taste. For a nut-free version, simply omit the nuts or replace them with mini chocolate chips.
Tips
The syrup must reach the correct temperature (250°F) for the candy to set properly. Do not open the oven or move the mixer while the egg whites are whipping, as vibrations can deflate the mixture.
4. Crockpot Candy
This slow-cooker peanut brittle is a crowd-pleaser that requires minimal supervision. By using a crockpot, the sugar and peanuts cook evenly without burning, resulting in a golden, crunchy treat that is easier to manage than stovetop versions.
Why You Will Love It
- Hands-off cooking method reduces the risk of burning.
- Large batch size makes it ideal for holiday stocking stuffers.
- Simple ingredients: peanuts, sugar, and butter.
Ingredients
- 2 cups (340g) raw peanuts
- 2 cups (400g) granulated sugar
- 1/2 cup (1 stick / 113g) unsalted butter
- 1/2 cup (120ml) light corn syrup
- 1/2 teaspoon baking soda
- 1 teaspoon vanilla extract
- 1/2 teaspoon salt
How To Make It
- Combine the peanuts, sugar, butter, corn syrup, and salt in a 3-quart or larger slow cooker. Stir to coat the peanuts.
- Cover and cook on High for 2 to 2.5 hours, stirring every 30 minutes to prevent sticking. The mixture will bubble vigorously and turn golden brown.
- When the mixture reaches a deep amber color and smells nutty, remove the lid. Carefully stir in the baking soda and vanilla extract; the candy will foam up significantly.
- Immediately pour the foaming mixture onto a greased baking sheet or a silicone mat. Use a spatula to spread it thin quickly before it hardens.
- Let the candy cool completely at room temperature until crisp, then break into irregular shards.
Variations And Substitutions
Almonds, cashews, or pecans can be substituted for peanuts. For a darker flavor, use dark brown sugar instead of white sugar, but monitor the color closely as it will darken faster.
Tips
Work quickly once the baking soda is added, as the candy hardens within minutes. Keep a spray bottle of water nearby to lightly mist your hands if the candy sticks while spreading.
5. Martha Washington Candy
Martha Washington candy is a vintage confection featuring a date and nut center coated in a rich chocolate shell. The dates provide natural sweetness and a moist interior, while the chocolate adds a satisfying snap. These bite-sized treats are elegant enough for formal events.
Why You Will Love It
- Combines the health benefits of dates with indulgent chocolate.
- Can be made ahead and stored for several days.
- Classic presentation looks professional with minimal effort.
Ingredients
- 1 lb (454g) pitted dates, chopped finely
- 1 cup (120g) chopped walnuts or pecans
- 1/2 cup (60g) all-purpose flour
- 1/2 cup (120ml) milk
- 1/2 cup (100g) granulated sugar
- 1/2 cup (1 stick / 113g) unsalted butter
- 1 teaspoon vanilla extract
- 12 oz (340g) semi-sweet chocolate chips
- 1 tablespoon shortening (for coating)
How To Make It
- In a saucepan, combine the dates, milk, sugar, and butter. Cook over medium-low heat, stirring frequently, until the mixture thickens and pulls away from the sides of the pan (about 10 minutes).
- Remove from heat and stir in the vanilla, flour, and chopped nuts. Allow the mixture to cool to room temperature, then refrigerate for 1 hour to firm up.
- Shape the chilled mixture into small balls (about 1 inch in diameter) using your hands.
- Melt the chocolate chips and shortening together in a microwave-safe bowl in 30-second intervals, stirring until smooth.
- Dip each ball into the chocolate using a fork, allowing excess to drip off, and place on wax paper. Let set at room temperature until the chocolate is firm.
Variations And Substitutions
Use dark chocolate or white chocolate for variety. For a gluten-free version, ensure your flour is replaced with a gluten-free 1:1 baking blend.
Tips
If the date mixture is too sticky to shape, chill it longer or wet your hands slightly with water. Store finished candies in the refrigerator to keep the chocolate from melting.
6. Homemade Candy Corn
Homemade candy corn offers a nostalgic fall flavor with a texture that is softer and less waxy than store-bought versions. Made with marshmallows and powdered sugar, these treats capture the essence of Halloween without artificial preservatives.
Why You Will Love It
- Uses real marshmallows for a superior texture.
- Easy to customize colors and sizes.
- Great activity for kids to help make.
Ingredients
- 1 bag (10 oz) marshmallows
- 1/2 cup (113g) unsalted butter
- 1/2 teaspoon vanilla extract
- 4 cups (480g) powdered sugar
- Yellow food coloring gel
- Orange food coloring gel
- White food coloring gel (or just leave white)
How To Make It
- Line a baking sheet with parchment paper and lightly grease it with butter.
- In a large saucepan over low heat, melt the marshmallows and butter together, stirring constantly until smooth. Remove from heat and stir in the vanilla.
- Gradually add the powdered sugar, mixing until a thick dough forms. Turn the dough out onto a surface dusted with powdered sugar.
- Knead the dough briefly, then divide it into three equal portions. Tint one portion yellow, one orange, and leave one white.
- Roll each colored portion into a long rope about 1 inch thick. Layer the ropes on top of each other (white on bottom, yellow middle, orange top) and press gently to bond.
- Cut the layered log into small triangular pieces (about 1/2 inch wide). Let them sit uncovered for 24 hours to dry and harden slightly.
Variations And Substitutions
Add a pinch of cinnamon to the white layer for a spiced flavor. For a vegan version, use plant-based marshmallows and coconut oil instead of butter.
Tips
Wear gloves while kneading the dough to prevent it from sticking to your hands. If the candy becomes too hard after drying, store it in an airtight container with a slice of bread to soften it slightly.
Final Thoughts
With these six recipes, you have everything needed to create a stunning assortment of homemade sweets. From the rich depth of caramels to the festive crunch of crockpot candy, each treat brings a unique charm to your table. We encourage you to save this article for your next baking session and pick one recipe to try first—perhaps the creamy cream cheese mints for a quick snack or the elaborate Martha Washington candy for a special occasion. Pair your creations with a glass of cold milk or a warm cup of coffee for the ultimate experience.
Better Than STORE-BOUGHT CANDY
Ingredients
Method
- Homemade Caramels: Combine cream, butter, sugar, corn syrup, and salt in a saucepan; boil to 245°F; remove from heat, stir in vanilla, pour into pan, cool, and cut into squares.
- Cream Cheese Mints: Beat cream cheese and vanilla; mix in powdered sugar; divide dough, tint half red, roll into balls, and refrigerate to firm.
- Jello Divinity Candy: Bloom gelatin; boil lemon gelatin, sugar, and syrup to 250°F; beat egg whites to soft peaks; slowly add hot syrup to eggs; add gelatin and vanilla; whip to stiff peaks; fold in nuts; drop onto wax paper.
- Crockpot Candy: Mix peanuts, sugar, butter, corn syrup, and salt in slow cooker; cook on high for 2-2.5 hours stirring occasionally; stir in baking soda and vanilla; pour onto greased sheet and break when cool.
- Martha Washington Candy: Cook dates, milk, sugar, and butter until thick; stir in flour, nuts, and vanilla; chill; shape into balls; dip in melted chocolate and shortening; let set.
- Homemade Candy Corn: Melt marshmallows and butter; mix in powdered sugar; divide dough into three parts, tint yellow, orange, and white; layer ropes, press, cut into triangles, and air dry.
Notes
Recipe 2 Tips: Chill dough if too sticky; store in fridge for freshness.
Recipe 3 Tips: Ensure syrup hits 250°F for proper setting; do not disturb while whipping.
Recipe 4 Tips: Work quickly after adding baking soda; keep water spray handy.
Recipe 5 Tips: Refrigerate finished candies to prevent chocolate melting.
Recipe 6 Tips: Air dry for 24 hours for best texture; store in airtight container.