Apple Fritter Waffle Donuts Recipe
Apple Fritter Waffle Donuts Recipe
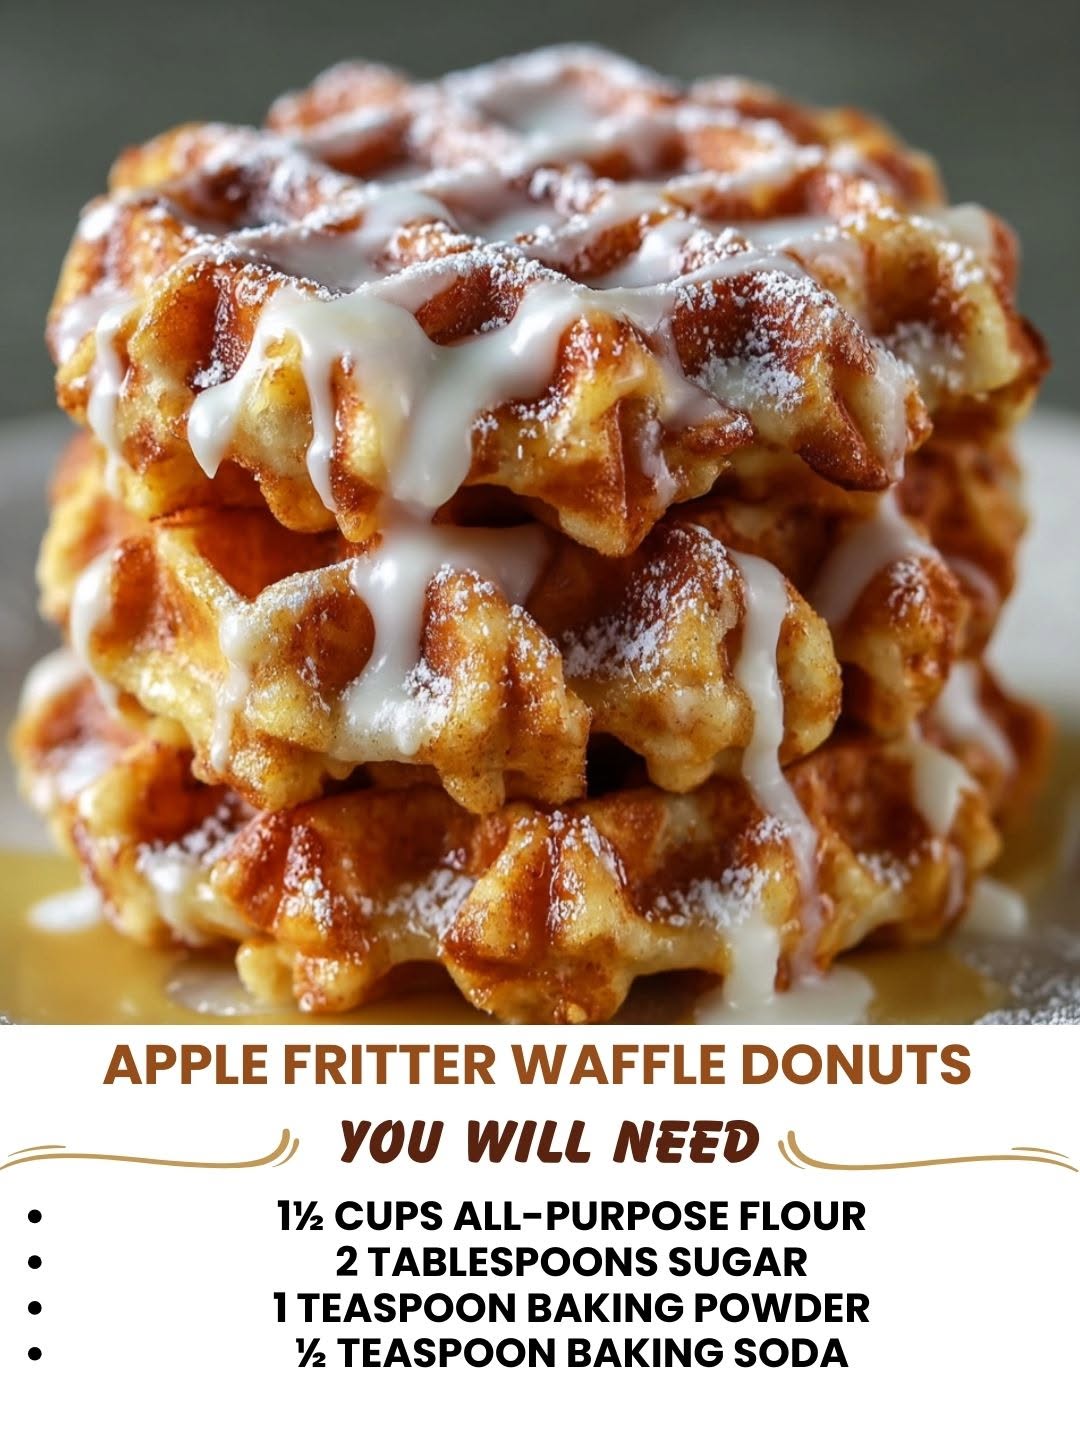
Apple Fritter Waffle Donuts Recipe: A Cozy Breakfast That Feels Like a Hug
I remember the exact moment this recipe came to life. It was a Sunday morning in late September, the kind where you wake up and everything feels a little slower, a little sweeter. My kitchen smelled like cinnamon from the apple crisp I’d made the night before, and I had a waffle maker sitting on the counter that I hadn’t used in months. My partner was scrolling through their phone, half-asleep with coffee in hand, when they said something like, “Wouldn’t it be wild if you could make a donut that was also a waffle? Like, crispy on the outside but still soft inside?”
That offhand comment stuck with me. I started thinking about all the textures I love in one bite: the soft spiced apples of a fritter, the cakey crumb of a donut, and that golden crispy exterior you get from a waffle maker. I spent the next two weeks tinkering, testing, and honestly, making a few batches that were… let’s just say they needed work. But then I nailed it. These Apple Fritter Waffle Donuts are now a regular fixture in my breakfast rotation, and I genuinely cannot stop making them.
Here’s what makes this recipe so special: it’s a hybrid that actually works. You’re using a donut batter that’s been perfectly seasoned with cinnamon and nutmeg, studded with tender apple chunks, and cooked in a waffle maker so it gets those beautiful crispy edges while staying soft inside. The result is something that tastes like a fried apple fritter but with way less oil and way more control. It’s approachable enough for a weekday breakfast but impressive enough to serve when people are visiting. And honestly? It’s just plain fun to make.
This recipe is for anyone who loves the idea of a donut but wants something a little more wholesome, a little more intentional. It’s for the waffle maker enthusiasts who’ve been waiting for something new to try. It’s for apple lovers, cinnamon obsessives, and anyone who thinks breakfast should taste like a warm hug. If you’re looking for that cozy, from-scratch feeling without spending your whole morning in the kitchen, this is it. Follow me on HaileeRecipes on Pinterest for more recipes like this one that feel special but don’t require a culinary degree.
Why You’ll Love This Recipe
Let me be honest about why I keep coming back to this recipe. First, the texture is genuinely unbeatable. You get that crispy, golden exterior from the waffle maker combined with a tender, moist interior that tastes like you spent way more time on it than you actually did. It’s the best of both worlds.
Second, the prep work is minimal. You’re not dealing with yeast, proofing times, or waiting around. You mix the batter, add your apples, and you’re cooking within ten minutes. That means you can wake up on a Saturday morning and have these ready before anyone else has even gotten out of bed.
Third, they’re naturally portion-controlled. A waffle maker gives you a consistent size, which means you’re not tempted to eat four donuts (though I won’t judge if you do). Each one is satisfying and filling, especially when you pair it with coffee or a glass of milk.
And finally, they’re versatile in the best way. You can make them plain, dress them up with glazes, serve them warm or at room temperature, and customize them to your taste. They’re breakfast, they’re dessert, they’re a snack. They work for a Tuesday morning or a Sunday brunch spread.
Ingredients for Apple Fritter Waffle Donuts
- 1 3/4 cups all-purpose flour — this is your base; don’t sift it unless your flour is really compacted
- 1/2 cup granulated sugar
- 2 teaspoons baking powder — this is what gives you that lift and tender crumb
- 1/2 teaspoon baking soda — works with the baking powder for rise
- 1 teaspoon ground cinnamon — adjust to your preference; I like mine generous
- 1/2 teaspoon ground nutmeg — don’t skip this; it adds warmth
- 1/4 teaspoon ground ginger — optional but adds a subtle spice note
- 1/4 teaspoon sea salt — balances the sweetness
- 2 large eggs — room temperature works best
- 1/2 cup buttermilk — if you don’t have it, mix regular milk with a tablespoon of lemon juice and let it sit for five minutes
- 1/4 cup melted butter — use real butter; it matters
- 1 teaspoon vanilla extract
- 2 medium apples (Granny Smith or Honeycrisp work best) — peeled, cored, and diced into small pieces, about 1/4 inch
- Cooking spray or oil — for the waffle maker
Hailee’s Tip: Don’t use apple juice or applesauce as a substitute for fresh apples here. The texture won’t be the same, and you’ll lose that satisfying bite. Fresh apples are essential.
Hailee’s Tip: If your apples are very juicy, pat them dry with a paper towel before folding them in. Excess moisture can make the batter too wet.
Optional Add-Ins and Variations
This is where you get to make this recipe your own. I love the classic version, but here’s what I’ve played around with:
- Caramel drizzle: Mix melted caramel sauce with a tiny bit of water and drizzle over warm waffle donuts. Pure comfort.
- Maple glaze: Whisk together powdered sugar, maple syrup, and a splash of milk for a glaze that tastes like fall.
- Chopped pecans or walnuts: Add 1/3 cup to the batter for crunch. Toast them first for more flavor.
- Brown sugar cinnamon topping: Mix brown sugar and cinnamon, then brush the warm waffle donuts with melted butter and coat immediately.
- Cream cheese filling: If you’re feeling fancy, pipe a little cream cheese between two waffle donuts for a sandwich effect.
- Pear instead of apple: Use half apple and half diced pear for a slightly different flavor profile.
Step-by-Step Method
Step 1: Preheat and Prepare
Get your waffle maker heating up. This is important because a properly heated waffle maker is the difference between golden and pale. While it’s warming, peel, core, and dice your apples. I like to do this right before I mix the batter so they don’t have time to brown.
Step 2: Mix Your Dry Ingredients
In a large bowl, whisk together the flour, sugar, baking powder, baking soda, cinnamon, nutmeg, ginger, and salt. I use a whisk because it aerates the mixture slightly and helps distribute the leavening agents evenly. Don’t overthink this step — just combine everything until it looks uniform.
Step 3: Combine Your Wet Ingredients
In a separate bowl, whisk together the eggs, buttermilk, melted butter, and vanilla extract. Make sure the eggs are well beaten and everything is combined. This is a good time to make sure there are no lumps of butter floating around.
Step 4: Bring It Together
Pour the wet ingredients into the dry ingredients. Here’s where I usually mess up: I overmix. Don’t do that. Stir just until the batter comes together. It’s okay if there are a few small lumps. Overmixing develops gluten, which makes these tough instead of tender. I learned this the hard way after my first batch felt like eating a hockey puck.
Step 5: Add the Apples
Gently fold in the diced apples. Make sure they’re distributed throughout the batter but don’t beat them into submission. You want distinct apple pieces, not apple mush.
Step 6: Cook Your Waffle Donuts
Lightly spray or oil your waffle maker. I use a pastry brush to apply oil because it’s more controlled. Scoop about 1/3 cup of batter into the center of each waffle maker cavity (adjust based on your waffle maker size). Close the lid gently — don’t slam it. Cook for about 4 to 5 minutes, until the exterior is golden and crispy. The waffle maker will usually beep when they’re done, but I like to check by opening it slightly to peek. If they’re not golden enough, give it another minute.
Step 7: Cool and Serve
Transfer the finished waffle donuts to a wire rack. This keeps the bottom from getting soggy. Serve warm with your choice of toppings or glaze. They’re best eaten within an hour of making, but they’ll keep for a few hours at room temperature.
Common Mistakes to Avoid
Overmixing the batter: This is the biggest culprit behind tough, dense waffle donuts. Mix just until combined. A few small lumps are your friend.
Using wet apples: If your apples release too much moisture, your batter becomes too thin and your waffle donuts turn out soggy. Dice them fresh and pat them dry if needed.
Not preheating the waffle maker: A cold waffle maker means uneven cooking and pale results. Give it a full five minutes to heat up.
Overfilling the waffle maker: I know the temptation is real, but too much batter spills over and makes a mess. Stick with about 1/3 cup per waffle.
Opening the waffle maker too early: Patience is key here. Wait until the steam has mostly stopped and the exterior looks set before peeking. Opening too early can cause them to fall apart.
My Tested Substitutions
For buttermilk: Mix regular milk with lemon juice or white vinegar (1 tablespoon acid per 1 cup milk) and let sit for five minutes. It works just as well and you probably have it on hand.
For all-purpose flour: You can use a one-to-one gluten-free flour blend if needed. The texture might be slightly different, but it still works. I’d recommend adding an extra 1/4 teaspoon of xanthan gum if your blend doesn’t already have it.
For butter: Coconut oil or vegetable oil work in a pinch, though you’ll lose a bit of that buttery flavor. I wouldn’t recommend this substitution if you can avoid it.
For eggs: If you need to go egg-free, try a flax egg (1 tablespoon ground flaxseed mixed with 3 tablespoons water per egg) or applesauce (1/4 cup per egg). The texture will be slightly different but still good.
How to Customize
One of my favorite things about this recipe is how customizable it is. Here are some ideas I’ve tried:
Different spices: Add a pinch of cardamom or allspice if you want to experiment. Start small — 1/8 teaspoon — and taste as you go.
Brown sugar instead of white: Use 1/2 cup packed brown sugar for a deeper, molasses-forward flavor.
Add citrus zest: A teaspoon of lemon or orange zest adds brightness that complements the apple beautifully.
Make them savory: Reduce the sugar to 1/4 cup, skip the sweet spices, add fresh herbs like thyme, and use sharp cheddar instead of apple. I know this sounds wild, but trust me.
Serving Ideas
These waffle donuts are delicious on their own, but here’s how I like to serve them:
- With a simple cinnamon sugar: Brush warm waffle donuts with melted butter and coat with cinnamon and sugar. Classic and perfect.
- With maple syrup: Warm maple syrup poured over the top. Nothing fancy, just delicious.
- With a glaze: Make a quick glaze by whisking powdered sugar with a splash of milk and vanilla. Drizzle generously.
- With whipped cream and caramel: If you’re feeling indulgent, top with a dollop of whipped cream and a drizzle of caramel sauce.
- With yogurt and granola: Serve alongside Greek yogurt and granola for a breakfast that feels a little more balanced.
- With fresh whipped cream and apple compote: Make a quick apple compote by cooking down diced apples with a little sugar and cinnamon, then serve with whipped cream and your waffle donuts.
Meal Prep and Storage
Same-day storage: Keep finished waffle donuts in an airtight container at room temperature for up to 4 hours. They’re best eaten warm, but they’re still good at room temperature.
Refrigerator storage: Store in an airtight container in the fridge for up to 3 days. Reheat in a 350°F oven for about 5 minutes to restore crispiness.
Freezer storage: These freeze beautifully for up to 2 months. Lay them out on a baking sheet to freeze individually first, then transfer to a freezer bag. Reheat directly from frozen in a 350°F oven for about 8 to 10 minutes.
Make-ahead batter: You can prepare the dry ingredients the night before and store them in an airtight container. Mix the wet ingredients fresh in the morning and combine just before cooking. Don’t add the apples until right before cooking — they’ll release moisture and make the batter soggy.
Nutritional Breakdown
Here’s what you’re looking at per waffle donut (based on the recipe making about 8 waffle donuts):
- Calories: approximately 210
- Protein: 4g
- Carbohydrates: 32g
- Fat: 8g
- Fiber: 1g
- Sugar: 16g
These numbers can vary slightly depending on your specific ingredients and how much batter you use per waffle donut. If you’re adding glazes or toppings, add those calories to the total.
Final Thoughts from Me
I love this recipe because it feels special without being complicated. It’s the kind of breakfast that makes you feel like you’re taking care of yourself, even when you’re moving fast. There’s something genuinely comforting about a warm, crispy waffle donut with soft apple pieces inside and cinnamon sugar on top.
I hope you make these soon. I hope they become a regular thing in your kitchen the way they have in mine. And I hope that when you bite into one and get that perfect combination of crispy exterior and tender interior with a burst of apple flavor, you feel a little bit of that cozy, slow-morning feeling that inspired me to create this recipe in the first place.
If you make them, I’d love to hear about it. Come back and let me know what you thought, what toppings you chose, or how you customized them. That’s the best part of sharing recipes — hearing about how they land in your kitchen and your life.
Happy cooking, and enjoy every warm, delicious bite.
Hailee
—
Apple Fritter Waffle Donuts Recipe
Ingredients
Method
- Step 1: Preheat and Prepare Get your waffle maker heating up. This is important because a properly heated waffle maker is the difference between golden and pale. While it's warming, peel, core, and dice your apples. I like to do this right before I mix the batter so they don't have time to brown. Step 2: Mix Your Dry Ingredients In a large bowl, whisk together the flour, sugar, baking powder, baking soda, cinnamon, nutmeg, ginger, and salt. I use a whisk because it aerates the mixture slightly and helps distribute the leavening agents evenly. Don't overthink this step — just combine everything until it looks uniform. Step 3: Combine Your Wet Ingredients In a separate bowl, whisk together the eggs, buttermilk, melted butter, and vanilla extract. Make sure the eggs are well beaten and everything is combined. This is a good time to make sure there are no lumps of butter floating around. Step 4: Bring It Together Pour the wet ingredients into the dry ingredients. Here's where I usually mess up: I overmix. Don't do that. Stir just until the batter comes together. It's okay if there are a few small lumps. Overmixing develops gluten, which makes these tough instead of tender. I learned this the hard way after my first batch felt like eating a hockey puck. Step 5: Add the Apples Gently fold in the diced apples. Make sure they're distributed throughout the batter but don't beat them into submission. You want distinct apple pieces, not apple mush. Step 6: Cook Your Waffle Donuts Lightly spray or oil your waffle maker. I use a pastry brush to apply oil because it's more controlled. Scoop about 1/3 cup of batter into the center of each waffle maker cavity (adjust based on your waffle maker size). Close the lid gently — don't slam it. Cook for about 4 to 5 minutes, until the exterior is golden and crispy. The waffle maker will usually beep when they're done, but I like to check by opening it slightly to peek. If they're not golden enough, give it another minute. Step 7: Cool and Serve Transfer the finished waffle donuts to a wire rack. This keeps the bottom from getting soggy. Serve warm with your choice of toppings or glaze. They're best eaten within an hour of making, but they'll keep for a few hours at room temperature.