Classic Baked Mac & Cheese
Classic Baked Mac & Cheese
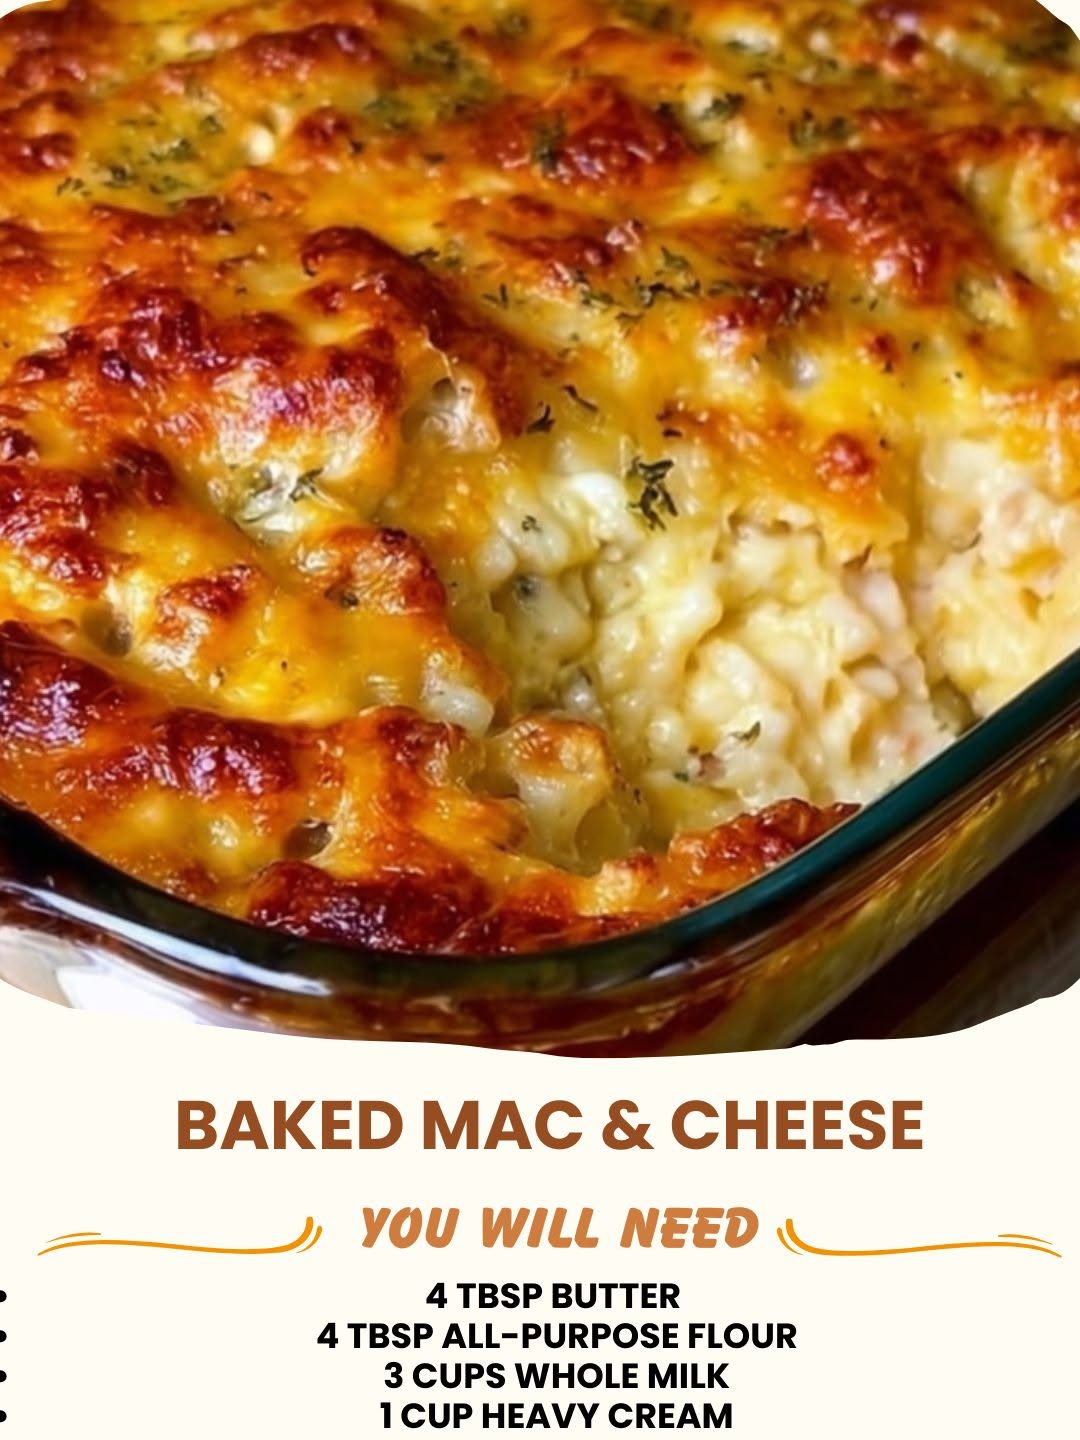
Classic Baked Mac & Cheese: A Comfort Food That Actually Tastes Homemade
There’s this moment on a Tuesday night when I’m standing in my kitchen, completely exhausted, and all I want is something warm that tastes like someone actually cares. That’s when I make mac and cheese. Not the blue box kind (though hey, no judgment—we’ve all been there), but the real deal. The kind with actual cheese, a silky sauce, and that golden, crispy top that makes you feel like you’re eating something special, even though it’s honestly pretty simple to pull together.
I grew up watching my mom make this exact recipe. She’d melt butter in a big pot, whisk in flour, add milk slowly so it wouldn’t get lumpy, and then—the magic part—she’d grate real cheddar cheese into that creamy sauce. The whole kitchen would smell incredible. I remember thinking it was this fancy, complicated thing that only grown-ups could make. Turns out, it’s not. It’s just butter, flour, milk, cheese, and pasta. That’s it. But somehow, when you combine those five things with a little care and attention, you get something that tastes like home.
This Classic Baked Mac & Cheese is for anyone who wants comfort food without the fuss. It’s for busy weeknight dinners, potlucks where you want to actually impress people, and those nights when you’re feeding a crowd and need something filling that everyone will eat. It’s also perfect if you’re new to cooking and want to learn a foundational skill—making a proper cheese sauce from scratch is genuinely useful knowledge you’ll use forever.
If you love easy, reliable recipes that actually work, follow me on HaileeRecipes on Pinterest for more comfort food recipes that won’t let you down.
Why You’ll Love This Recipe
Okay, let me be honest about what makes this different from other mac and cheese recipes you might find. First, it actually tastes like cheese. I’m not using some weird processed sauce or trying to hide the flavor under a bunch of breadcrumbs. You taste real cheddar, and it’s creamy without being heavy or greasy.
Second, this recipe is forgiving. I’ve made it a thousand times, and I’ve messed up in basically every way possible. Too much milk? Still works. Cheese not melting smoothly? I’ll walk you through fixing it. The pasta a little overcooked? Honestly, it still tastes good. This isn’t some precious recipe that falls apart if you breathe on it wrong.
Third, it actually bakes. That top gets golden and slightly crispy, and the whole thing comes together in a way that feels more intentional than stovetop mac and cheese. There’s something about putting it in the oven that makes it feel like you really cooked something.
Finally, it’s genuinely customizable. Want to add bacon? Do it. Jalapeños? Sure. Breadcrumbs on top? Absolutely. This recipe is a solid foundation that you can build on, not a rigid formula that breaks if you deviate.
Ingredients
- 1 pound elbow pasta — Hailee’s Tip: Don’t use the fancy shapes here. Elbow pasta is the classic for a reason. It holds the sauce perfectly and cooks evenly.
- 4 tablespoons butter — Hailee’s Tip: Use real butter, not margarine. It matters more here than you’d think.
- 3 tablespoons all-purpose flour — Hailee’s Tip: This is your thickener. Make sure you cook it with the butter for about a minute before adding milk, or you’ll have a grainy sauce.
- 3 cups whole milk — Hailee’s Tip: Whole milk is important. Low-fat milk can make the sauce feel thin and sad. If you only have 2%, it’ll still work, but add it slowly and watch the consistency.
- 3 cups sharp cheddar cheese, shredded — Hailee’s Tip: Shred it yourself from a block if you can. Pre-shredded cheese has anti-caking agents that can make your sauce grainy. If you’re using pre-shredded, toss it with a tiny pinch of cornstarch before adding it to the sauce.
- 1 cup mild cheddar cheese, shredded — Hailee’s Tip: This mellows out the sharpness and makes the flavor more balanced. You can use all sharp if you prefer, but I like the combo.
- 1 teaspoon salt — Hailee’s Tip: Taste as you go. You might need a tiny bit more depending on your cheese.
- ½ teaspoon black pepper
- ¼ teaspoon garlic powder — Hailee’s Tip: Optional but really nice. It adds a subtle savory depth.
- ¼ teaspoon cayenne pepper — Hailee’s Tip: Just a pinch. This isn’t about heat; it’s about making the cheese flavor pop.
- ½ cup panko breadcrumbs (optional, for topping)
- 2 tablespoons melted butter (for the breadcrumb topping)
Optional Add-Ins and Variations
Here’s where you get to make this recipe your own. The base is solid, but there’s so much room to play around.
- Bacon: Cook 6-8 strips until crispy, crumble it, and stir it into the sauce before baking. This is never a bad idea.
- Fresh herbs: Stir in fresh thyme, chives, or parsley right before baking. Use about 2 tablespoons of fresh herbs.
- Jalapeños: Dice up 2-3 fresh jalapeños and add them to the sauce. You can also use pickled jalapeños if that’s what you have.
- Smoked paprika: Add ½ teaspoon for a subtle smoky flavor that’s really nice.
- Nutmeg: Just a tiny pinch—like ⅛ teaspoon. It sounds weird, but it’s classic in cheese sauces and adds warmth.
- Cream cheese: Replace ½ cup of the cheddar with cream cheese for a creamier, richer texture.
- Gruyère: Use 1 cup gruyère instead of mild cheddar for a more sophisticated flavor.
- Caramelized onions: If you have time, caramelize 1 large onion and stir it in. It adds sweetness and depth.
Step-by-Step Method
Step 1: Cook the pasta
Bring a large pot of salted water to a boil. Add your elbow pasta and cook it until it’s just barely al dente—and I mean barely. You want it to still have a tiny bit of resistance when you bite it. This is important because it’s going to cook a little more in the oven. I usually cook mine for about 1 minute less than the box says. Drain it, but don’t rinse it. The starch on the pasta helps the sauce cling to it.
What I messed up: For years, I cooked the pasta all the way through and then wondered why my mac and cheese turned mushy. Don’t do that.
Step 2: Make the roux
In a large saucepan or Dutch oven, melt the butter over medium heat. Once it’s melted and foamy, add the flour. Stir it constantly for about 1-2 minutes. This is called making a roux, and it’s the base of your sauce. You’re cooking out the raw flour taste and creating a thickener. It should smell a bit nutty and toasty. Don’t let it brown too much, though.
What I messed up: I used to skip this step or rush through it, and then my sauce would taste floury and weird. That minute or two makes a real difference.
Step 3: Add the milk slowly
Here’s where you need to be a little patient. Pour in the milk slowly while whisking constantly. Start with about ½ cup, whisk until it’s smooth, and then add the rest gradually. This prevents lumps. If you dump all the milk in at once, you’ll get clumps of flour that won’t smooth out, and your sauce will be grainy. Keep whisking until it’s smooth and creamy.
What I messed up: The first time I made this, I was impatient and poured the milk in too fast. I ended up with a lumpy sauce and had to strain it through a sieve. Not fun. Go slow. It takes maybe 3 minutes, and it’s worth it.
Step 4: Cook the sauce
Keep the heat at medium and let the sauce cook, stirring occasionally, for about 5-8 minutes. It should thicken and coat the back of a spoon. You’ll see it go from thin and pourable to thick and creamy. This is the right time to add your salt, pepper, garlic powder, and cayenne. Taste it and adjust as needed.
Step 5: Add the cheese
Remove the pan from the heat. This is important—you don’t want the cheese cooking on high heat. Add the shredded cheddar cheese a handful at a time, stirring until each handful is completely melted before adding more. The residual heat will melt it perfectly. Once all the cheese is melted and the sauce is smooth and creamy, you’re good to go.
What I messed up: I used to add all the cheese at once and then wonder why it was grainy and broken. Patience, my friend. Add it slowly.
Step 6: Combine pasta and sauce
Add the cooked pasta to the cheese sauce and stir until every piece is coated. This should take just a minute or two. It’ll look like a lot of sauce, but that’s correct. The pasta will absorb some of it as it bakes.
Step 7: Transfer to a baking dish
Preheat your oven to 350°F. Pour the mac and cheese into a buttered 9×13 baking dish (or a similar size). Spread it out evenly.
Step 8: Add the breadcrumb topping (optional but recommended)
If you’re using breadcrumbs, mix the panko with the 2 tablespoons of melted butter and a pinch of salt. Sprinkle it evenly over the top of the mac and cheese. This will get golden and crispy in the oven, which is honestly the best part.
Step 9: Bake
Bake for 25-30 minutes, until the top is golden brown and the sauce is bubbling around the edges. If you’re using breadcrumbs and they’re browning too fast, you can tent the dish loosely with foil for the last 10 minutes. Let it rest for 5 minutes before serving. This helps it set up a bit and makes it easier to scoop.
Common Mistakes to Avoid
Overcooking the pasta: This is the number one mistake I see. Your pasta will cook more in the oven, so cook it just under al dente.
Skipping the roux: Some recipes try to make a cheese sauce without making a roux first. It never works as well. The roux is what makes it creamy and thick.
Adding the milk too fast: Lumps are your enemy. Go slow.
Cooking the cheese on high heat: High heat can break the cheese and make it grainy. Remove from heat before adding cheese.
Using pre-shredded cheese without adjusting: Those anti-caking agents can make your sauce grainy. If you use pre-shredded, toss it with cornstarch first or just bite the bullet and shred a block.
Not seasoning enough: Taste as you go. Cheese sauce needs salt and a little acid or spice to really shine.
My Tested Substitutions
Different cheeses: You can use all sharp cheddar, or swap in some gruyère, fontina, or even a little smoked gouda. Just make sure you’re using cheeses that melt smoothly. Avoid super hard cheeses like parmesan for the main sauce—save those for topping.
Milk alternatives: I’ve made this with 2% milk, and it works fine but feels a bit thinner. I’ve also used half milk and half heavy cream, which is absolutely decadent. Avoid skim milk if you can—it doesn’t have enough fat to make a creamy sauce.
Pasta shapes: Elbow is traditional, but shells, small penne, or cavatappi all work great. Just avoid long pasta like spaghetti—it’s awkward to eat in a casserole.
Breadcrumb topping: If you don’t have panko, crushed crackers work. Crushed cornflakes are surprisingly good. You can also skip the topping entirely if you prefer a creamier, less crispy texture.
How to Customize
This is your recipe, so make it yours. If you love spice, add more cayenne or some hot sauce to the sauce. If you’re feeding kids, dial back the seasonings and maybe skip the cayenne entirely. If you want it lighter, use a combination of milk and chicken broth instead of all milk. If you want it richer, add some cream cheese or a splash of heavy cream.
You can also make individual portions in ramekins instead of one big casserole. Just divide the mac and cheese between 4-6 ramekins, top with breadcrumbs if you like, and bake for about 15-20 minutes until golden.
Serving Ideas
Mac and cheese is pretty perfect on its own, but here are some ideas to round out the meal:
- A simple green salad with a tangy vinaigrette to cut through the richness
- Steamed or roasted broccoli on the side (or mixed into the mac and cheese)
- A crusty bread for soaking up any extra sauce
- Sliced tomatoes with fresh basil
- Roasted Brussels sprouts
- A simple coleslaw for crunch and freshness
- Cornbread (this combo is unbeatable)
Meal Prep & Storage
This recipe is great for meal prep, which I love because it means less cooking during the week.
Make ahead: You can assemble the whole thing the night before. Just make the mac and cheese, transfer it to your baking dish, cover it tightly with foil, and refrigerate. When you’re ready to bake, add about 10 minutes to the baking time since it’s starting cold.
Storage: Leftovers keep in an airtight container in the fridge for up to 4 days. Reheat in a 350°F oven for about 15-20 minutes, covered with foil, until warmed through. You can also reheat individual portions in the microwave, though the texture won’t be quite as creamy.
Freezing: This freezes well for up to 3 months. Freeze it in the baking dish covered tightly with foil, or portion it into individual containers. Thaw overnight in the fridge before reheating.
Nutritional Breakdown
This makes about 8 servings. Per serving:
- Calories: approximately 580
- Protein: 24g
- Carbohydrates: 52g
- Fat: 28g
- Fiber: 2g
Keep in mind that this is an estimate and can vary based on the exact brands you use and how tightly you pack your measuring cups.
Final Thoughts
This Classic Baked Mac & Cheese is the kind of recipe I come back to again and again. It’s not fancy, but it’s reliable. It’s not complicated, but it tastes like you actually know what you’re doing. It’s the kind of food that makes people happy, and honestly, that’s what cooking is really about.
I hope you make this recipe and that it becomes something you turn to on nights when you need comfort and warmth. I hope you experiment with it, make it your own, and maybe even pass it on to someone else. That’s what happened with my mom’s recipe—it became mine, and now I’m sharing it with you.
If you make this, I’d love to hear about it. Come find me on Pinterest or just make it for someone you love. That’s really all that matters.
Happy cooking.
—
**Recipe
Classic Baked Mac & Cheese
Ingredients
Method
- Step 1: Cook the pasta Bring a large pot of salted water to a boil. Add your elbow pasta and cook it until it's just barely al dente—and I mean barely. You want it to still have a tiny bit of resistance when you bite it. This is important because it's going to cook a little more in the oven. I usually cook mine for about 1 minute less than the box says. Drain it, but don't rinse it. The starch on the pasta helps the sauce cling to it. What I messed up: For years, I cooked the pasta all the way through and then wondered why my mac and cheese turned mushy. Don't do that. Step 2: Make the roux In a large saucepan or Dutch oven, melt the butter over medium heat. Once it's melted and foamy, add the flour. Stir it constantly for about 1-2 minutes. This is called making a roux, and it's the base of your sauce. You're cooking out the raw flour taste and creating a thickener. It should smell a bit nutty and toasty. Don't let it brown too much, though. What I messed up: I used to skip this step or rush through it, and then my sauce would taste floury and weird. That minute or two makes a real difference. Step 3: Add the milk slowly Here's where you need to be a little patient. Pour in the milk slowly while whisking constantly. Start with about ½ cup, whisk until it's smooth, and then add the rest gradually. This prevents lumps. If you dump all the milk in at once, you'll get clumps of flour that won't smooth out, and your sauce will be grainy. Keep whisking until it's smooth and creamy. What I messed up: The first time I made this, I was impatient and poured the milk in too fast. I ended up with a lumpy sauce and had to strain it through a sieve. Not fun. Go slow. It takes maybe 3 minutes, and it's worth it. Step 4: Cook the sauce Keep the heat at medium and let the sauce cook, stirring occasionally, for about 5-8 minutes. It should thicken and coat the back of a spoon. You'll see it go from thin and pourable to thick and creamy. This is the right time to add your salt, pepper, garlic powder, and cayenne. Taste it and adjust as needed. Step 5: Add the cheese Remove the pan from the heat. This is important—you don't want the cheese cooking on high heat. Add the shredded cheddar cheese a handful at a time, stirring until each handful is completely melted before adding more. The residual heat will melt it perfectly. Once all the cheese is melted and the sauce is smooth and creamy, you're good to go. What I messed up: I used to add all the cheese at once and then wonder why it was grainy and broken. Patience, my friend. Add it slowly. Step 6: Combine pasta and sauce Add the cooked pasta to the cheese sauce and stir until every piece is coated. This should take just a minute or two. It'll look like a lot of sauce, but that's correct. The pasta will absorb some of it as it bakes. Step 7: Transfer to a baking dish Preheat your oven to 350°F. Pour the mac and cheese into a buttered 9x13 baking dish (or a similar size). Spread it out evenly. Step 8: Add the breadcr