Oreo Icebox Dessert: No-Bake Creamy Layers Ready in 15 Minutes
Oreo Icebox Dessert Recipe | No-Bake & Easy
Oreo Icebox Dessert: No-Bake Creamy Layers Ready in 15 Minutes
I’ve been making this Oreo Icebox Dessert for years, and it’s honestly one of my most-requested recipes. There’s something magical about layering crushed cookies, creamy filling, and chocolate pudding into one dish that tastes like pure indulgence but requires zero baking skills. The first time I made an Oreo Icebox Dessert was for a summer potluck when my oven decided to break down the day before. I was panicked, but then I remembered my grandmother’s old icebox cake recipe and adapted it with Oreos. The result? Everyone asked for the recipe, and I’ve been making it ever since. What I love most is that this dessert comes together in just 15 minutes of actual work time, then you let the refrigerator do the heavy lifting. The cookies soften slightly as they chill, the cream filling becomes impossibly creamy, and the chocolate pudding layer sets into the perfect texture. It’s the kind of dessert that looks fancy enough for a dinner party but tastes like a nostalgic childhood treat. I’ve served this at family gatherings, potlucks, and casual weeknight dinners, and it never disappoints. The best part? You can make it a full day ahead, which means less stress when guests arrive. Whether you’re feeding a crowd or just want an easy dessert that impresses, this Oreo Icebox Dessert is your answer.
Why You’ll Love This Recipe
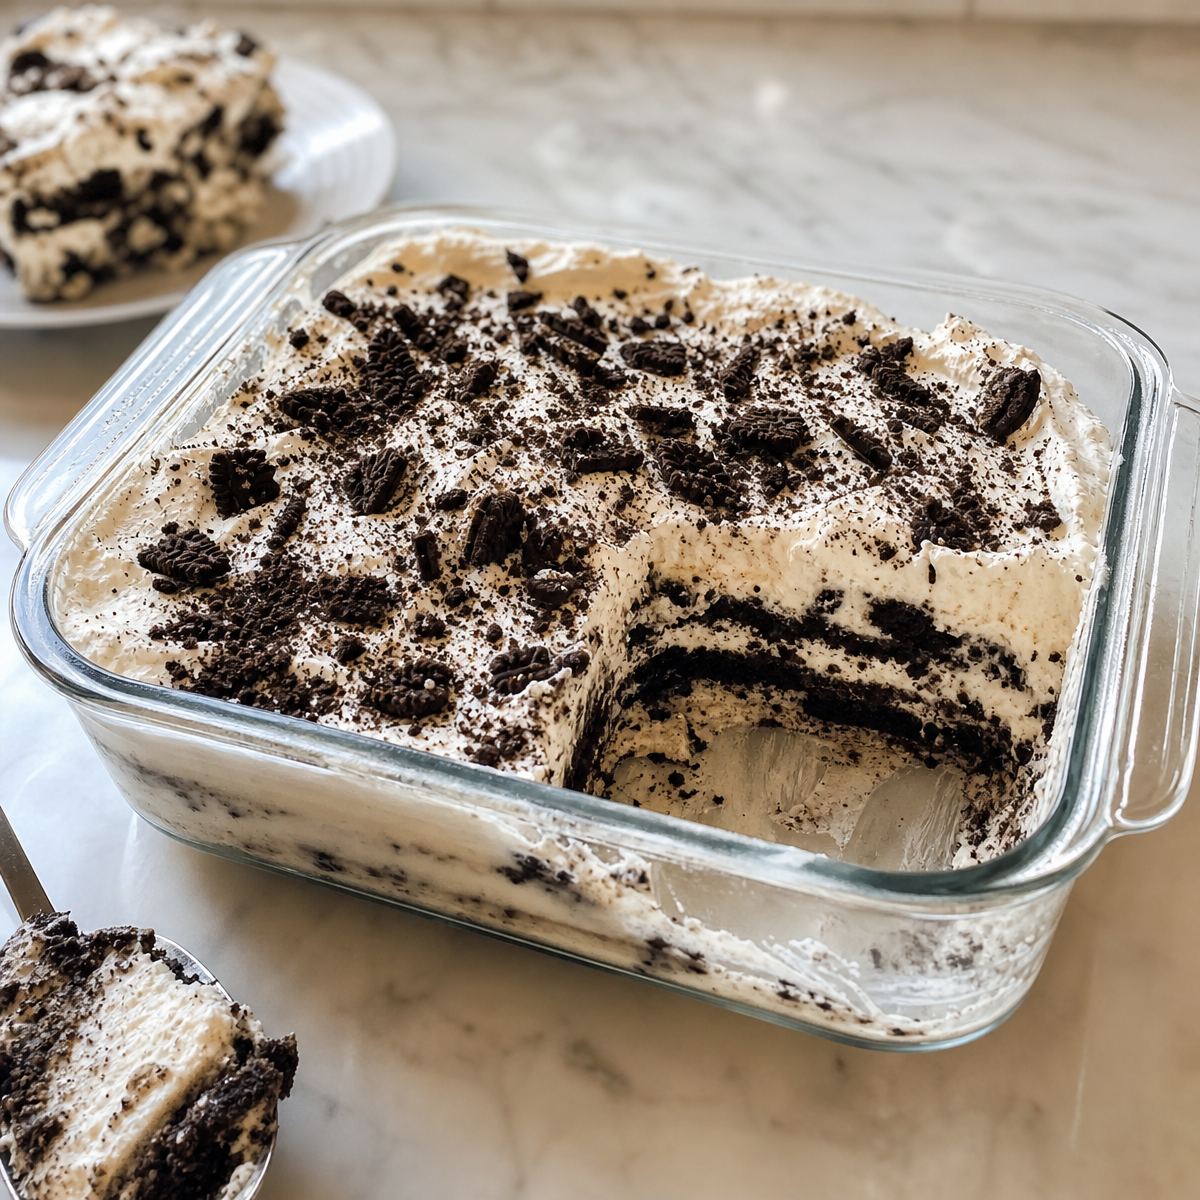
This Oreo Icebox Dessert checks every box for an ideal dessert. It’s no-bake, which means your kitchen stays cool and you don’t need to worry about timing or oven temperatures. The layers create visual appeal—when you cut into it, you see distinct stripes of cookie, cream, and chocolate that make people think you spent hours in the kitchen.
The texture is where this dessert really shines. The bottom layer of crushed Oreos mixed with butter becomes almost like a cookie crust, holding everything together. The middle layer is pure creamy comfort, and the chocolate pudding on top adds richness without being heavy. Each bite has a little bit of everything.
It’s also incredibly forgiving. Unlike baked desserts where timing matters, this one actually improves as it sits in the fridge. The flavors meld, the texture becomes creamier, and it’s actually better the next day. I often make it two days ahead for entertaining.
And let’s talk about the crowd-pleaser factor. I’ve never met anyone who didn’t love this dessert. Kids love the Oreos, adults love the creamy richness, and everyone loves that it tastes indulgent but isn’t overly complicated.
Ingredients
- 30 Oreo cookies (about 10 ounces), crushed into fine crumbs
- 4 tablespoons butter, melted
- 16 ounces cream cheese, softened to room temperature
- 1 cup powdered sugar
- 8 ounces whipped topping (like Cool Whip), thawed
- 1 cup cold milk
- 1 package (3.9 ounces) instant chocolate pudding mix
- 8 ounces additional whipped topping for the top layer
- Crushed Oreos for garnish (about 6-8 cookies)
Sophia’s Tip: Make sure your cream cheese is truly softened to room temperature. Cold cream cheese will be lumpy and difficult to mix smoothly. I set mine out about 30 minutes before I start, or you can microwave it for 10-15 seconds to soften it gently. Also, use real butter here—it makes a difference in the crust texture compared to margarine.
Optional Add-Ins and Variations
While the classic version is perfection, I love playing with variations depending on what I have on hand or what mood I’m in.
Mint Chocolate Version: Use mint chocolate pudding instead of regular chocolate pudding. It’s a refreshing twist that feels a bit more elegant. You can also add a few drops of peppermint extract to the cream cheese layer.
Peanut Butter Lover’s Version: Swirl a few tablespoons of peanut butter into the cream cheese layer before spreading it over the crust. It adds richness and pairs beautifully with the chocolate pudding.
Cookie Crumble Top: Instead of just crushed Oreos on top, mix crushed Oreos with a little melted butter and brown sugar, then sprinkle over the whipped topping. It creates a crunchy texture contrast.
Cookies and Cream Pudding Version: Use cookies and cream instant pudding instead of chocolate pudding for an extra cookie flavor throughout.
Step-by-Step Instructions
Step 1: Make the Cookie Crust
Start by crushing your Oreos. I use a food processor and pulse until I get fine, consistent crumbs—about 10-15 pulses. If you don’t have a food processor, put the cookies in a ziplock bag and crush them with a rolling pin or the bottom of a glass. It takes a bit longer, but you have more control over the texture.
Pour the crushed Oreos into a bowl and drizzle with melted butter. Mix until the texture resembles wet sand—every crumb should be lightly coated with butter. This is important because it helps the crust hold together.
Press the mixture firmly into the bottom of a 9×13 inch baking dish. Use the bottom of a measuring cup to press it down evenly. You want a compact layer that won’t crumble when you add the next layer on top.
Sophia’s Kitchen Note: Don’t skip the pressing step. A loose crust will break apart when you cut into the finished dessert. Take your time here—it only takes a minute and makes a huge difference.
Step 2: Make the Cream Cheese Layer
Remove your cream cheese from the fridge and let it sit for about 30 minutes until it’s soft and spreadable. This is crucial—cold cream cheese will be lumpy and won’t mix smoothly with the other ingredients.
Add the softened cream cheese to a large bowl and beat with an electric mixer on medium speed for about 1 minute until it’s creamy and smooth. Add the powdered sugar and continue beating for another minute until the mixture is light and fluffy.
Gently fold in the 8 ounces of thawed whipped topping using a rubber spatula. Don’t overmix—you want to keep the whipped topping light and airy. Fold just until combined, with no white streaks remaining.
Step 3: Spread the Cream Cheese Layer
Spread the cream cheese mixture evenly over your Oreo crust. This is important: make sure you seal it all the way to the edges of the baking dish. If there are gaps, the pudding layer will seep down and make the crust soggy. Use an offset spatula or the back of a spoon to smooth it out.
Sophia’s Kitchen Note: I like to spread this layer about 1/2 inch thick. It’s thick enough to be creamy and luxurious but not so thick that the dessert becomes overwhelming.
Step 4: Make and Spread the Pudding Layer
Pour the cold milk into a bowl and add the instant chocolate pudding mix. Whisk vigorously for about 1 minute until the pudding thickens. It should reach a consistency similar to yogurt—thick enough to spread but not so thick that it’s hard to work with.
Spread the pudding evenly over the cream cheese layer. Again, make sure you go all the way to the edges. The pudding will set as it chills, creating a firm layer.
Step 5: Add the Final Topping
Spread or dollop the remaining 8 ounces of whipped topping over the pudding layer. You can make it smooth and even, or leave it a bit rustic with peaks and swirls—both look beautiful. Sprinkle crushed Oreos over the top for garnish.
Step 6: Chill
Cover the baking dish with plastic wrap and refrigerate for at least 2 hours before serving. I prefer to let it chill for 4-6 hours or overnight so all the layers set firmly and the flavors have time to meld together.
Common Mistakes to Avoid
Using Cold Cream Cheese: This is the number one mistake I see. Cold cream cheese won’t mix smoothly and will create lumps in your filling. Always soften it first.
Not Pressing the Crust Firmly: A loose crust will crumble when you cut into the dessert. Take the extra 30 seconds to press it down properly.
Overmixing the Whipped Topping: When you fold the whipped topping into the cream cheese, be gentle. Overmixing deflates it and makes the layer dense instead of creamy and light.
Skipping the Edge Seal: If you don’t spread the cream cheese layer all the way to the edges, the pudding will seep down and make the crust soggy. Make sure every edge is covered.
Not Letting It Chill Long Enough: While you can technically eat this after 2 hours, it’s so much better after 4-6 hours or overnight. The layers set properly and the texture becomes perfect.
My Tested Substitutions
Whipped Topping: You can use homemade whipped cream instead of Cool Whip. Whip 1 cup of heavy cream with 2 tablespoons powdered sugar until stiff peaks form. It’s slightly less stable than Cool Whip but tastes amazing.
Pudding Mix: Any instant pudding flavor works here. I’ve used butterscotch, vanilla, and cookies and cream with great results. Chocolate is classic, but don’t be afraid to experiment.
Cookies: Double Stuf Oreos create an even more indulgent crust. Regular Oreos work perfectly, but if you love intense cookie flavor, go for the Double Stuf version.
Butter: You can use coconut oil instead of butter for a slightly different flavor profile, though butter is my preference for this recipe.
Cream Cheese: I haven’t found a good substitute for cream cheese in this recipe, as it’s essential to the texture. However, if you need a dairy-free option, you could try a dairy-free cream cheese alternative, though the texture may be slightly different.
How to Customize This Recipe
One of my favorite things about this Oreo Icebox Dessert is how easily you can customize it to suit your preferences or dietary needs.
Make It Smaller: Cut all the ingredients in half and use an 8×8 inch baking dish instead. This is perfect for smaller households or when you don’t want a huge dessert sitting in your fridge.
Individual Servings: Layer the ingredients in small mason jars or clear cups. Use about 2 tablespoons of each layer per serving. These look beautiful and are perfect for potlucks or meal prep.
Add Texture: Mix crushed pretzels or graham crackers into the Oreo crust for a sweet and salty combination. Use about half Oreos and half pretzels.
Flavor Variations: Add 1 teaspoon of vanilla extract to the cream cheese layer for extra depth. Or add a pinch of espresso powder to the pudding layer to intensify the chocolate flavor.
Make It Lighter: Use light cream cheese and light whipped topping to reduce the calories slightly. The texture will be a bit less rich, but it’s still delicious.
Serving Suggestions
This Oreo Icebox Dessert is perfect on its own, but here are some ways I like to serve it.
Classic Presentation: Cut into squares and serve directly from the baking dish. It’s casual and perfect for family gatherings.
Plated Elegantly: Cut into squares and place on individual plates. Add a dollop of whipped cream on the side and a few crushed Oreos for garnish. It looks fancy enough for a dinner party.
With Fresh Fruit: Serve alongside fresh berries or sliced strawberries. The tartness of the fruit balances the richness of the dessert beautifully.
With Coffee: This dessert pairs wonderfully with coffee. Serve it after dinner with a cup of hot coffee or iced coffee in the summer.
Potluck Style: Transport it in the baking dish and serve it family-style. Everyone can help themselves to a square.
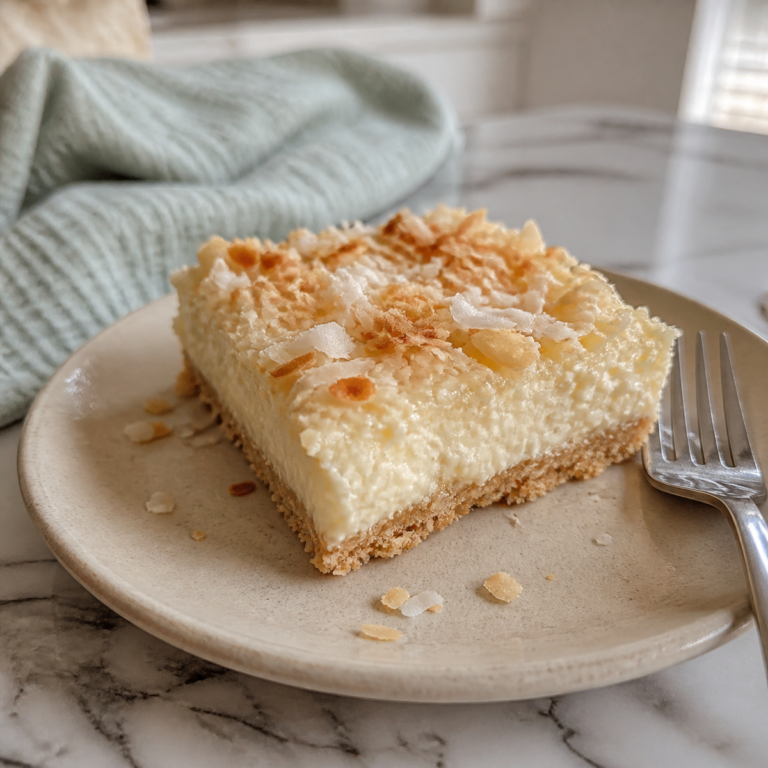
[INTERNAL LINK: If you love no-bake desserts, you might also enjoy our Slice Of Creamy Cookies Cheesecake: No-Bake Dessert Ready in 15 Minutes]
Meal Prep and Storage
Make-Ahead Instructions: This dessert is perfect for making ahead. You can prepare it up to 3 days in advance. Cover it tightly with plastic wrap and store it in the refrigerator. The flavors actually improve as it sits, and the texture becomes even creamier.
Storage: Keep the Oreo Icebox Dessert covered in the refrigerator for up to 4 days. The layers stay distinct and the texture remains perfect. Don’t freeze it, as the whipped topping and pudding become grainy when thawed.
Transporting: If you’re taking this to a potluck or gathering, keep it in the baking dish and cover it with plastic wrap. Transport it in a cooler with ice packs to keep it cold. It can sit out for up to 2 hours before serving.
Serving from the Fridge: You can serve this directly from the refrigerator. It’s best served cold, and the cold temperature helps the layers stay distinct and firm.
Leftover Storage: Store any leftovers in an airtight container in the refrigerator. It keeps well for up to 4 days, though it’s so good it rarely lasts that long in my house.
Nutrition Information
Per serving (1/8 of the recipe): Approximately 420 calories, 22g protein, 48g carbohydrates, 18g fat, 8g saturated fat, 65mg cholesterol, 380mg sodium, 2g fiber, 38g sugar.
Note: Nutrition information is an estimate and may vary based on specific brands used. This dessert is rich and indulgent, so portion sizes are typically smaller.
Frequently Asked Questions
Q: Can I make Oreo Icebox Dessert ahead of time?
A: Absolutely! This dessert actually tastes better when made a day ahead. The flavors meld together beautifully, and the texture becomes even creamier. Cover it tightly with plastic wrap and refrigerate for up to 3 days. It’s perfect for meal prep.
Q: Do I need to crush the Oreos by hand?
A: You can crush them by hand in a ziplock bag, but I prefer using a food processor for consistent, finer crumbs. If you like chunkier texture, pulse just a few times. Hand-crushing takes about 5 minutes and gives you more control over the size.
Q: Can I use a different type of cookie instead of Oreos?
A: Yes! Thin Mints, chocolate wafers, or even digestive biscuits work wonderfully. The key is using a cookie that’s sturdy enough to hold its shape when mixed with the cream filling. Avoid very delicate cookies that crumble into dust.
Q: How long does Oreo Icebox Dessert last in the refrigerator?
A: This dessert keeps well for up to 4 days in an airtight container in the fridge. The texture stays creamy and the cookies soften slightly, which many people prefer. Don’t freeze it, as the texture becomes grainy when thawed.
Q: Can I make this in individual servings?
A: Definitely! Layer the ingredients in small mason jars or clear cups for a beautiful presentation. Use about 2 tablespoons of each layer per serving. These individual cups are perfect for potlucks and look Instagram-worthy.
Final Thoughts
This Oreo Icebox Dessert has become a staple in my kitchen, and I hope it becomes one in yours too. There’s something special about a dessert that’s this easy to make but tastes like you spent hours in the kitchen. It’s the kind of recipe that brings people together, whether you’re serving it at a fancy dinner party or a casual family gathering.
What I love most is that it removes the stress from dessert making. No oven to worry about, no timing to get right, just simple layering and refrigeration. And the best part? Everyone loves it. I’ve never had anyone turn down a slice of this Oreo Icebox Dessert.
I encourage you to make this recipe exactly as written the first time, then feel free to experiment with variations. Try different pudding flavors, add mix-ins to the cream cheese layer, or make it in individual servings. The possibilities are endless, and it’s hard to go wrong.
Make this dessert for your next gathering, and I promise you’ll get requests for the recipe. It’s that good.
Recipe Card
Oreo Icebox Dessert: No-Bake Creamy Layers Ready in 15 Minutes
Ingredients
Equipment
Method
- Crush 30 Oreo cookies in a food processor until fine crumbs form, or place in a ziplock bag and crush with a rolling pin. Pour crumbs into a bowl and mix with melted butter until the texture resembles wet sand.
- Press the Oreo mixture firmly into the bottom of a 9x13 inch baking dish using the bottom of a measuring cup. Make sure it's compact and even.
- Soften cream cheese to room temperature (about 30 minutes out of the fridge). Beat with an electric mixer on medium speed for 1 minute until creamy and smooth.
- Add powdered sugar to the cream cheese and beat for another minute until light and fluffy. Gently fold in 8 ounces of thawed whipped topping using a rubber spatula until just combined.
- Spread the cream cheese mixture evenly over the Oreo crust, making sure to seal it all the way to the edges of the baking dish.
- Pour cold milk into a bowl and add the instant chocolate pudding mix. Whisk vigorously for about 1 minute until thickened to a yogurt-like consistency.
- Spread the pudding evenly over the cream cheese layer, going all the way to the edges.
- Spread or dollop the remaining 8 ounces of whipped topping over the pudding layer. Sprinkle crushed Oreos over the top for garnish.
- Cover the baking dish with plastic wrap and refrigerate for at least 2 hours before serving. For best results, chill for 4-6 hours or overnight.
- Cut into squares and serve cold. Store covered in the refrigerator for up to 4 days.
Notes
Softening Cream Cheese: Cold cream cheese will create lumps. Let it sit at room temperature for 30 minutes, or microwave for 10-15 seconds to soften gently.
Crust Pressing: Take time to press the Oreo crust firmly into the baking dish. A loose crust will crumble when cutting.
Individual Servings: Layer ingredients in small mason jars or clear cups using about 2 tablespoons of each layer per serving for a beautiful presentation.
Storage: Keep covered in the refrigerator for up to 4 days. Do not freeze, as the whipped topping and pudding become grainy when thawed.
Variations: Try different pudding flavors (mint chocolate, butterscotch, cookies and cream), add peanut butter to the cream cheese layer, or use Double Stuf Oreos for extra cookie flavor.