Wendy’s Frosty at Home
Wendy's Frosty at Home
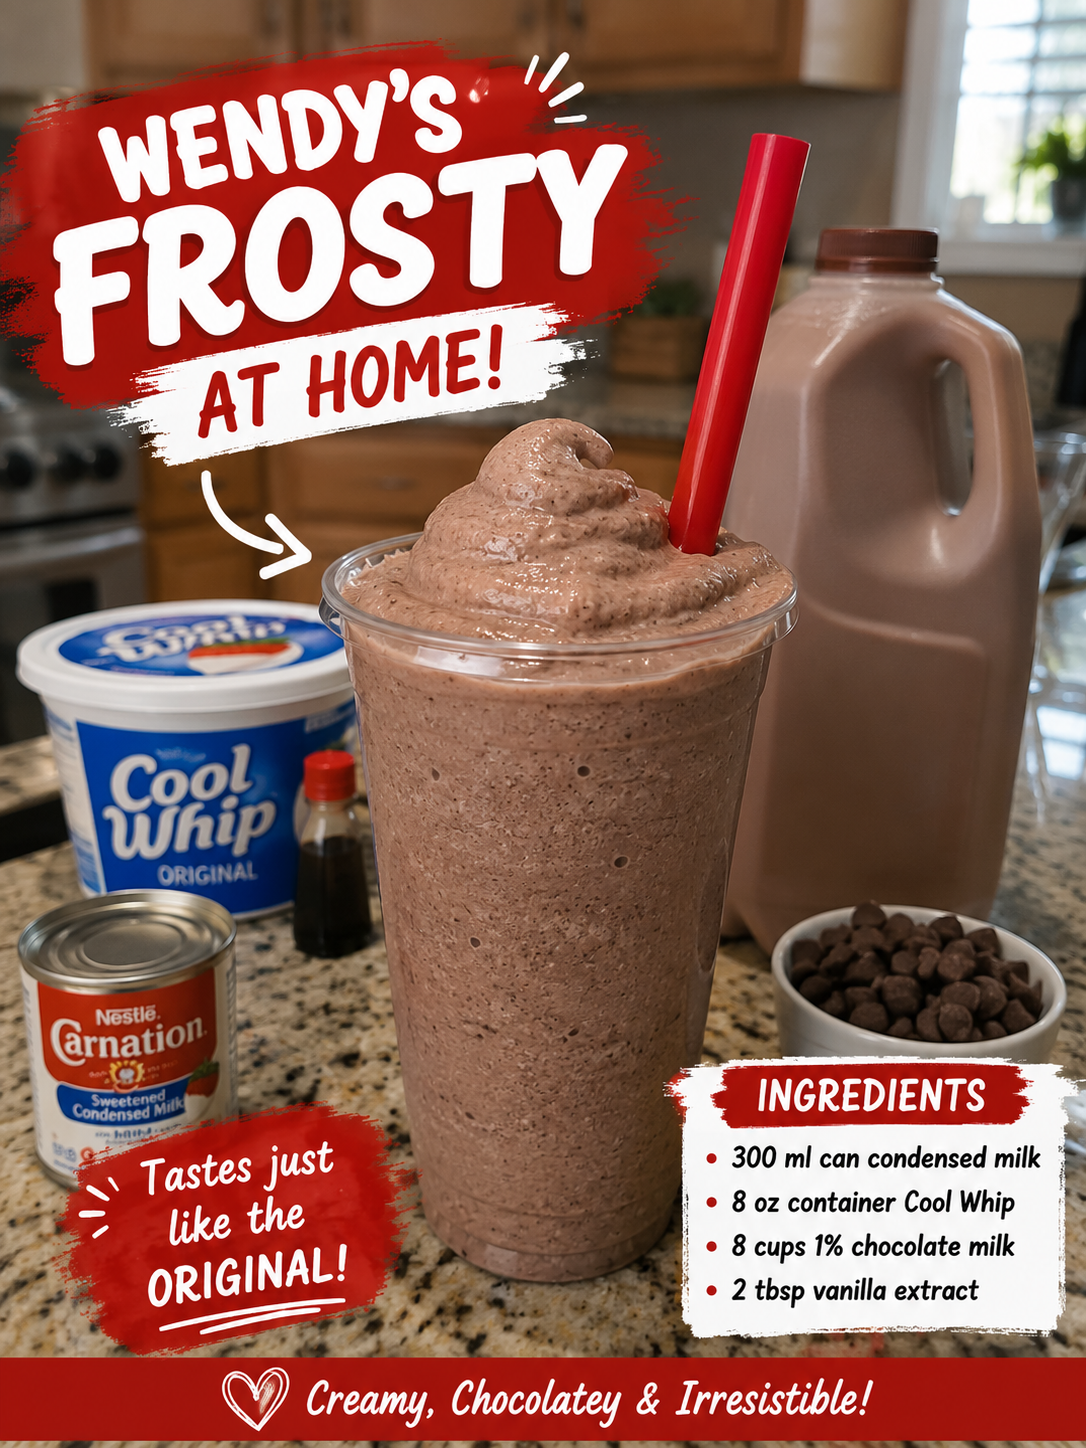
Imagine a thick, velvety treat that balances the rich, creamy sweetness of ice cream with the distinct, slightly tangy flavor of chocolate milk. This is the essence of a Wendy’s Frosty at Home. It is not merely a frozen dessert; it is a specific texture experience that sits somewhere between a milkshake and soft-serve, dense enough to hold its shape on a spoon yet smooth enough to melt instantly on the tongue. This recipe is particularly useful when you crave that nostalgic, cold comfort on a hot summer afternoon or as a sweet finish to a casual dinner at home. The goal is to replicate the signature consistency without needing commercial machinery, relying instead on the right ratio of frozen dairy to liquid chocolate.
Creating this dessert from scratch allows you to control the sweetness and the chocolate intensity. Unlike store-bought mixes that often rely on stabilizers to achieve a specific mouthfeel, this method uses the natural properties of heavy cream and a precise amount of milk to create that signature “frosty” thickness. The result is a dessert that is rich and indulgent but not overwhelmingly heavy. It pairs exceptionally well with a simple burger, a scoop of vanilla ice cream, or simply eaten on its own as a quiet moment of enjoyment. For those who enjoy the brand’s signature treat, this homemade version offers a familiar taste with the added benefit of knowing exactly what goes into every spoonful.
For more delicious dessert ideas and visual inspiration, Follow Hailee Recipes on Pinterest to explore a variety of sweet creations.
Why This Recipe Works
The secret to achieving the correct texture lies in the temperature of the ingredients and the order in which they are combined. Commercial machines use a specific churn speed and freezing time to incorporate air while keeping the mixture partially frozen. At home, we mimic this by starting with very cold ingredients and using a high-speed blender to crush ice or frozen dairy into a fine suspension. The key is the ratio of fat to liquid. Heavy cream provides the necessary fat content to create a creamy body, while a small amount of milk thins the mixture just enough to make it pourable and scoopable, preventing it from becoming a solid block of ice cream. Using chocolate syrup rather than melted chocolate chips ensures a smooth, uniform flavor without the risk of graininess or seizing. The sugar in the syrup also lowers the freezing point of the mixture, which is crucial for maintaining that soft-serve consistency even after freezing.
Ingredients
This recipe yields approximately 4 servings of the thick, chocolatey treat. Ensure all ingredients are chilled before beginning to ensure the mixture reaches the desired thickness quickly.
- 2 cups heavy whipping cream, very cold
- 1 cup whole milk, very cold
- 1/2 cup granulated sugar
- 1/2 cup unsweetened cocoa powder, sifted
- 1/2 cup chocolate syrup (thick consistency recommended)
- 1 teaspoon pure vanilla extract
- 1/4 teaspoon salt
- 1/2 cup ice cubes (optional, for extra thickness if using fresh dairy)
How To Make Wendy’s Frosty at Home
- Prepare the Chocolate Base: In a medium mixing bowl, combine the sifted cocoa powder, granulated sugar, and salt. Whisk these dry ingredients together thoroughly to ensure there are no lumps. Add the chocolate syrup and vanilla extract to the dry mixture. Stir vigorously with a spoon or whisk until the mixture forms a thick, glossy paste. This step ensures the cocoa is fully hydrated and distributed, preventing gritty pockets in the final product.
- Combine Dairy and Chocolate: Pour the very cold heavy whipping cream and whole milk into the bowl containing the chocolate paste. Using a hand mixer or a stand mixer fitted with the whisk attachment, beat the mixture on medium-low speed. The goal is to incorporate the chocolate paste without introducing too much air too quickly. Mix until the color is uniform and the mixture begins to thicken slightly, about 2 to 3 minutes.
- Chill the Mixture: Once combined, cover the bowl tightly with plastic wrap and place it in the refrigerator for at least 30 minutes. This chilling period is essential as it lowers the temperature of the entire mixture, preparing it for the freezing stage. If you are using the optional ice cubes, you will add them during the next step, but the base must be cold first.
- Blend for Texture: Transfer the chilled chocolate-dairy mixture into a high-speed blender. If you are using the optional ice cubes to boost thickness, add them now. Secure the lid tightly. Pulse the blender a few times to break up the ice, then blend on high speed for 30 to 45 seconds. Stop and scrape down the sides if necessary. The mixture should look smooth and have a consistency similar to a thick milkshake, but slightly heavier.
- Freeze to Set: Pour the blended mixture into a shallow, freezer-safe container, such as a metal loaf pan or a glass baking dish. A shallow container allows the cold to penetrate the mixture more evenly. Cover the container with a lid or plastic wrap. Place it in the freezer for 2 to 3 hours. Check the texture every 45 minutes; if it begins to freeze into a solid block, remove it and stir vigorously with a fork or whisk to break up ice crystals. Repeat this stirring process once or twice until the mixture reaches the desired soft, creamy consistency.
Doneness And Troubleshooting
Success is determined by texture rather than time. When you scoop the Frosty, it should hold its shape on the spoon but melt smoothly when touched. If the mixture is too runny after the initial freeze, it likely needs more time in the freezer or a second blending with fresh ice. If it has become too hard to scoop, it has been frozen too long without agitation. To fix this, let it sit at room temperature for 10 to 15 minutes before scooping, or blend it briefly with a splash of cold milk to restore creaminess. The mixture should never be icy or crunchy; if you feel ice crystals, it indicates the ingredients were not cold enough or the stirring process was skipped. The visual cue for doneness is a smooth, matte finish on the surface of the dessert, with no visible separation of liquid and fat.
Substitutions And Variations
If you need to adjust the recipe for dietary preferences or ingredient availability, there are a few workable changes. You can substitute the whole milk with 2% milk or even unsweetened almond milk, though the final texture may be slightly less rich and creamy due to the lower fat content. For a dairy-free version, use full-fat coconut milk (the canned variety) instead of heavy cream and milk, though this will impart a subtle coconut flavor. If you prefer a less sweet dessert, reduce the granulated sugar to 1/4 cup, but be aware that sugar helps prevent the mixture from freezing too hard, so you may need to let it thaw longer before serving. Adding a tablespoon of instant coffee powder can enhance the chocolate flavor without making the dessert taste like coffee.
Serving Suggestions
This treat is best served immediately after being stirred from the freezer. It pairs wonderfully with a classic hamburger or a simple cheeseburger, offering a sweet contrast to savory flavors. For a dessert platter, serve it in chilled bowls topped with a few chocolate chips or a drizzle of extra chocolate syrup. You can also layer it with vanilla ice cream and crushed cookies to create a Frosty sundae. If serving to children, consider topping it with a small dollop of whipped cream and a cherry, mimicking the classic presentation.
Storage And Reheating
Store any leftovers in an airtight container in the freezer. The texture will harden over time, so it is best consumed within 24 hours for optimal creaminess. If the Frosty becomes too hard after storage, do not microwave it, as this will melt the fat and ruin the texture. Instead, transfer the container to the refrigerator for 20 to 30 minutes to allow it to soften naturally. If it has been frozen for several days, you may need to blend it with a small amount of fresh milk to restore the original consistency. Do not refreeze the mixture after it has been thawed, as this will cause separation and a grainy texture.
While this recipe captures the beloved flavor profile of a fast-food classic, the homemade version offers a fresher, cleaner taste. By controlling the ingredients, you ensure a dessert that is satisfying without being overly processed. Enjoy the process of making this cold treat, and remember that patience during the freezing and stirring stages is the key to achieving the perfect scoop.
Wendy's Frosty at Home
Ingredients
Method
- In a medium mixing bowl, combine the sifted cocoa powder, granulated sugar, and salt. Whisk these dry ingredients together thoroughly. Add the chocolate syrup and vanilla extract. Stir vigorously until the mixture forms a thick, glossy paste.
- Pour the very cold heavy whipping cream and whole milk into the bowl containing the chocolate paste. Using a hand mixer or stand mixer fitted with the whisk attachment, beat on medium-low speed until the color is uniform and the mixture begins to thicken slightly, about 2 to 3 minutes.
- Cover the bowl tightly with plastic wrap and place it in the refrigerator for at least 30 minutes.
- Transfer the chilled mixture into a high-speed blender. If using optional ice cubes, add them now. Secure the lid and blend on high speed for 30 to 45 seconds until smooth and thick.
- Pour the blended mixture into a shallow, freezer-safe container. Cover and freeze for 2 to 3 hours. Stir vigorously with a fork every 45 minutes to break up ice crystals until the desired soft consistency is reached.