Walking Bag Snack Recipes: Fuel Your Adventures
Walking Bag Snack Recipes: Fuel Your Adventures
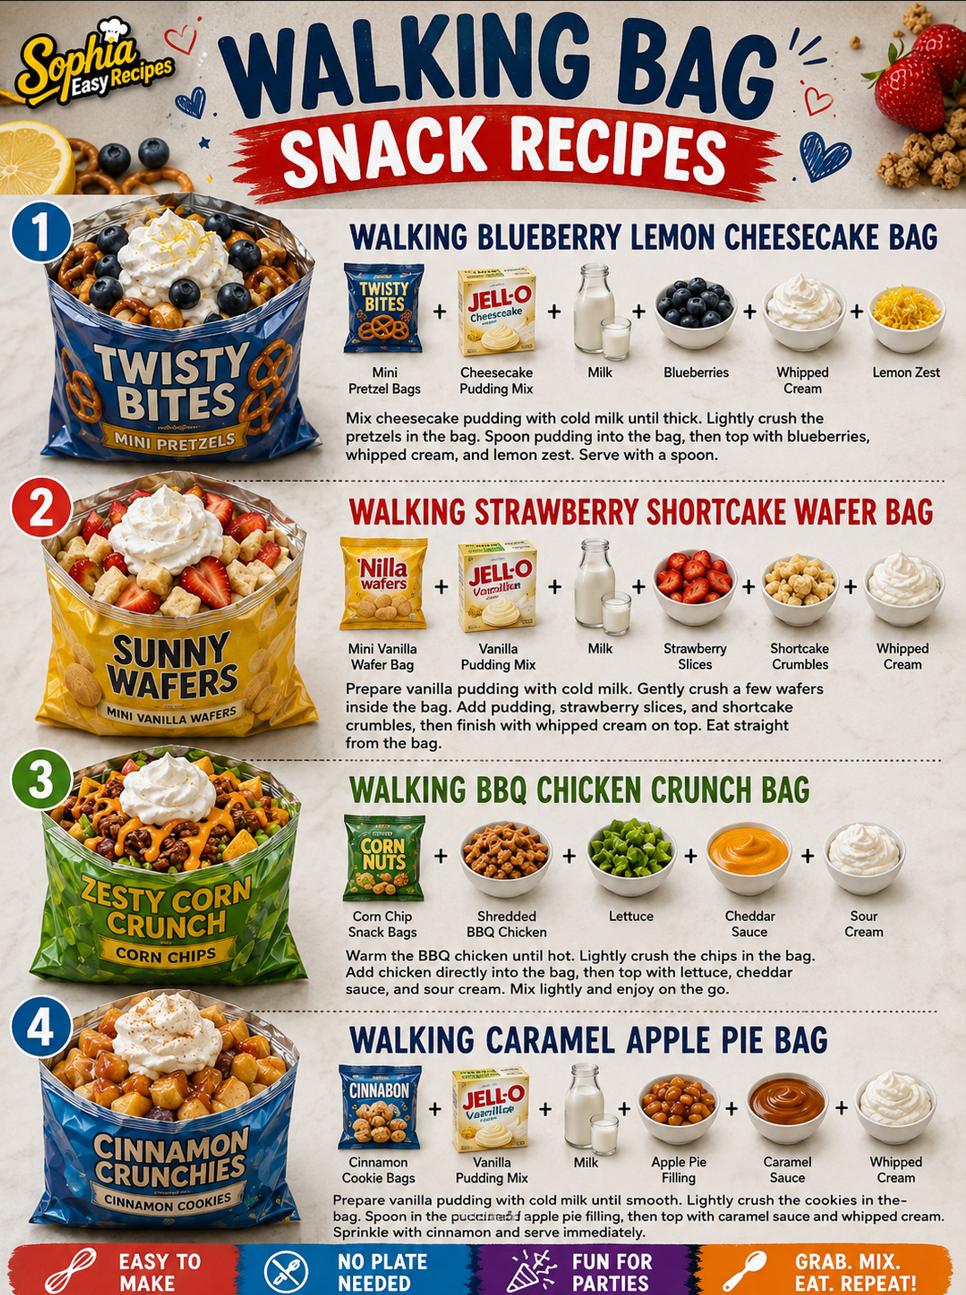
I’m so excited to share my walking bag snack recipes with you because let’s be real, we’re all looking for ways to eat better on the go. Whether you’re heading to work, running errands, or just need something delicious to munch on during your day, these portable recipes are total game-changers. I’ve created four different walking bag snacks that are easy to pack, actually taste amazing, and won’t leave you feeling guilty about your choices.
What I love most about these recipes is that they prove snacking doesn’t have to be boring or unhealthy. You get everything from sweet treats like my Walking Blueberry Lemon Cheesecake Bag and Walking Strawberry Shortcake Wafer Bag to something more savory with my Walking BBQ Chicken Crunch Bag. And yes, there’s even a Walking Caramel Apple Pie Bag for when you need that cozy dessert vibe in snack form. These are the kinds of recipes worth saving because they actually solve a real problem in your everyday routine.
I genuinely think you’ll find yourself making these over and over once you see how simple they are to pull together. Save this roundup, bookmark it, and Follow me on HaileeRecipes on Pinterest so you never miss a new recipe. Let’s make snack time something you actually look forward to.
1. Walking Blueberry Lemon Cheesecake Bag
This Walking Blueberry Lemon Cheesecake Bag combines creamy, tangy cheesecake filling with bright lemon zest and bursts of fresh blueberries in a portable, no-bake format. The buttery graham cracker crust provides satisfying crunch while the smooth filling stays perfectly chilled in a sealed bag. This dessert snack is ideal for hiking trips, picnics, or afternoon walks when you want something indulgent yet convenient. It works beautifully because all components are mixed directly in the bag, eliminating mess while delivering the beloved flavors of classic cheesecake without requiring an oven or plates.
Why You’ll Love It
- Completely no-bake and requires no special equipment beyond a sturdy bag and mixing utensils.
- Stays fresh and chilled for hours when kept in an insulated cooler, making it perfect for all-day adventures.
- Individual portions mean no cutting or serving dishes needed, and cleanup is literally just tossing the bag.
Ingredients
- 8 ounces cream cheese, softened to room temperature
- 1/4 cup powdered sugar
- 1/2 cup heavy whipping cream
- Zest of 2 lemons and 2 tablespoons fresh lemon juice
- 1 cup fresh blueberries
- 3/4 cup graham cracker crumbs
- 3 tablespoons melted butter
- 1 tablespoon honey
How To Make It
- In a sturdy freezer bag, combine the graham cracker crumbs with melted butter and honey, then seal and shake vigorously until the mixture resembles wet sand.
- Add the softened cream cheese directly to the bag with the crust mixture and massage the outside of the bag to break up and blend the cream cheese until mostly smooth.
- Pour the heavy whipping cream into the bag, then seal and knead thoroughly for 2 to 3 minutes until the mixture reaches a light, fluffy consistency similar to mousse.
- Add the powdered sugar, lemon zest, and lemon juice to the bag, seal tightly, and massage for another minute until fully incorporated and no streaks of sugar remain.
- Gently fold in the fresh blueberries by carefully squeezing and turning the bag several times, being careful not to crush the berries.
- Remove excess air from the bag, seal completely, and place in a cooler with ice packs for at least 30 minutes before eating to allow flavors to meld and texture to set.
Variations And Substitutions
Swap blueberries for raspberries, blackberries, or a mixed berry combination for different flavor profiles. Replace lemon with lime zest and juice for a tropical twist, or use orange for a citrus variation. For a less tangy version, reduce lemon juice to 1 tablespoon and increase honey to 2 tablespoons. You can also substitute Greek yogurt for half the heavy cream to reduce richness while maintaining creaminess.
Make-Ahead, Storage, And Serving Tips
Prepare this snack up to 24 hours in advance and store in the coldest part of your refrigerator or cooler. Keep it packed with ice packs during your walk to maintain the ideal chilled texture. The bag can be eaten directly from the bag using a spoon, or squeezed into a bowl if you prefer. If the filling becomes too soft during warm weather, freeze it for 15 minutes before serving. For best texture and flavor, consume within 8 hours of preparation.
2. Walking Strawberry Shortcake Wafer Bag
This elegant walking snack transforms the classic dessert into portable perfection. Delicate wafer cookies layered with whipped cream and fresh strawberries create a sophisticated treat that’s surprisingly easy to pack and eat on the go. The combination of crispy, creamy, and fruity textures delivers restaurant-quality indulgence without the mess. Perfect for picnics, hiking breaks, or afternoon strolls, this snack offers a refreshing contrast to heavier trail foods while feeling genuinely special and celebratory.
Why You’ll Love It
- Elegant and impressive enough to serve at gatherings or enjoy as a special treat.
- Takes only 10 minutes to assemble with no baking required.
- Naturally refreshing and light compared to other walking snacks.
Ingredients
- 8 rectangular wafer cookies
- 1 cup heavy whipping cream
- 2 tablespoons powdered sugar
- 1 teaspoon vanilla extract
- 1 pound fresh strawberries, sliced
- 2 tablespoons honey or strawberry jam
- Pinch of salt
How To Make It
- Pour heavy cream into a bowl and whip with an electric mixer or whisk until soft peaks form, about 2-3 minutes.
- Add powdered sugar, vanilla extract, and salt to the whipped cream and continue beating until stiff peaks form.
- Gently fold the sliced strawberries into the honey or jam in a separate bowl to coat them lightly.
- Lay out four wafer cookies on a clean surface and spread each with a generous layer of whipped cream.
- Top each wafer with a portion of the honey-coated strawberries.
- Place the remaining four wafers on top to create sandwiches, pressing gently.
- Wrap each sandwich individually in parchment paper or plastic wrap, sealing the edges well.
- Pack into an insulated bag with an ice pack for transport.
Variations And Substitutions
Swap wafer cookies for thin shortbread biscuits or ladyfinger cookies for different textures. Replace strawberries with raspberries, blueberries, or sliced peaches depending on season and preference. Use Greek yogurt mixed with honey instead of whipped cream for a tangier, protein-rich option. Add a thin layer of strawberry jam between the wafer and cream for extra flavor, or dust the assembled sandwiches with crushed freeze-dried strawberries for added crunch.
Make-Ahead, Storage, And Serving Tips
Assemble these snacks up to 4 hours before serving and keep them refrigerated until departure. The whipped cream may soften slightly during transport, so pack them with a frozen ice pack in an insulated bag. For best results, eat within 2-3 hours of assembly before the wafers begin to soften excessively. If you’re hiking in warm weather, consider assembling them just before leaving or use stabilized whipped cream made with cream cheese for better structure.
3. Walking BBQ Chicken Crunch Bag
This savory snack combines smoky BBQ chicken with satisfying crunch in a portable bag that’s perfect for hiking, commuting, or outdoor adventures. The mix of tender chicken pieces, crispy fried onions, and crunchy nuts creates an irresistible texture contrast, while BBQ seasoning adds bold flavor without requiring sauce. It’s ideal for when you want a protein-packed snack that feels indulgent but travels beautifully in a ziplock bag, making it far superior to typical trail mix.
Why You’ll Love It
- High in protein to keep you satisfied during long walks or hikes.
- No messy sauce means your hands and bag stay clean while eating.
- Comes together in minutes with mostly pantry staples and rotisserie chicken.
Ingredients
- 2 cups shredded rotisserie chicken, dried on paper towels
- 1 cup roasted unsalted cashews or peanuts
- 1 cup crispy fried onions
- 1/2 cup roasted sunflower seeds
- 2 tablespoons BBQ seasoning powder
- 1 tablespoon smoked paprika
- 1 teaspoon garlic powder
- 1/2 teaspoon cayenne pepper, optional
How To Make It
- Pat the shredded rotisserie chicken dry with paper towels to remove excess moisture, which helps it stay crispy in the bag.
- In a large bowl, combine the dried chicken, cashews, fried onions, and sunflower seeds.
- In a small bowl, whisk together BBQ seasoning powder, smoked paprika, garlic powder, and cayenne pepper if using.
- Sprinkle the seasoning mixture over the chicken and nuts, then toss everything together until evenly coated.
- Divide the mixture into individual ziplock bags or one large container, pressing out excess air before sealing.
- Give the bag a gentle shake before eating to redistribute any settled seasonings.
Variations And Substitutions
Swap the cashews for almonds, pecans, or walnuts depending on your preference. Use store-bought BBQ seasoning or make your own with brown sugar, paprika, and chili powder. Replace fried onions with crispy chickpeas for extra protein, or add dried cranberries for a touch of sweetness. For spice lovers, increase the cayenne or add a pinch of ghost pepper powder.
Make-Ahead, Storage, And Serving Tips
Prepare this snack up to 3 days ahead and store in an airtight container at room temperature. The fried onions will soften slightly over time, so if you prefer maximum crunch, assemble individual bags the morning of your walk. Keep it in a cool backpack pocket away from direct sunlight. If the mixture seems dry, you haven’t overdried the chicken; if it feels damp, spread it on a baking sheet for 10 minutes before bagging. This snack works wonderfully at room temperature and needs no refrigeration for day trips.
4. Walking Caramel Apple Pie Bag
This portable caramel apple pie bag combines all the cozy flavors of classic apple pie in a convenient, mess-free format perfect for hiking or commuting. Crispy cinnamon-sugar tortilla chips layer with spiced apples, creamy caramel sauce, and a touch of vanilla for a snack that tastes like dessert but travels beautifully. The warm spices and sweet-tart apple filling create that beloved pie experience, while the crispy texture keeps everything interesting. Serve this chilled or at room temperature for a satisfying treat that won’t leave your hands sticky or your bag messy.
Why You’ll Love It
- Captures authentic apple pie flavors in a handheld, portable format that requires no utensils.
- Layers of crispy, cinnamon-sugar tortilla chips stay crunchy and don’t get soggy when packed properly.
- Make-ahead friendly and stores well in a paper bag, making it ideal for meal prep throughout the week.
Ingredients
- 2 large flour tortillas, cut into chip-sized pieces
- 3 tablespoons granulated sugar
- 1 teaspoon ground cinnamon
- 2 tablespoons butter, melted
- 2 medium apples, peeled, cored, and diced into small cubes
- 1 tablespoon lemon juice
- 1 teaspoon vanilla extract
- 1/4 cup caramel sauce
- Pinch of nutmeg
How To Make It
- Preheat your oven to 350 degrees Fahrenheit. Brush the tortilla pieces lightly with melted butter on both sides.
- Mix the cinnamon and sugar together in a small bowl, then sprinkle the mixture evenly over the buttered tortilla pieces.
- Spread the tortilla chips on a baking sheet in a single layer and bake for 8 to 10 minutes until golden and crispy, stirring halfway through.
- While the chips bake, toss the diced apples with lemon juice, vanilla extract, and a pinch of nutmeg in a bowl to prevent browning and add flavor.
- Remove the chips from the oven and let them cool completely on the baking sheet for about 5 minutes.
- Layer the cooled cinnamon-sugar chips with the apple mixture in a paper or parchment bag, drizzling the caramel sauce between layers.
- Fold the top of the bag closed and shake gently to combine all the flavors just before eating.
Variations And Substitutions
Swap the flour tortillas for crispy wonton wrappers for extra crunch, or use whole wheat tortillas for added fiber. Replace regular caramel with salted caramel for a sophisticated twist, or try dulce de leche for a different sweet flavor. Add chopped pecans or walnuts between layers for nutty texture, or sprinkle in a tiny pinch of sea salt to enhance the caramel notes. For a spiced version, increase the cinnamon or add a small amount of cardamom to the apple mixture.
Make-Ahead, Storage, And Serving Tips
Prepare the cinnamon-sugar tortilla chips up to three days in advance and store them in an airtight container at room temperature. Dice and prepare the apples up to one day ahead, keeping them in the refrigerator with the lemon juice. Assemble the bags no more than two hours before eating to keep the chips crispy; the apples will soften slightly over time as they release their juices. Store assembled bags in a cool place or refrigerator if traveling in warm weather. If the chips soften during transport, they’ll still taste delicious and develop a slightly chewy texture similar to a baked apple crisp.
Final Thoughts
Walking bag snack recipes are a game-changer for anyone who’s always on the go. Whether you’re heading to the office, the gym, or out for a day of errands, having a delicious and satisfying snack packed and ready means you’ll stay energized without resorting to vending machine impulse buys. The recipes we’ve shared today prove that portable snacking doesn’t have to mean sacrificing taste or nutrition.
If you’re new to packing your own walking snacks, we encourage you to start with whichever recipe sounds most appealing to you. Maybe it’s the trail mix that calls to you, or perhaps the energy balls are more your speed. Pick one, give it a try, and notice how much better you feel when you have a homemade snack in your bag. Once you find your favorite, the others will be waiting for you to explore whenever you’re ready.
Walking Blueberry Lemon Cheesecake Bag
Ingredients
Method
- In a small bowl, combine softened cream cheese, powdered sugar, vanilla extract, lemon zest, and fresh lemon juice until smooth and well blended.
- Fold in the fresh blueberries gently to avoid crushing them.
- Sprinkle graham cracker crumbs into the bottom of the resealable plastic bag.
- Transfer the blueberry cheesecake mixture into the bag.
- Seal the bag tightly and shake gently to combine all ingredients.
- Cut a small corner off the bag and squeeze the mixture into your mouth or onto a plate to enjoy.